

One string of warm cafe lights, a few yards of black cheesecloth, and a bag of mini pumpkins. That’s not a shopping list.. that’s a party.
I’ve thrown a Halloween party every single year for longer than I’ll admit, and I’ve learned exactly which decorations earn the gasps and which ones nobody notices. Spoiler: it’s almost never the expensive animatronic. It’s the tablescape, the glowing jars, the photo wall everyone lines up for.
The other half of what I know came from failing at the store. My first few Halloweens I dropped real money on props that looked cheap the second they left the box, while the things I made myself with cheesecloth and spray paint got all the compliments. (Painful lesson. Great outcome.)
So this is both halves in one place. First the party setup, zone by zone, so you know what to decorate and in what order. Then the ten DIY projects that deliver the expensive look for a few dollars each. Nothing here needs a workshop, a craft degree, or a haunted-house budget.
The Foundation Every Party Needs First
Before the fun stuff, the base. These are the pieces that make everything else look intentional, and if you only do this section you already have a party.
Start With a Spooky Tablescape
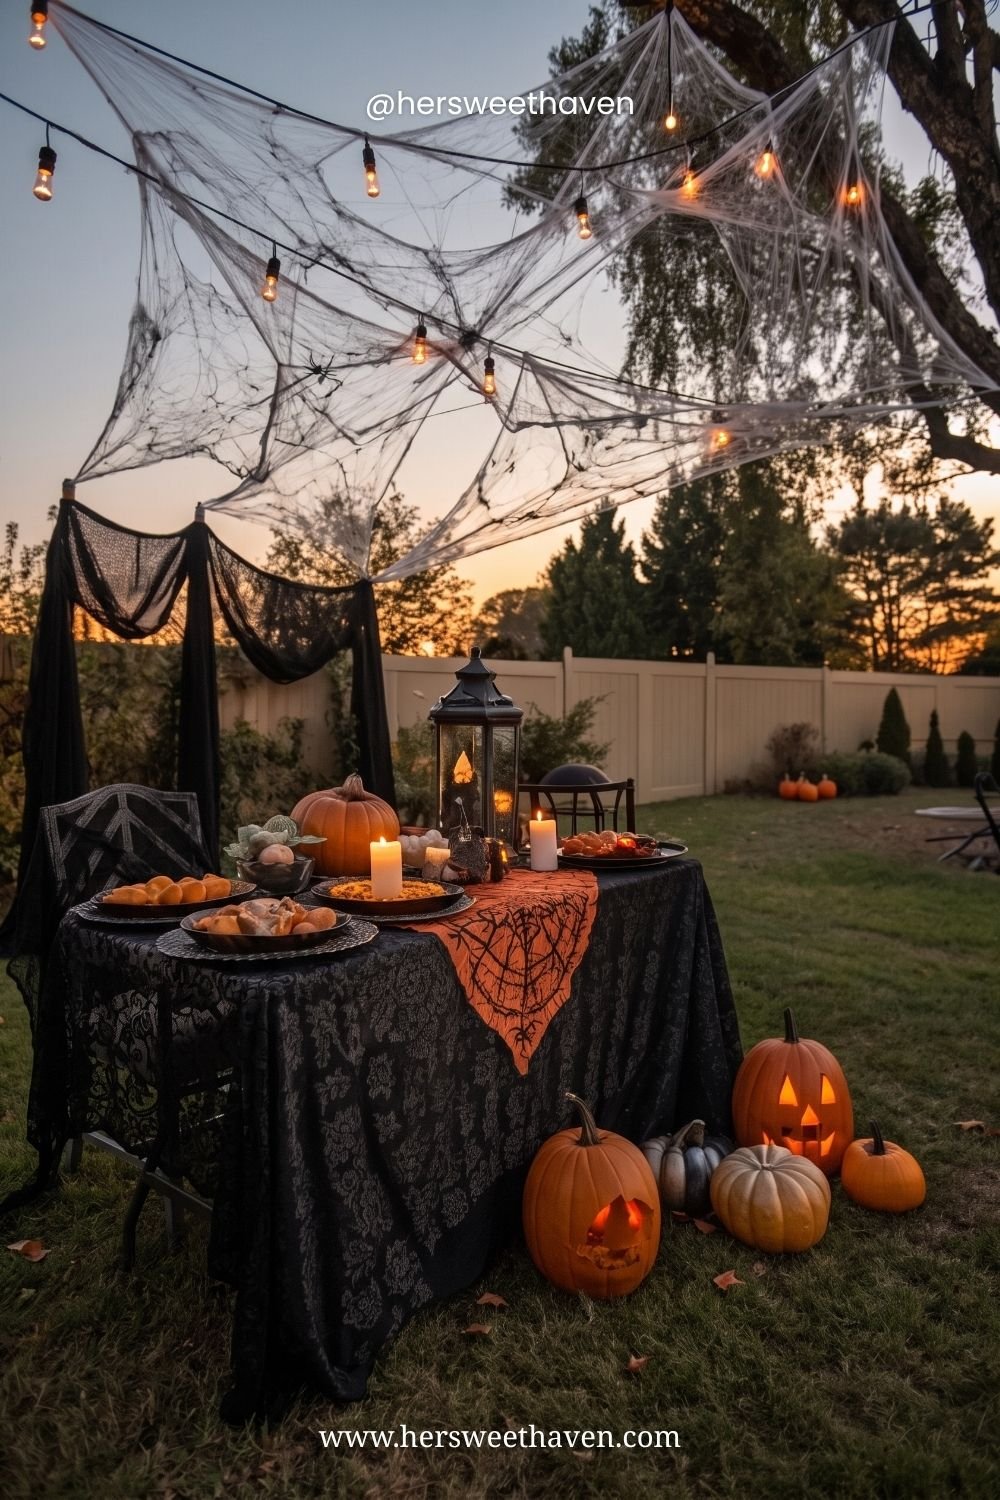
The food table is where guests gather, so it’s where your decorating dollars work hardest. Black lace over the table, an orange spiderweb runner, carved pumpkins clustered on the ground, stretchy webbing overhead with warm bulbs woven through. Dramatic from across the yard, cozy up close.
The table does double duty: it holds the food and anchors the entire look. Decorate it first, always. My full Halloween party menu covers what goes on it.
Ghost Lanterns for Instant Glow
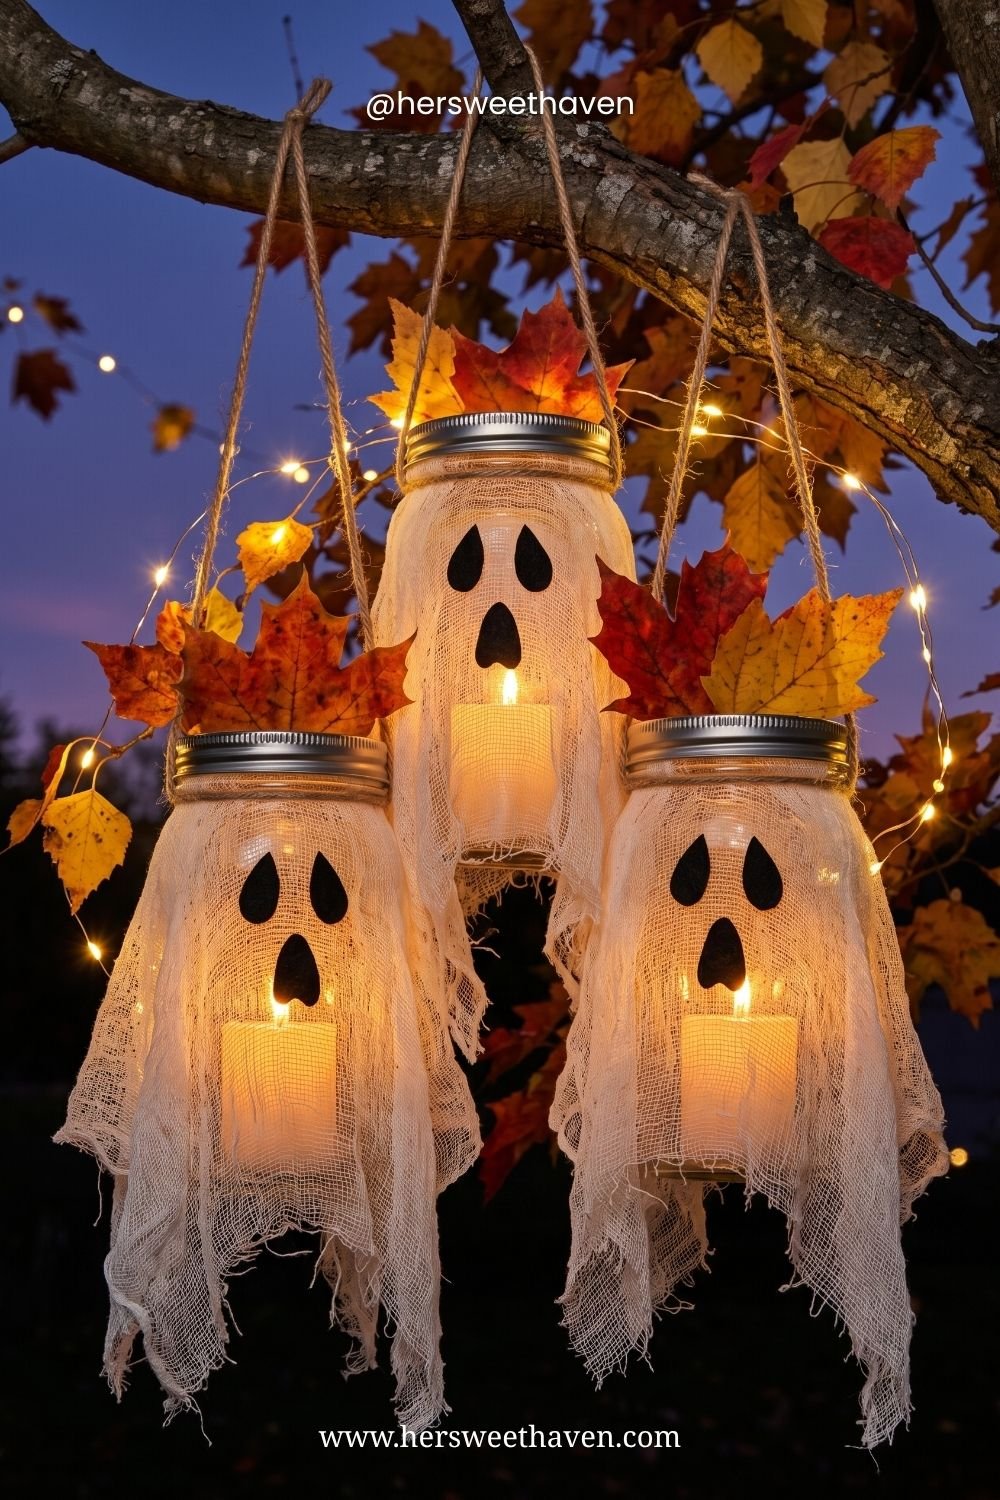
Highest compliment-per-dollar item on the whole list: mason jars wrapped in cheesecloth with little felt faces and a flameless candle inside. Hang them from a branch and they glow like friendly ghosts at dusk.
About a dollar each, ten minutes of work. This DIY ghost lanterns tutorial walks through it, and this mason jar lantern tutorial has painted and tissue-paper versions. (Your wallet will thank you.)
The Light-and-Cloth Rule
Every foundation comes down to two things: warm light and draped fabric. String lights, flameless candles, and lanterns handle the glow. Black cheesecloth, webbing, and lace handle the drama.
Master those two and you can decorate any space for almost nothing.
And the part that took me years to learn: dim the overheads. Halloween magic dies under bright ceiling fixtures. Kill the main lights, let the strings and candles do the work, and even a half-decorated room looks intentional. It’s free, it takes one second, and new hosts always forget it.
The Crowd-Pleasers That Get the Most Compliments
Now the pieces that make guests pull out their phones. These three get the biggest reactions at my party every year, no contest.
The Wanted Poster Guest Wall
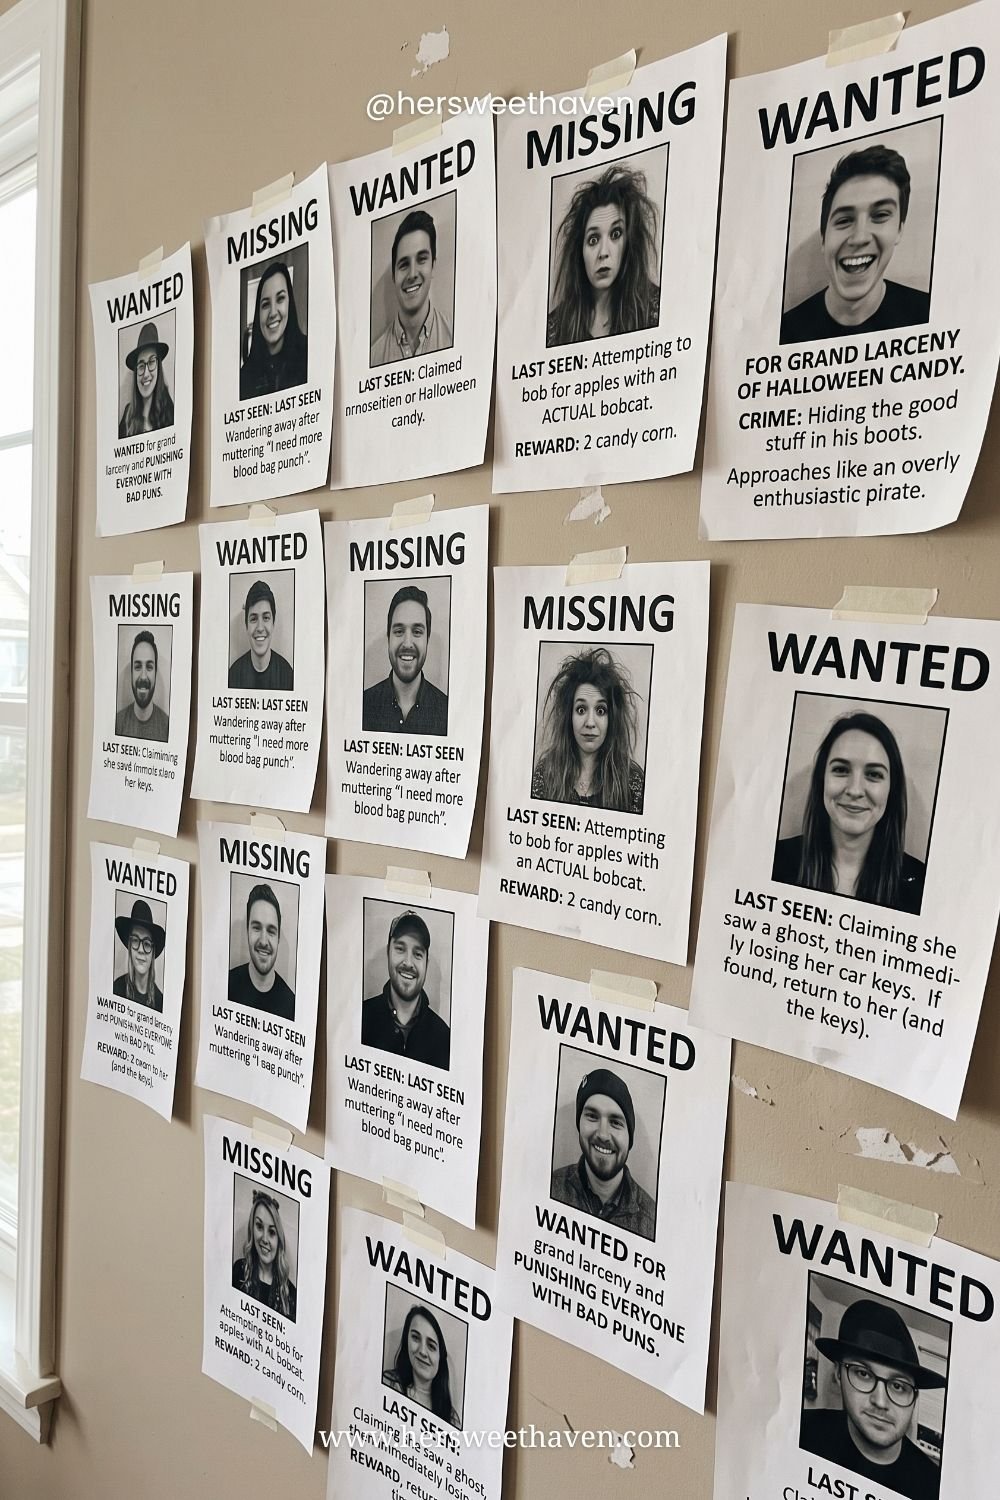
This one wins the night. Print black-and-white WANTED and MISSING posters featuring your actual guests, with ridiculous made-up crimes (“wanted for hiding the good candy in his boots”). Tape them to a wall and watch people crowd around finding themselves.
Ask friends for goofy photos in advance, or pull them from social media, and write the crimes to match each personality. The inside jokes are what make it land. Here’s the mistake I see over and over: people decorate for strangers instead of for the guests in the room. A few dollars of printer ink beats a $60 prop every time.
A Photo Backdrop People Line Up For
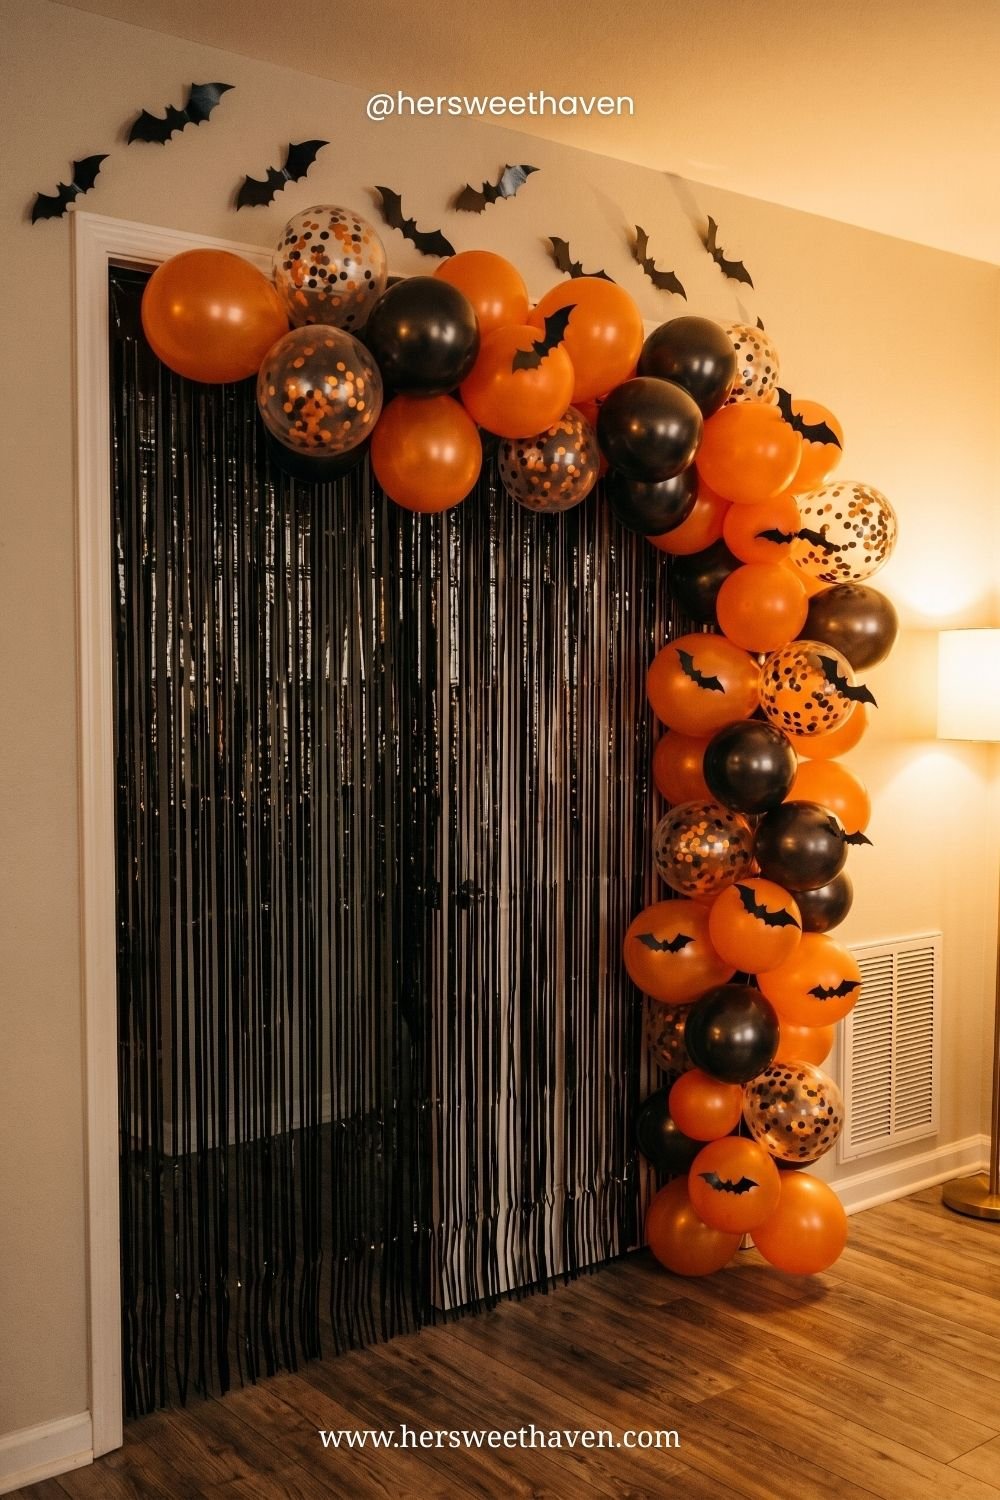
Give people somewhere to take pictures and your party lives online for weeks. An orange-and-black balloon arch with confetti balloons, a black fringe curtain, paper bats climbing the wall. Cheap, fast, endlessly photogenic.
Set it near the drinks so people naturally drift over. Then toss a basket of props nearby (witch hats, a fake cobweb boa, plastic pitchforks) and the photos get ten times better. That basket is the difference between a backdrop nobody uses and one with a line all night.
The Backyard Glow-Up
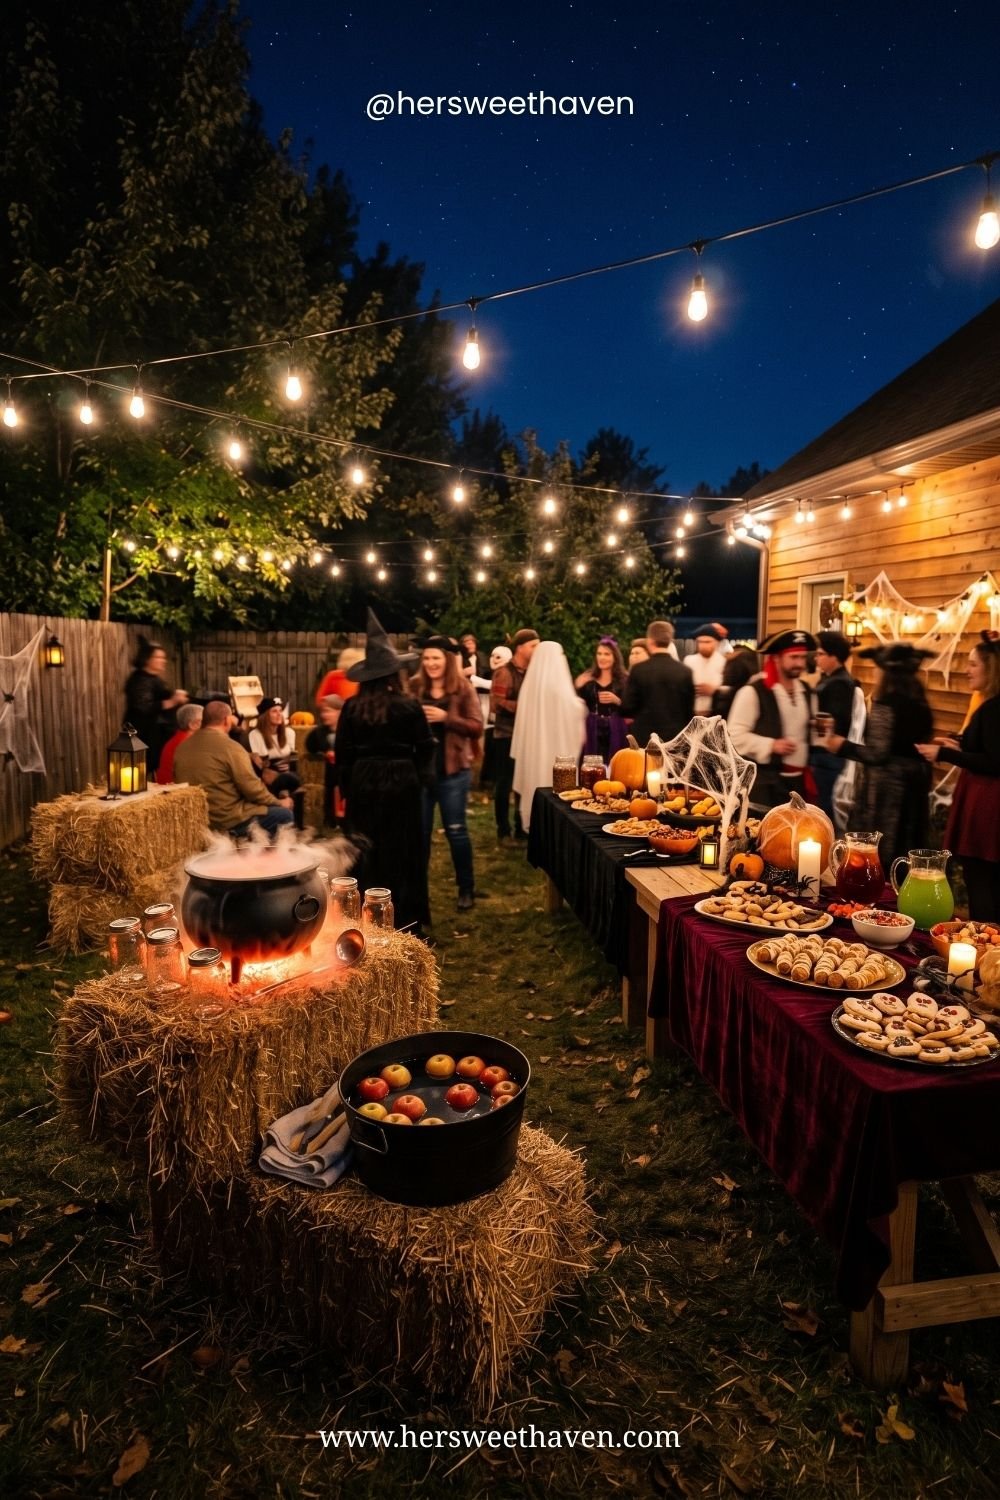
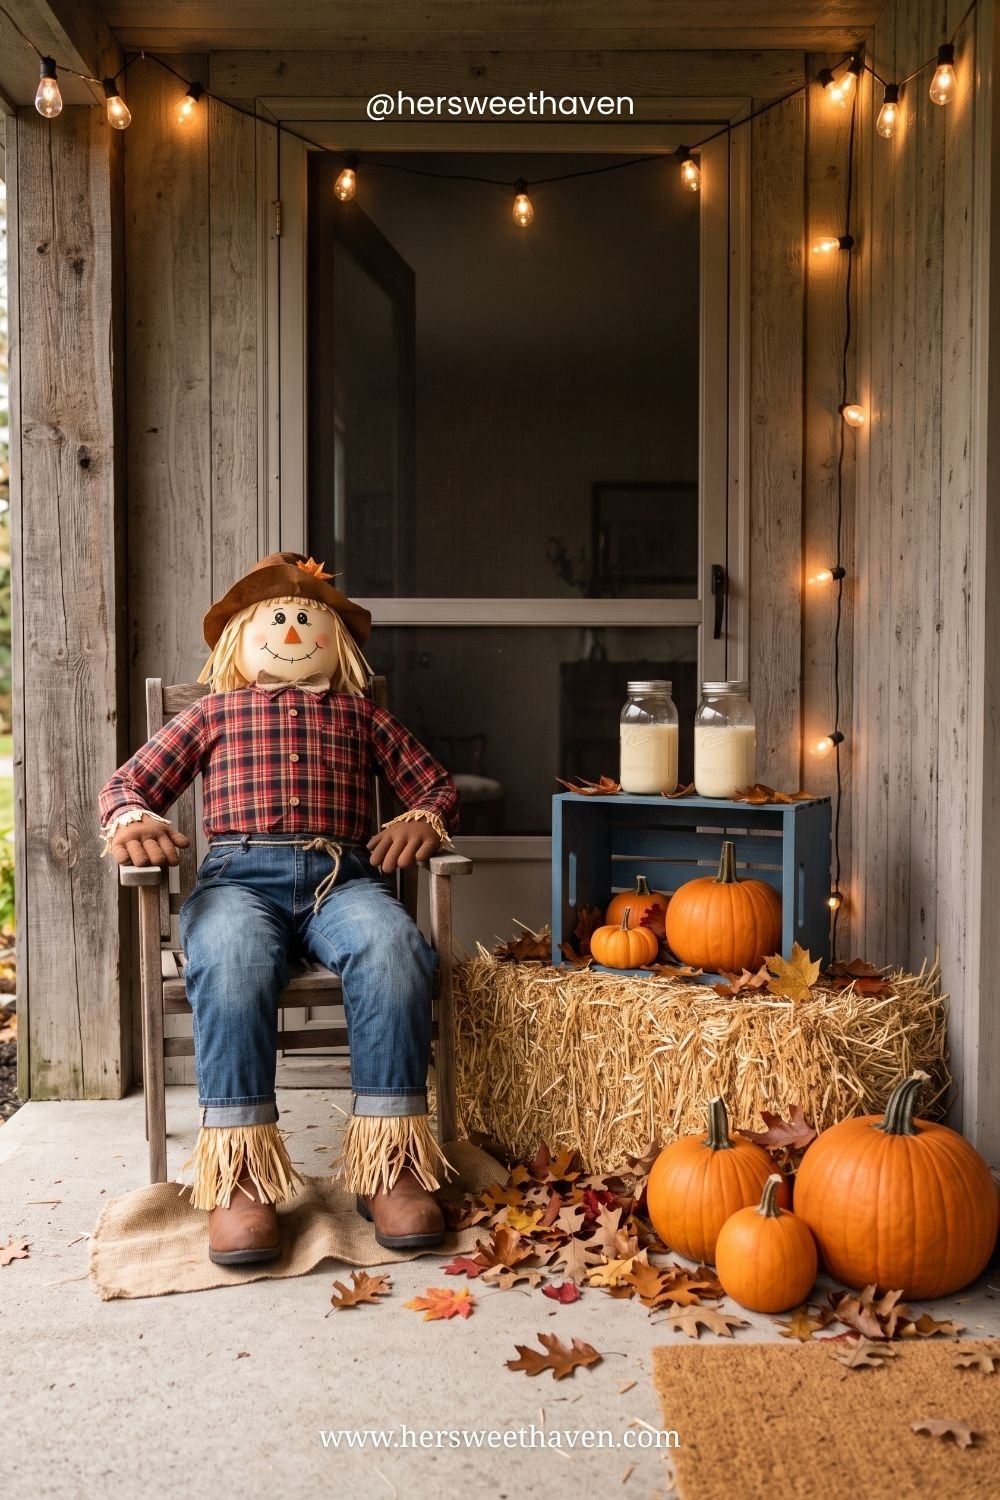
If you have outdoor space, string lights change everything. Crisscross warm bulbs overhead, add hay bales for seating, a cauldron drink dispenser, and velvet cloths on the food tables.
Overhead lighting is the trick. It makes any space feel like an event, and guests instinctively relax under a canopy of little glowing bulbs. Hay bales are the unsung hero here too: a few dollars from a farm stand, they seat people, and a plaid throw over one makes it genuinely cozy.
Low-Effort Level-Ups
With the crowd-pleasers handled, here are the sneaky-easy upgrades that look like far more work than they are.
Caution Tape on the Front Door
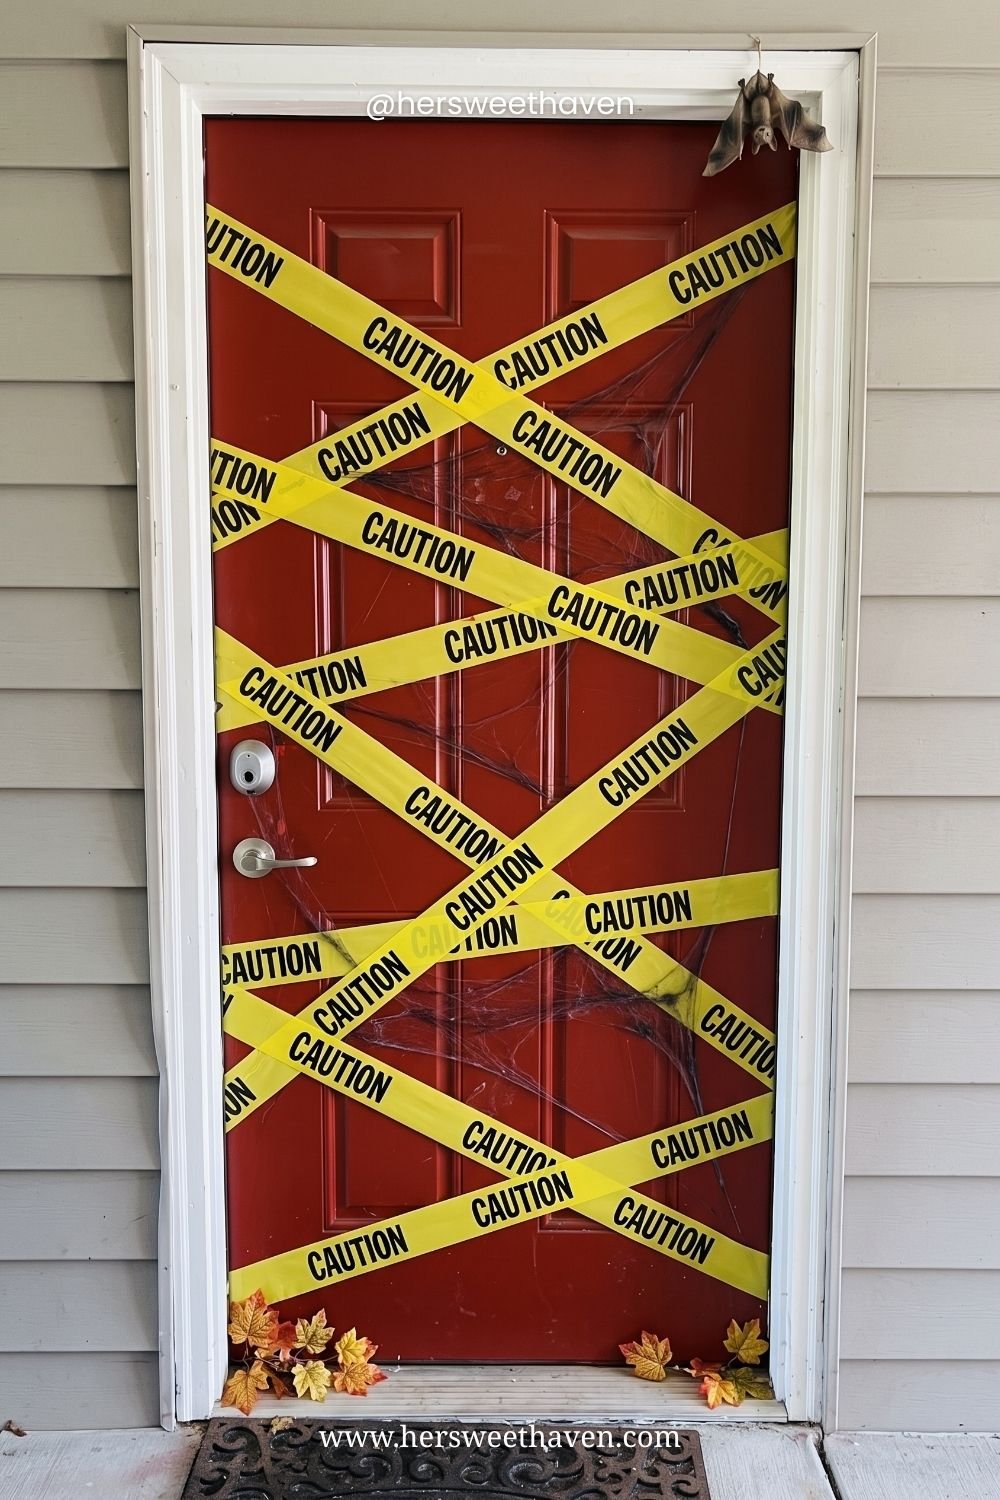
First impressions start at the door, and this takes five minutes. Crisscross yellow CAUTION tape across the entry, tuck in fake webbing, hang a rubber bat in the corner. Guests know what kind of night they’re walking into before they knock.
A roll of tape costs a couple of dollars and reuses every year. Extend the moment down the walkway with two carved pumpkins on the steps and guests arrive already grinning.
Turn a Hallway Into a Tunnel
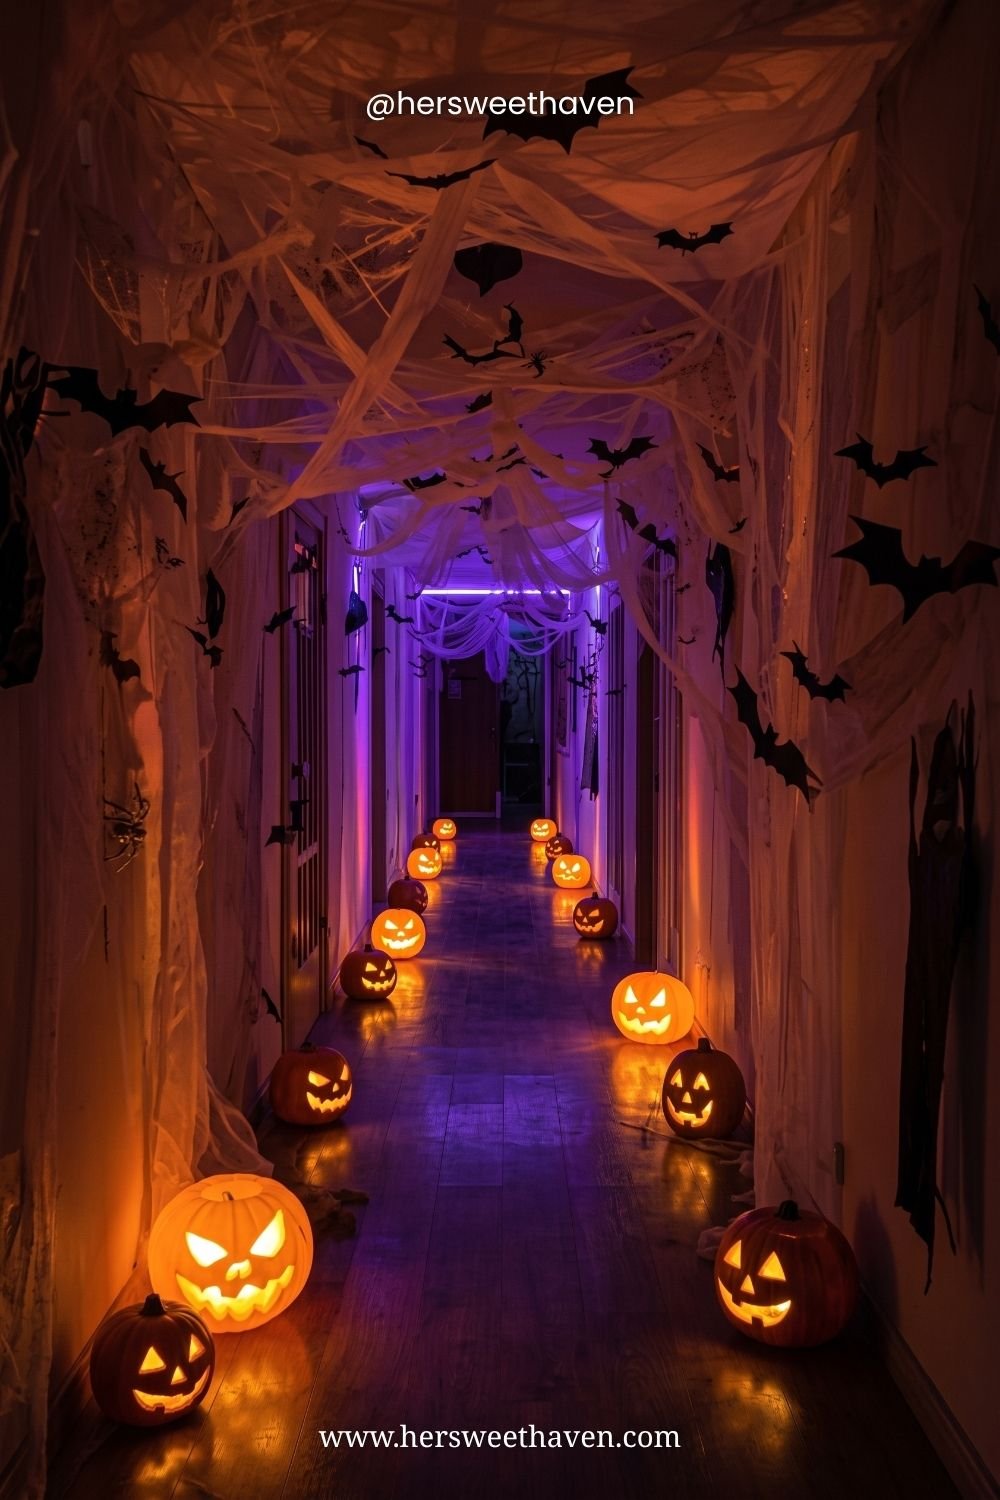
Drape the ceiling and walls in white cheesecloth, add paper bats, one purple uplight, and a runway of jack-o’-lanterns down the floor. Walking through it feels like entering another world.
Uplighting is the secret weapon. One color-changing bulb aimed at the ceiling does more atmospheric work than a cart full of props. (Trust the process. Or at least trust this one.)
The Crime-Scene Gag
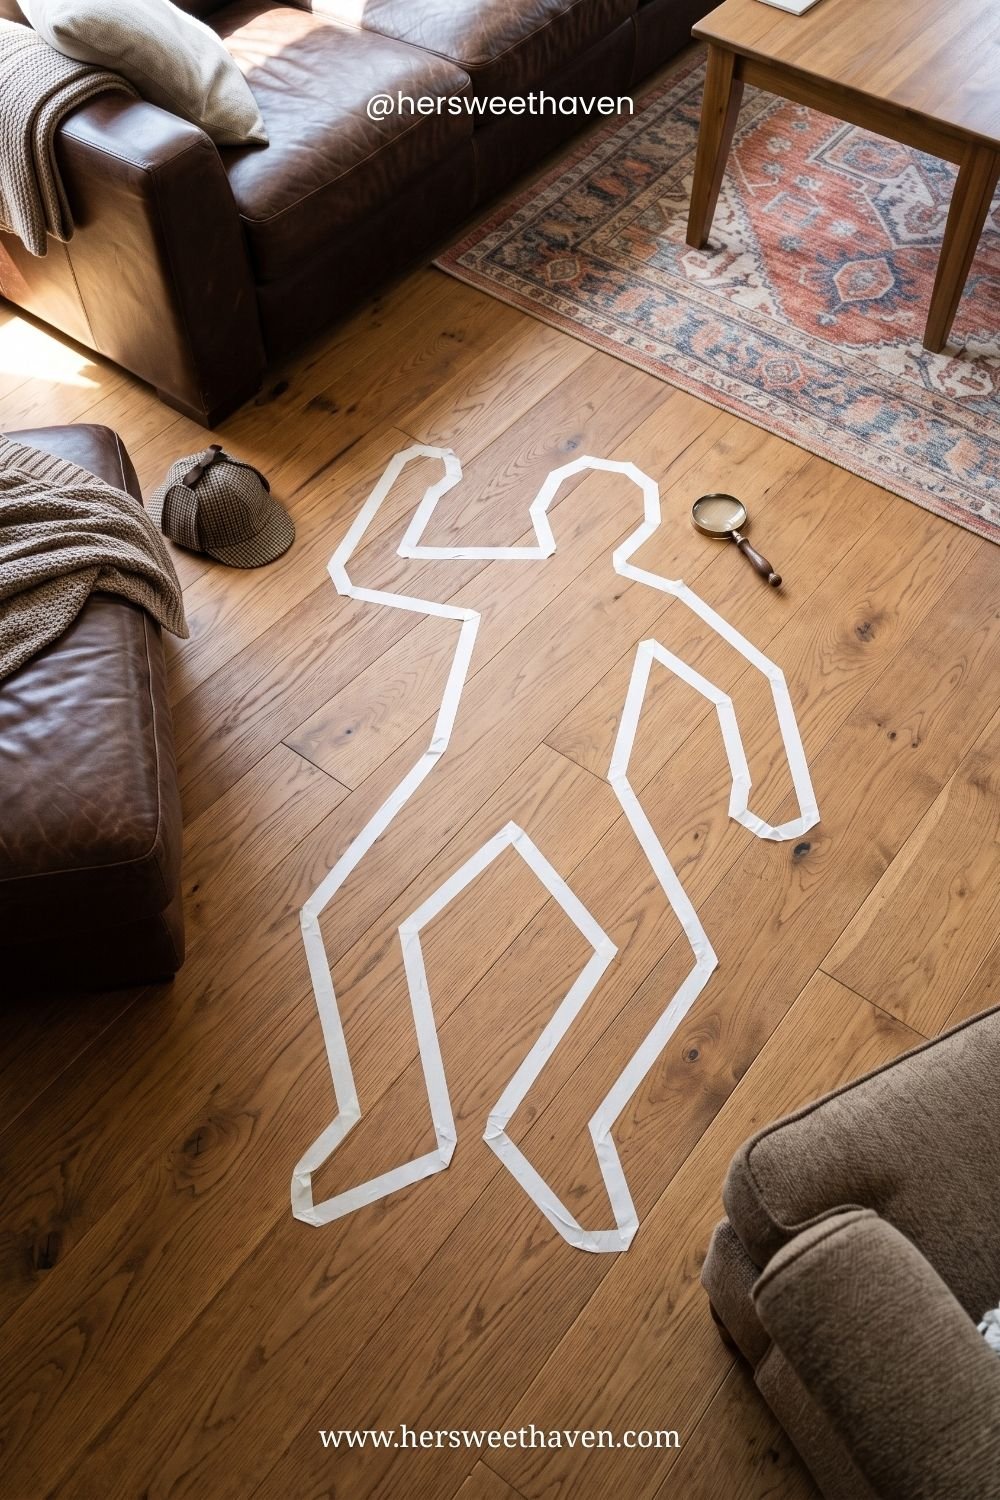
A tape body outline on the floor, a magnifying glass, a detective hat tossed nearby. That’s the whole setup, and it makes people laugh every time they walk past. If jar crafts are more your speed, this mummy lantern tutorial is another five-minute win.
Little gags scatter personality around without cluttering. Two or three tiny moments beat one giant expensive prop.
Yard Showstoppers
Feeling ambitious? These two are the “did you SEE their yard” pieces that stop cars.
A Glowing Pumpkin Arch
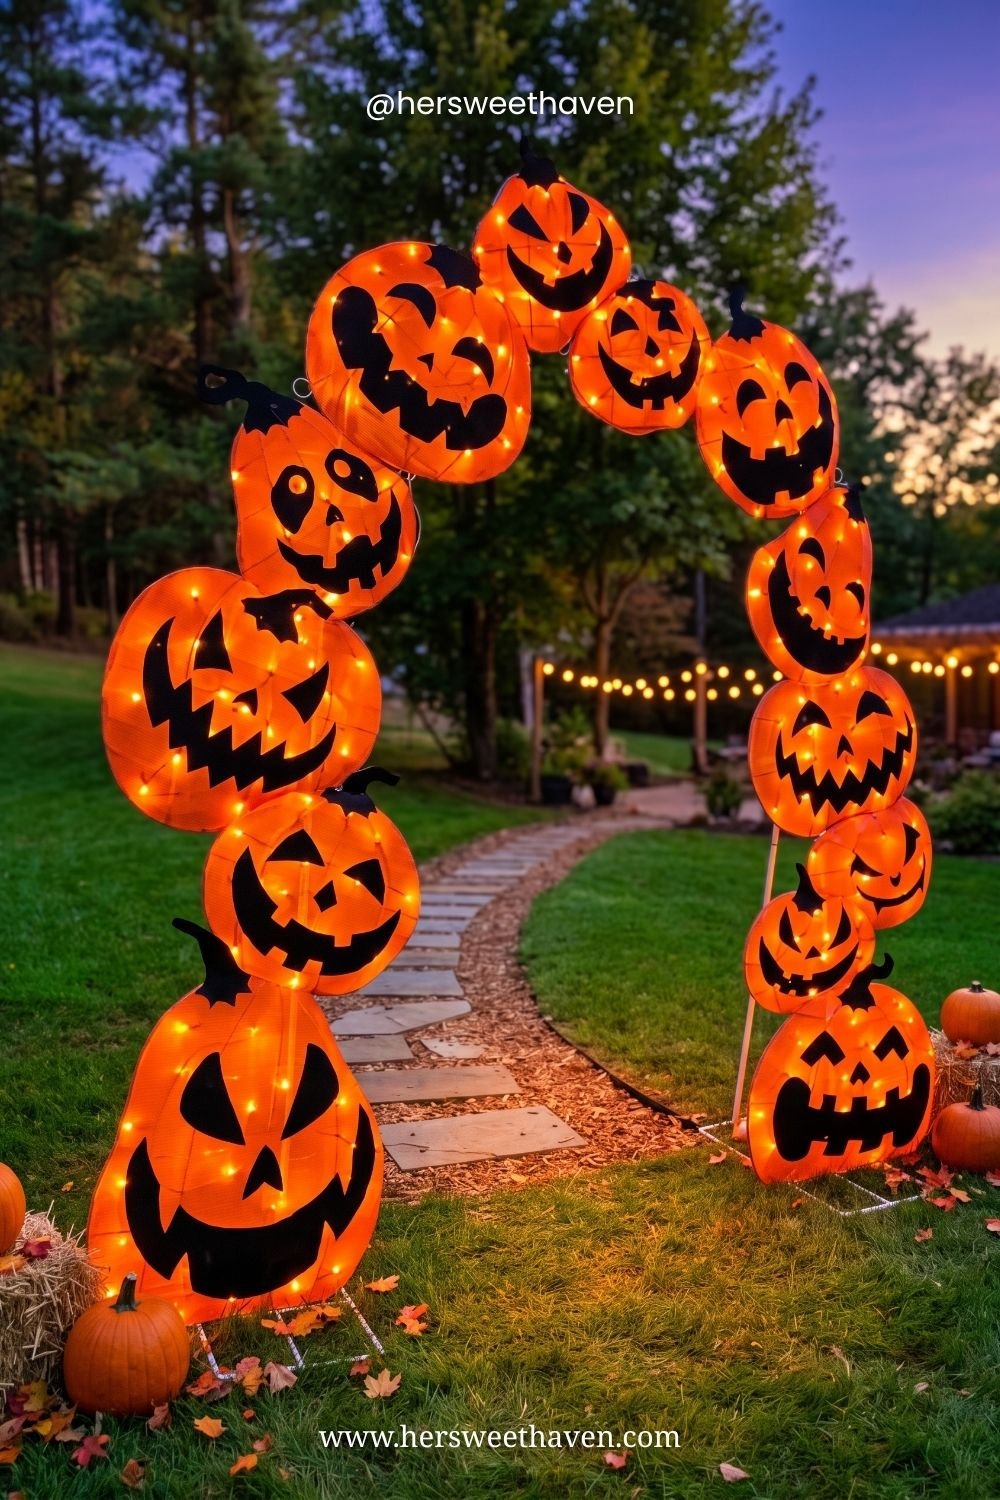
A light-up jack-o’-lantern arch over your walkway frames the entrance, glows for the whole neighborhood, and photographs beautifully with people walking through it.
These come as pre-lit kits, so big doesn’t mean hard. Stake it, plug it in, done in fifteen minutes. Flank it with hay bales and real pumpkins so it feels rooted instead of floating.
The Crawling Skeleton Graveyard
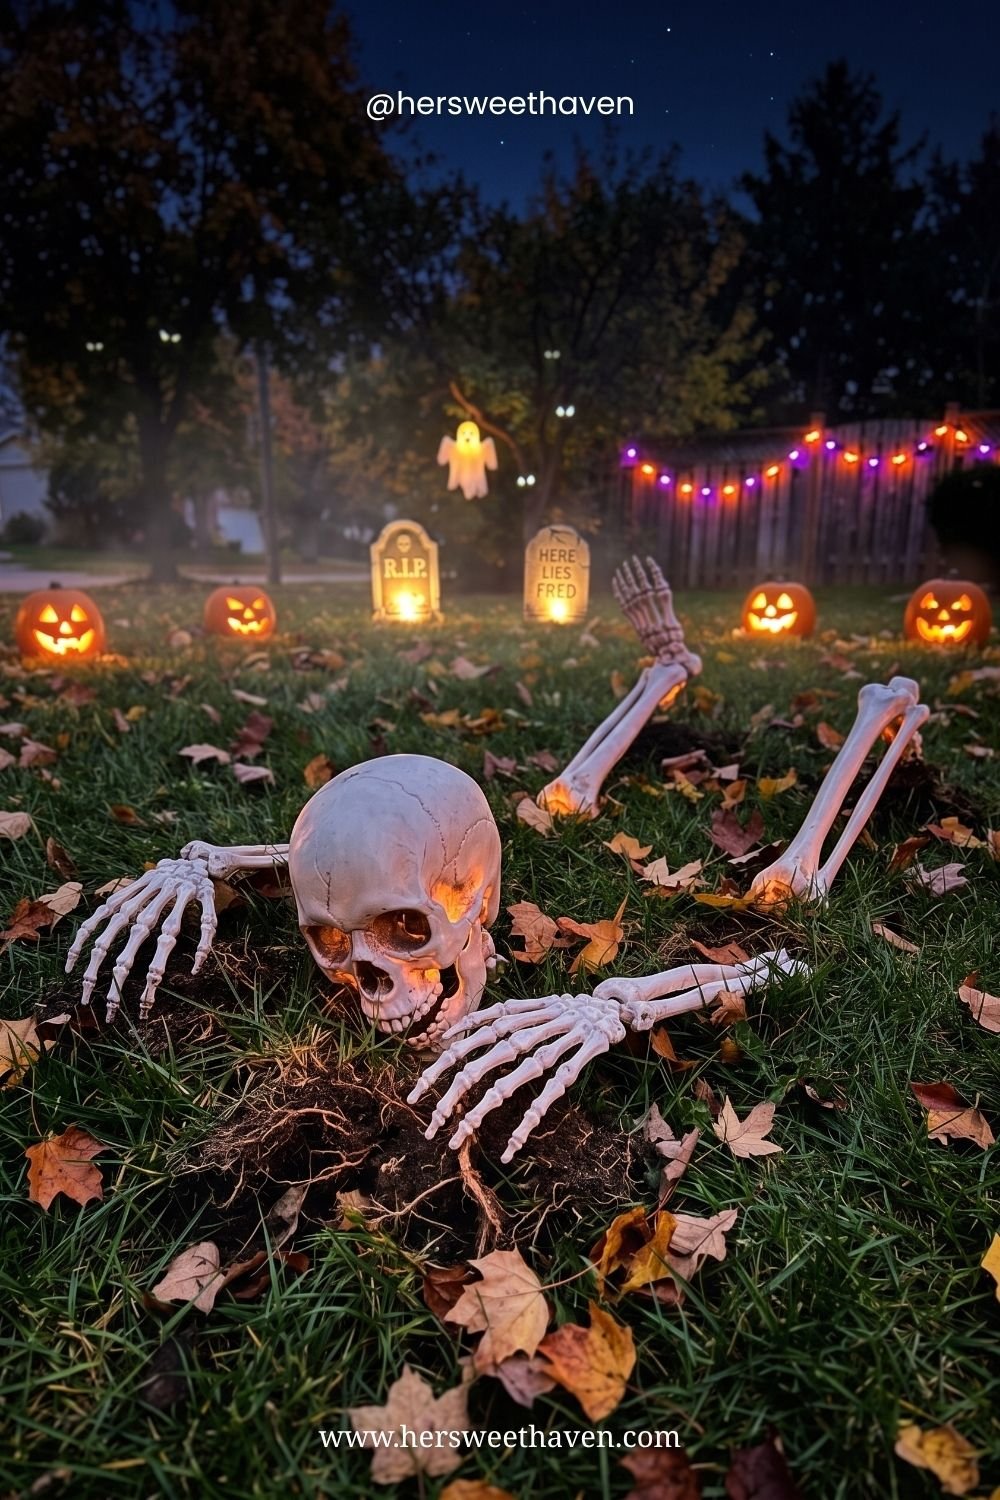
A skeleton clawing out of the lawn, a few tombstones, scattered jack-o’-lanterns, purple-and-orange lights on the fence. This is the scene that makes trick-or-treaters dare each other to come closer.
Half-bury the skeleton in real dirt for the crawling-out effect and it looks genuinely uncanny at night.
Three Rules That Make Cheap Decor Look Expensive
Walk into any seasonal store and you’ll see $60 animatronics and $30 resin skulls. The pricing suggests impressive equals expensive. It doesn’t, and a lot of that plastic reads exactly as cheap as it feels once it’s in your living room.
Here’s what actually does the work.
Rule 1: Texture Beats Price
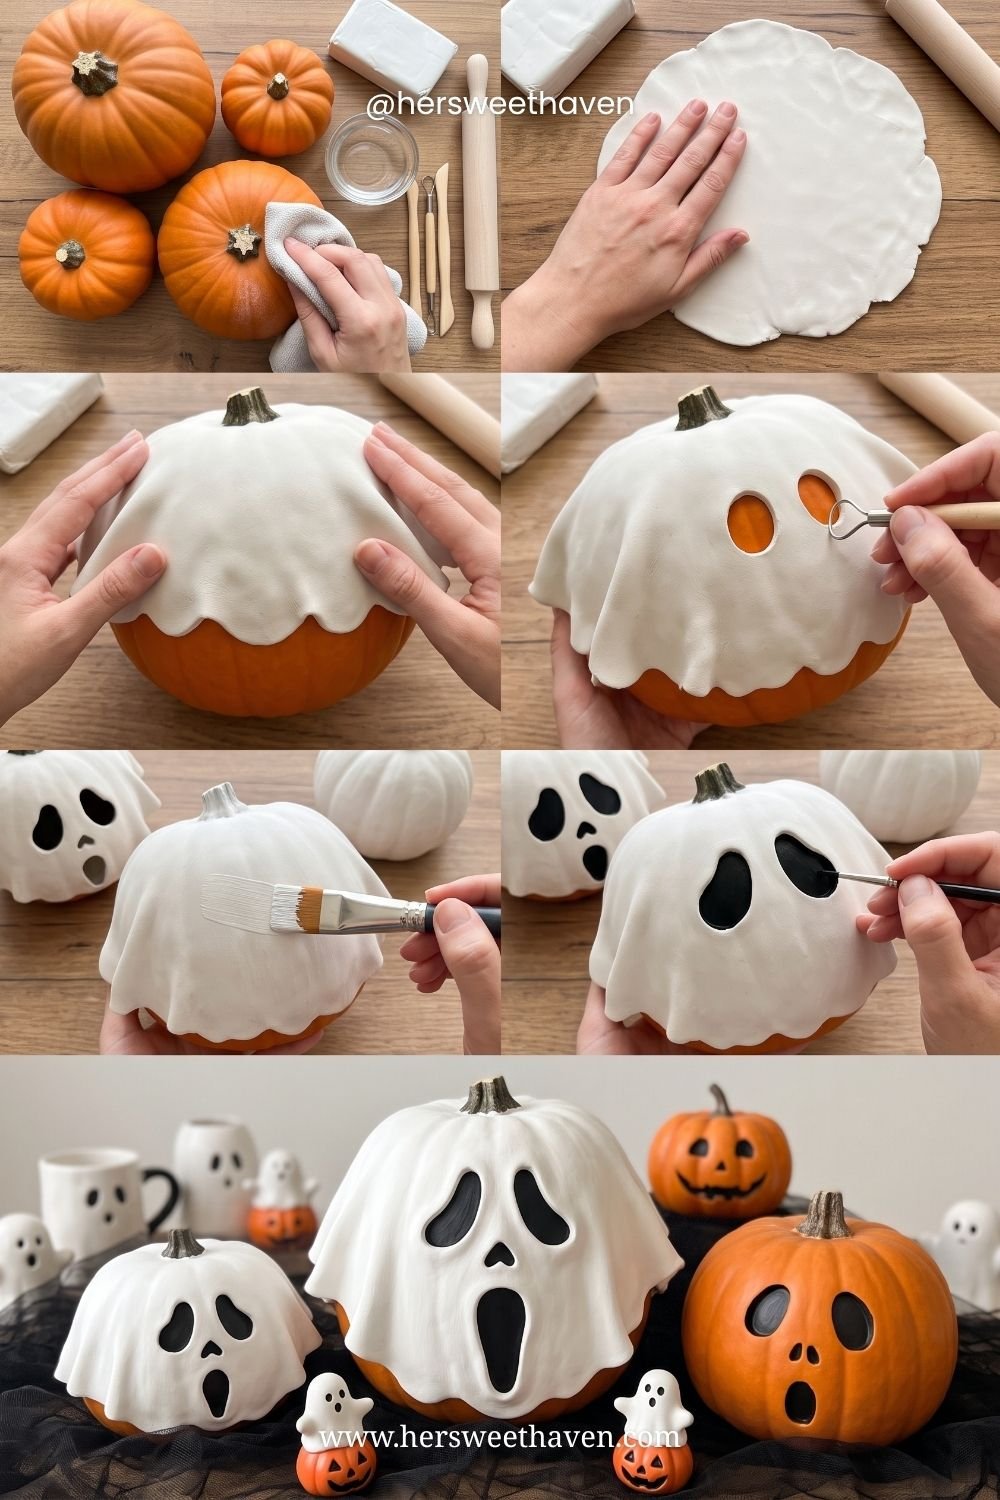
Ghost pumpkins: real pumpkins, a sheet of white air-dry clay rolled thin and draped over the top, holes cut for the eyes and mouth, painted white with black interiors. Cost: a pumpkin and a block of clay.
They look like boutique ceramics because of that soft draped fold. Texture is what your brain reads as expensive, not the price tag. Make three in different sizes and group them, and don’t stress the edges. Wobbly and hand-formed is the entire charm.
Rule 2: Shadow Is Free Drama
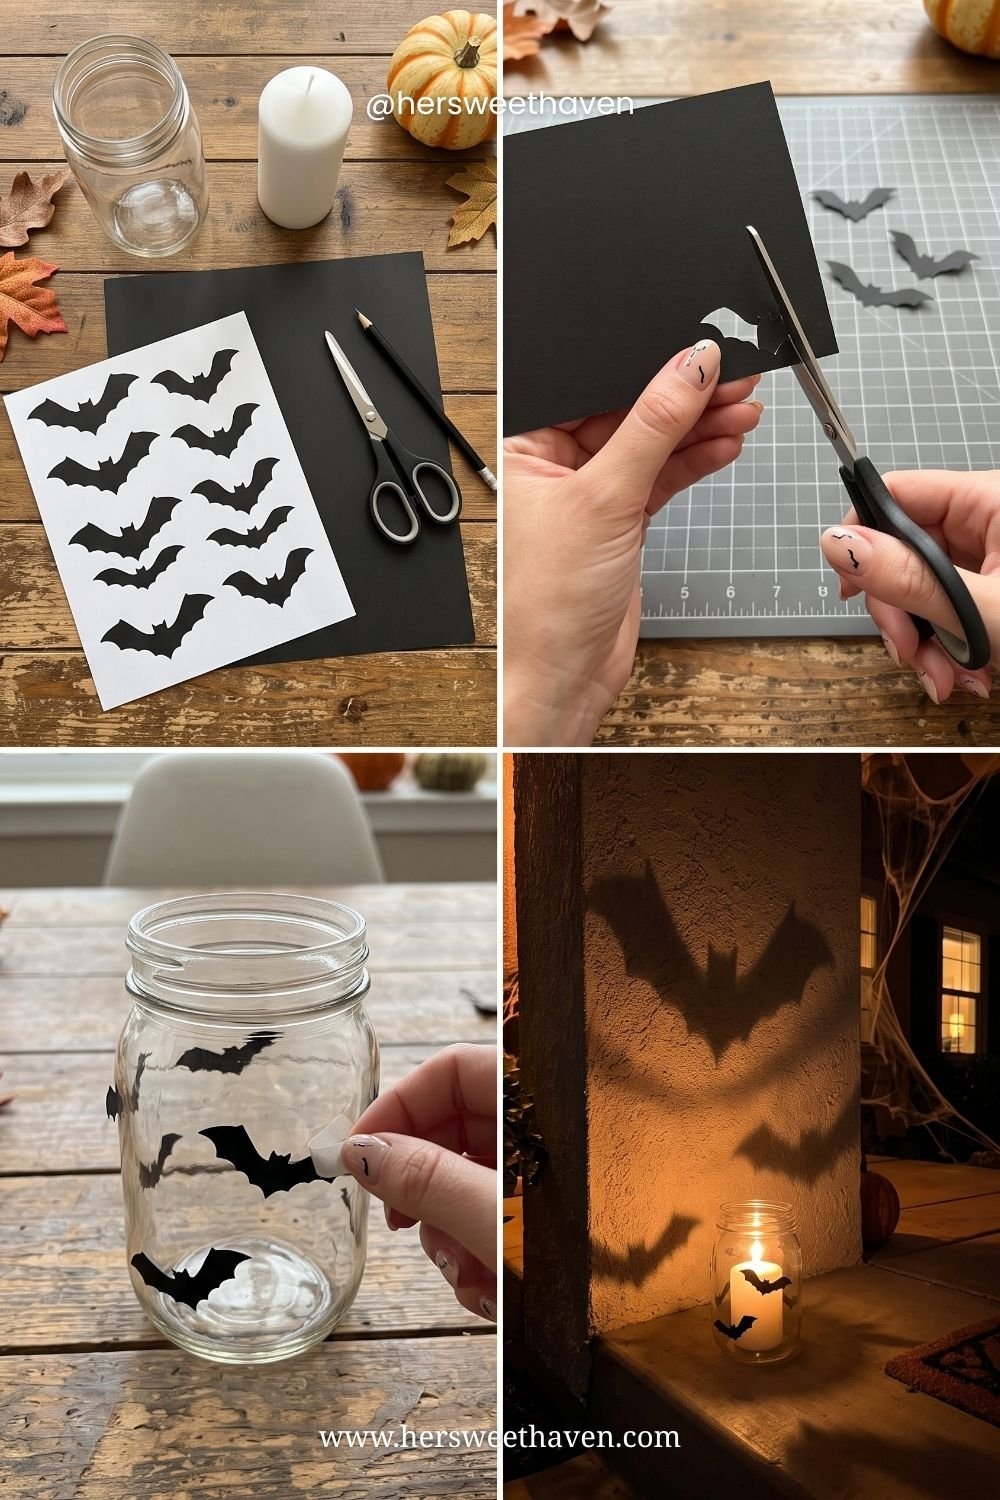
Cheapest project in the post. Black paper bats taped inside a mason jar, a candle in the middle, and suddenly there are giant bat shadows crawling up your wall. A dollar of paper and a jar you own.
The decoration isn’t the jar. It’s the shadow it throws, and shadows cost nothing. Move the jar closer to the wall for crisp little bats, further for huge looming ones.
Rule 3: One Clever Detail Beats Ten Generic Ones
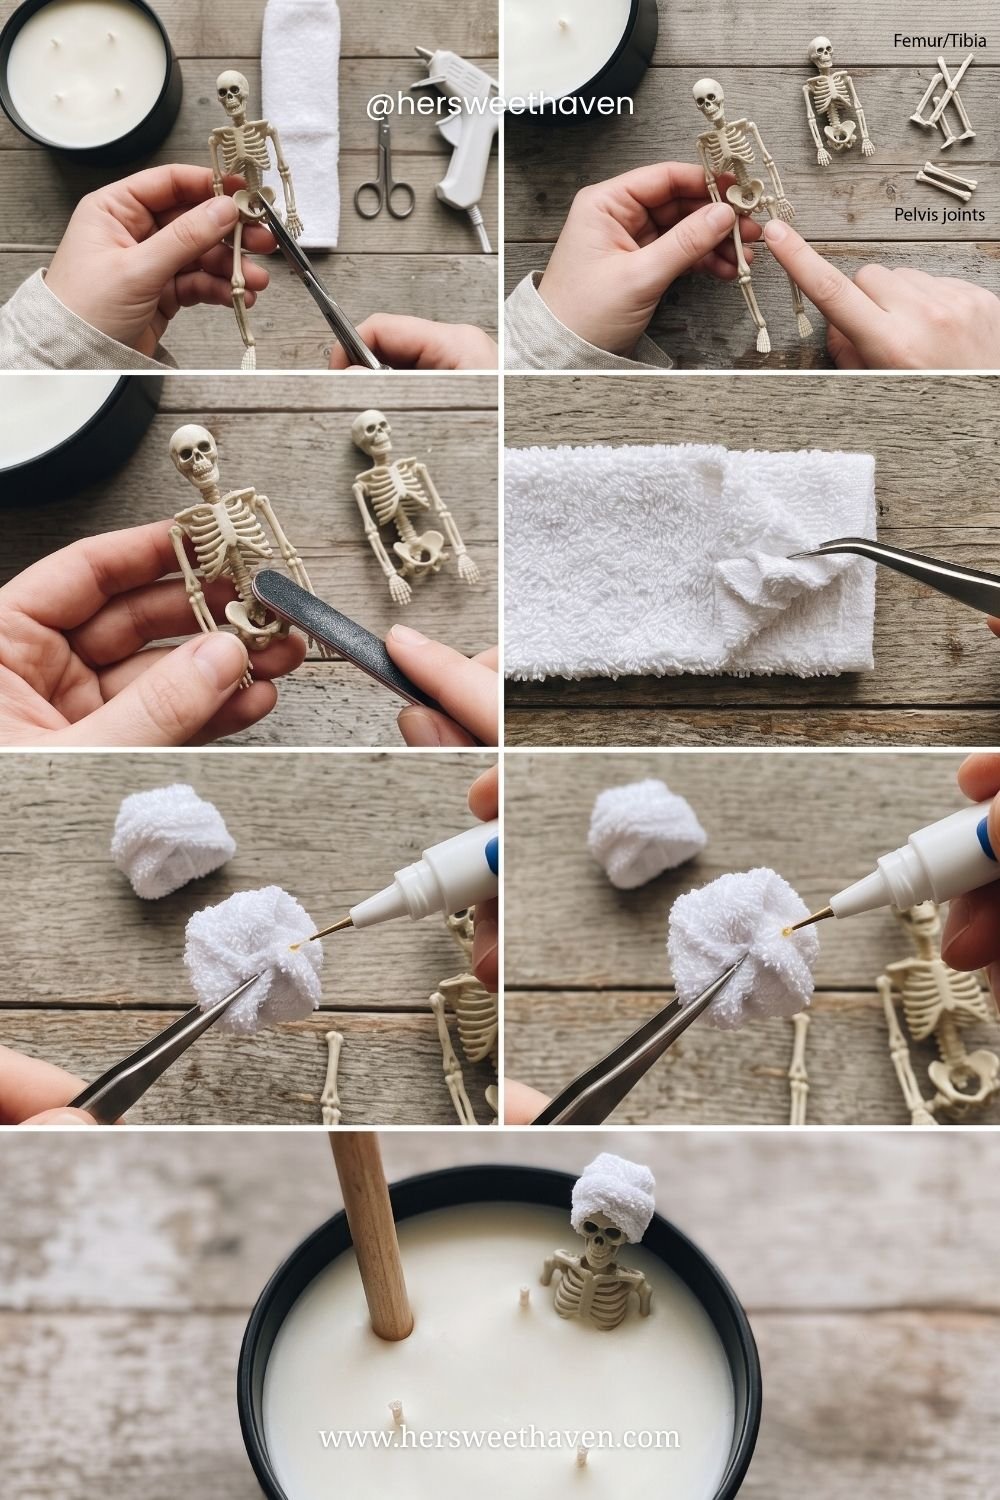
A mini plastic skeleton, a tiny towel turban made from a scrap of terrycloth, and a candle. It’s a skeleton at the spa, and it’s the kind of detail people photograph and send to their group chat.
One well-executed idea beats a table crowded with generic props. Restraint reads as intentional, and intentional reads as designed.
The Projects That Look Way More Expensive Than They Are
Seven builds, all of them cheaper than the store version by an embarrassing margin.
The Mummy Tree
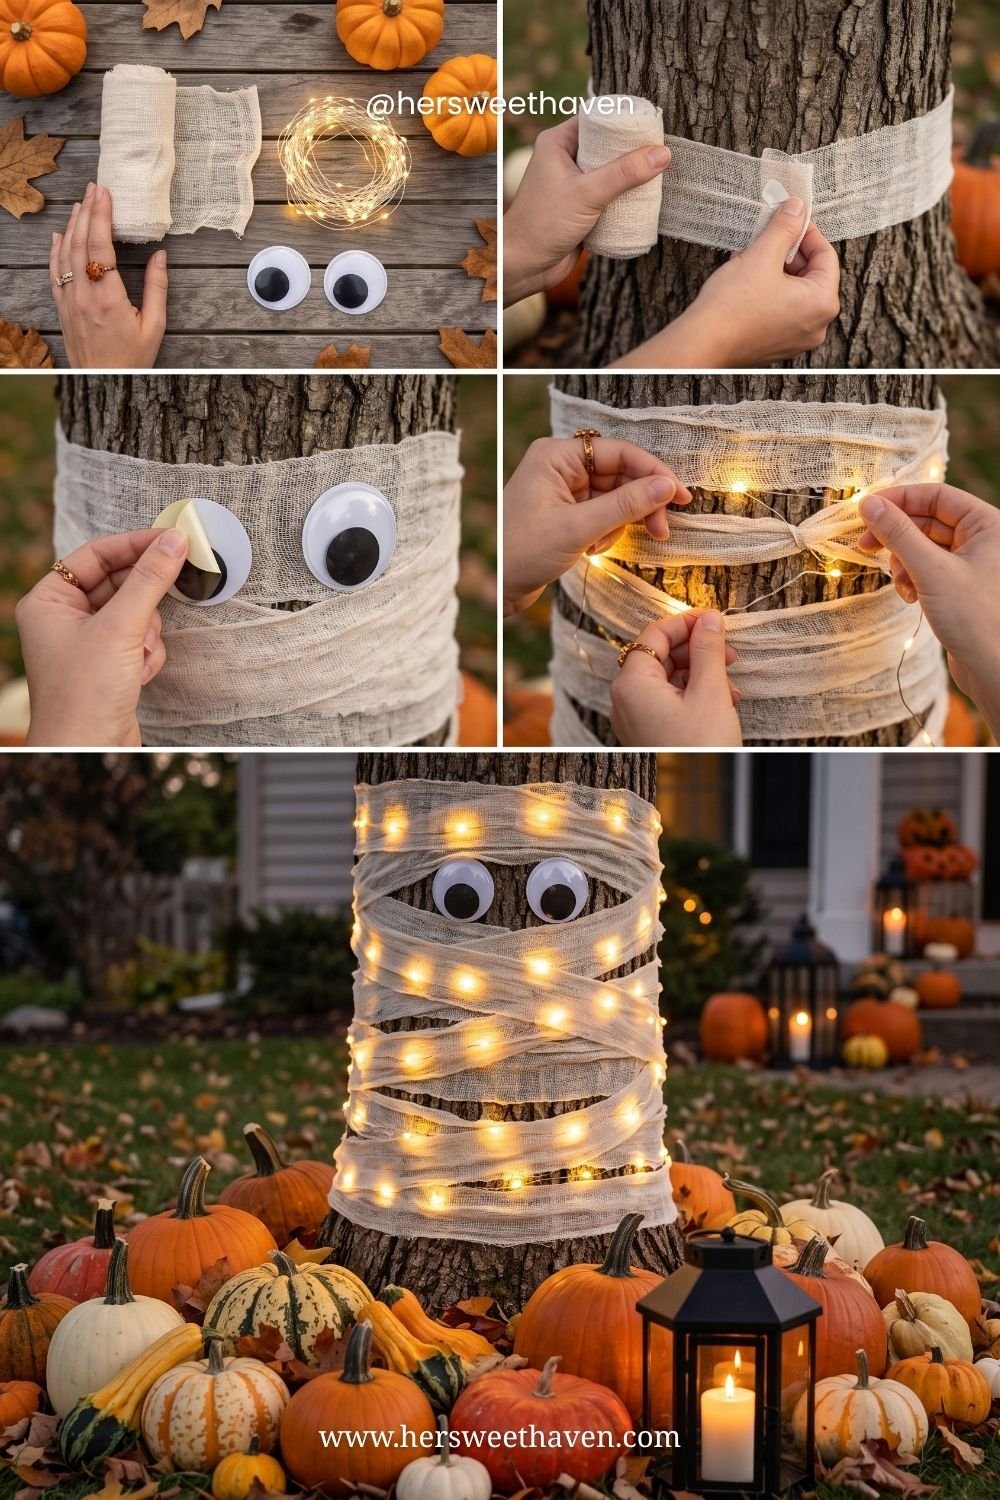
A tree wrapped in cheesecloth, two giant googly eyes, and a strand of warm fairy lights woven through the wrap. In daylight it’s cute. At dusk it’s what makes cars slow down.
Maybe $12 in materials, and the lights are reusable forever. Ring the base with pumpkins and a lantern to finish it.
The Chicken Wire Ghost
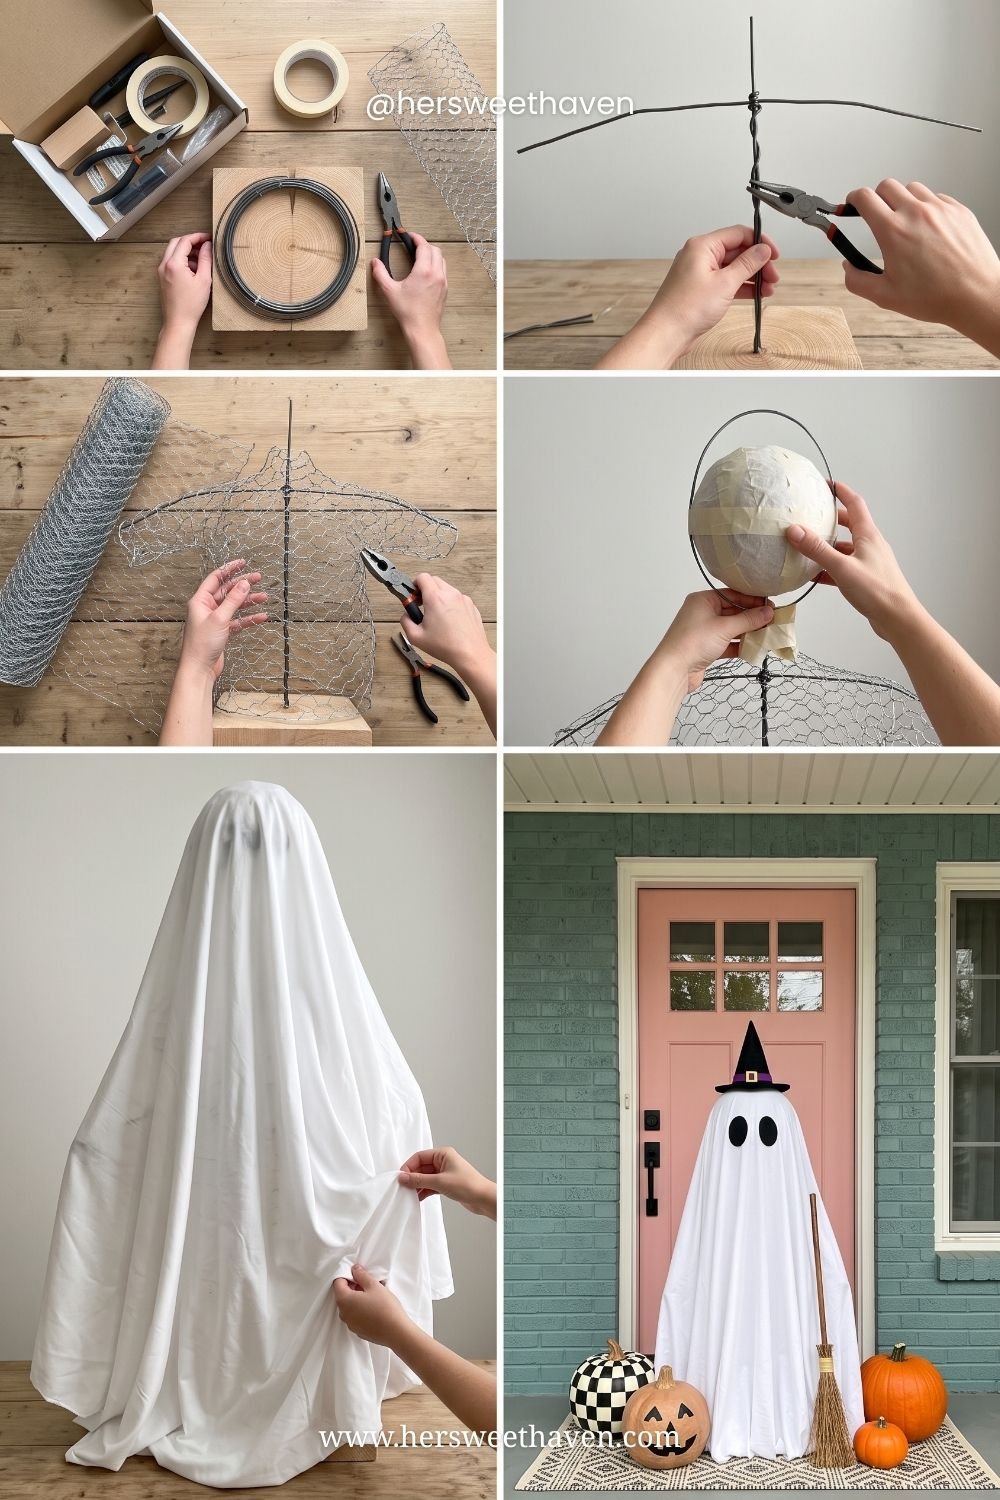
The undisputed champion of budget-to-impact. Bend wire into a frame, shape chicken wire over it into a body and head, drape a white sheet, add felt eyes and a witch hat. It stands on your porch like a real figure.
Store versions run $80 and up. Yours costs about $20 and an old sheet. This chicken wire ghost tutorial covers the frame and this HGTV guide to human-size ghosts has the shaping tricks. Wear gloves. The wire bites.
The Cheesecloth Hallway
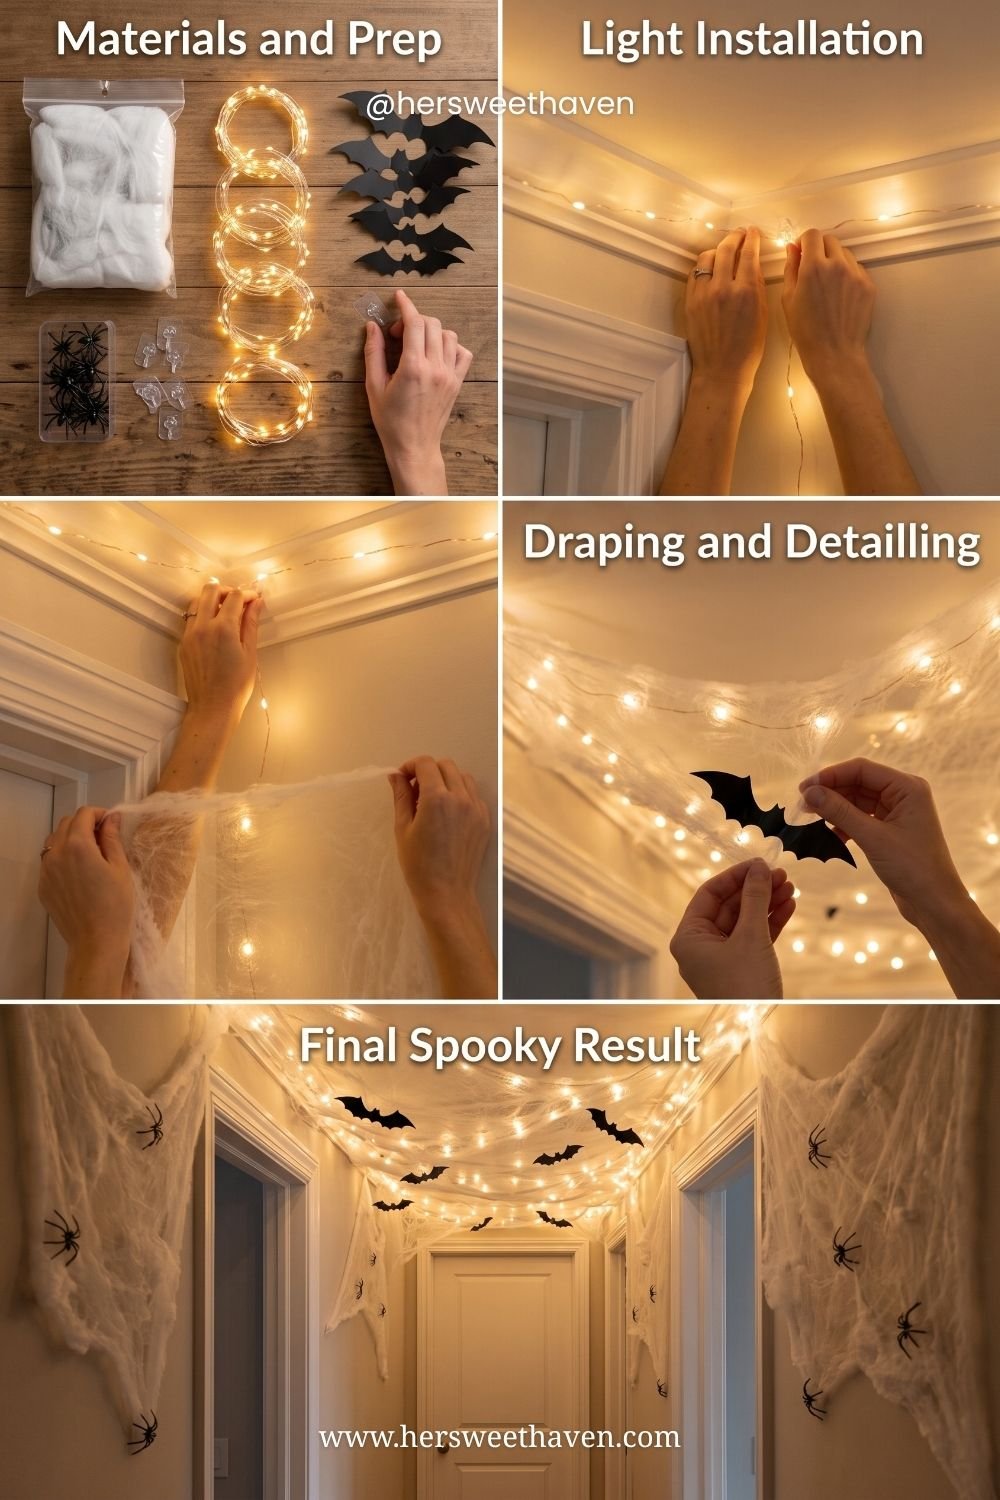
This is the warm-light version of that tunnel from Part One, and here’s the build order that matters: fairy lights along the ceiling line first, cheesecloth draped in loose swags second, paper bats and plastic spiders last.
Lights before fabric, always. Do it the other way around and you’ll spend twenty minutes fishing a light strand out of a cobweb. One hour, about $15.
The Bat Garland Mantel
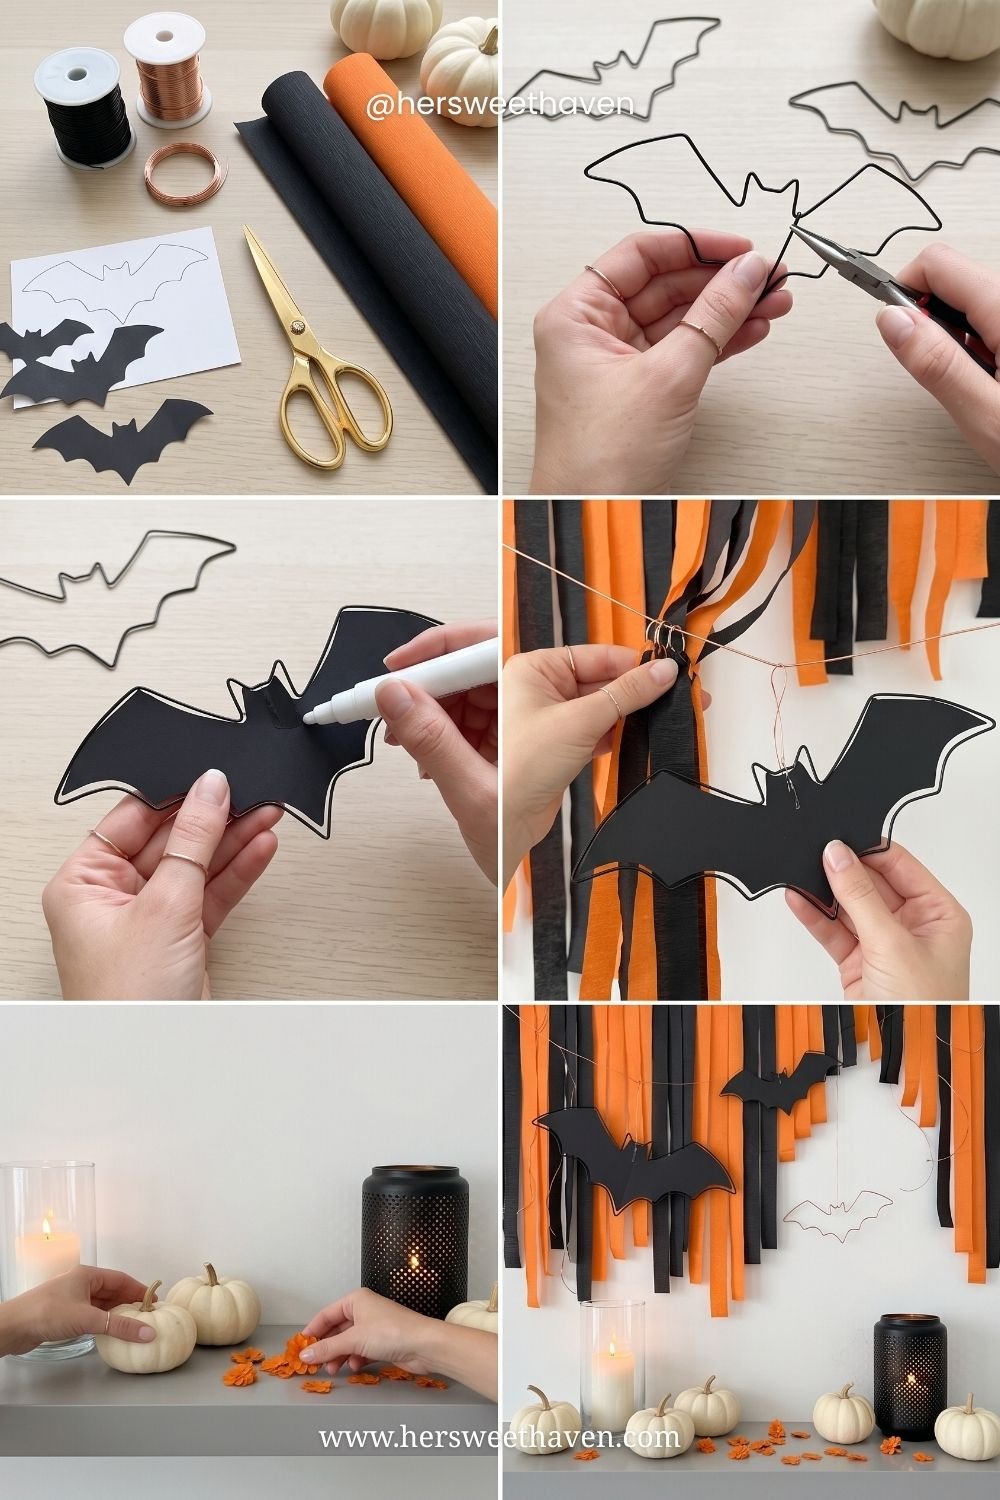
Black cardstock bats outlined with a white paint pen, hung on wire so they look like they’re flying, paired with orange and black crepe streamers and white pumpkins with candles. A full mantel scene for about $10.
The white outline is the small detail that makes them look designed rather than printed. Vary the sizes too: a few big, a few medium, a scattering of tiny ones at different heights. Uniform bats read as a craft project. Varied ones read as a display.
The Painted Ghost Doormat
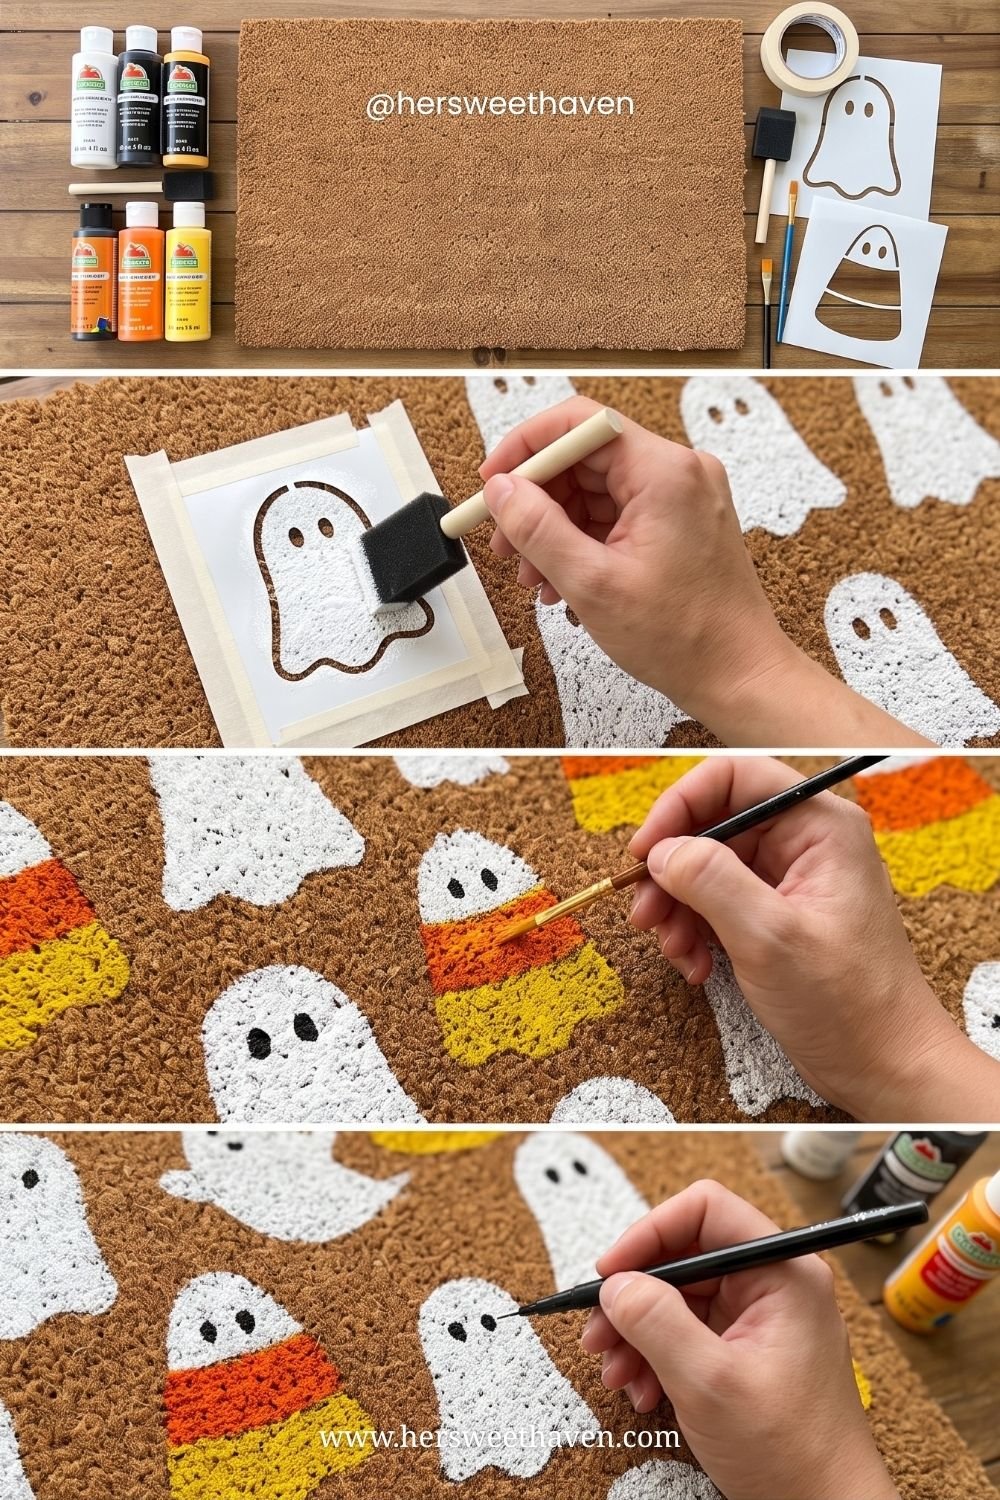
A plain coir doormat, a homemade stencil, and craft paint in white, orange, yellow, and black. Stencil rows of little ghosts and candy corn, then add faces with a fine brush.
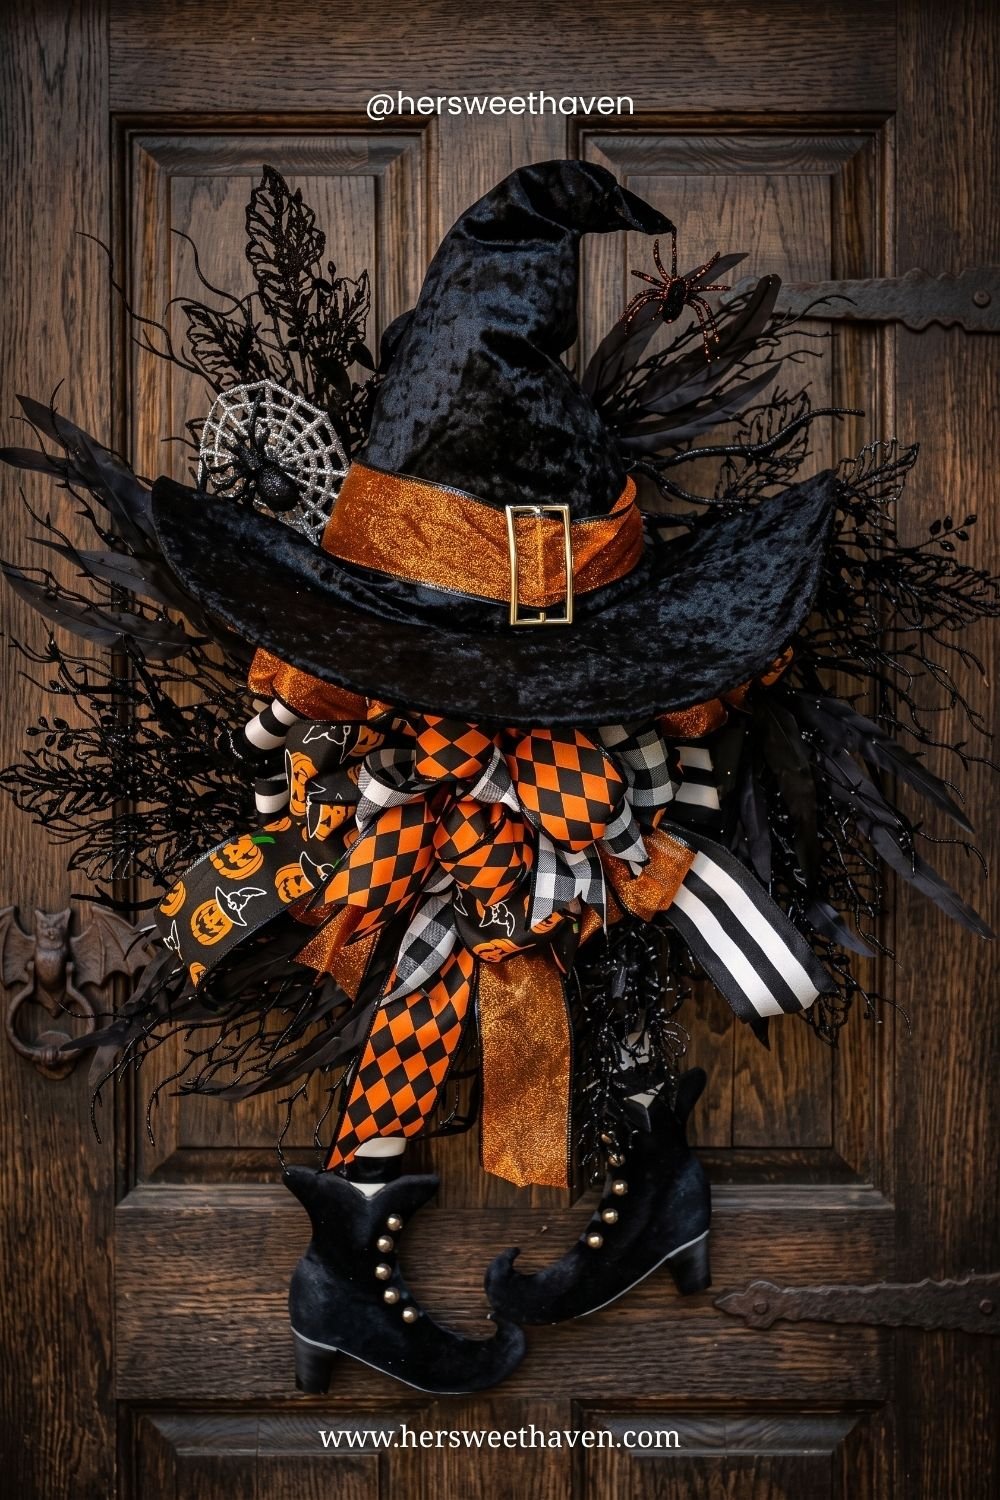
Boutique versions sell for $45. Yours is a $12 mat and paint you’ll reuse. Pair it with something on the door and your entry is done, and my roundup of Halloween wreaths worth making has options for about the same price.
The Bat Swarm Front Door
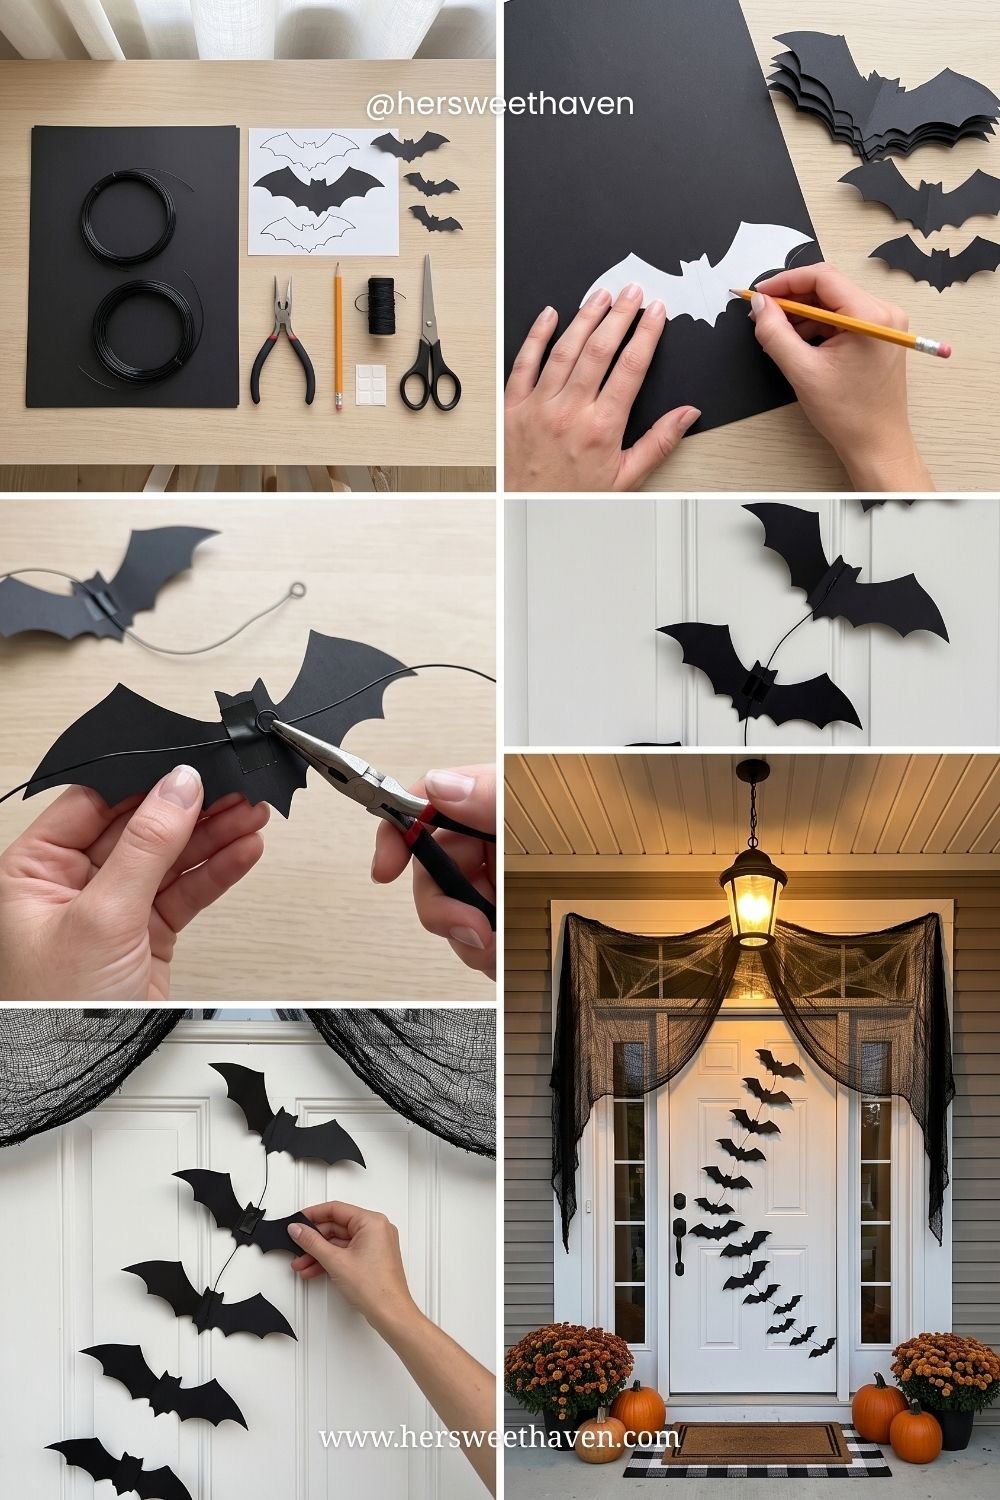
Black cheesecloth swagged over the entry, a warm porch light behind it, and a swarm of paper bats climbing the door in a curving line.
The glow behind the fabric is what makes it look styled instead of draped. Mount the bats on thin wire so they stand off the surface and cast their own little shadows. That’s the whole trick.
The Potion Bottle Apothecary
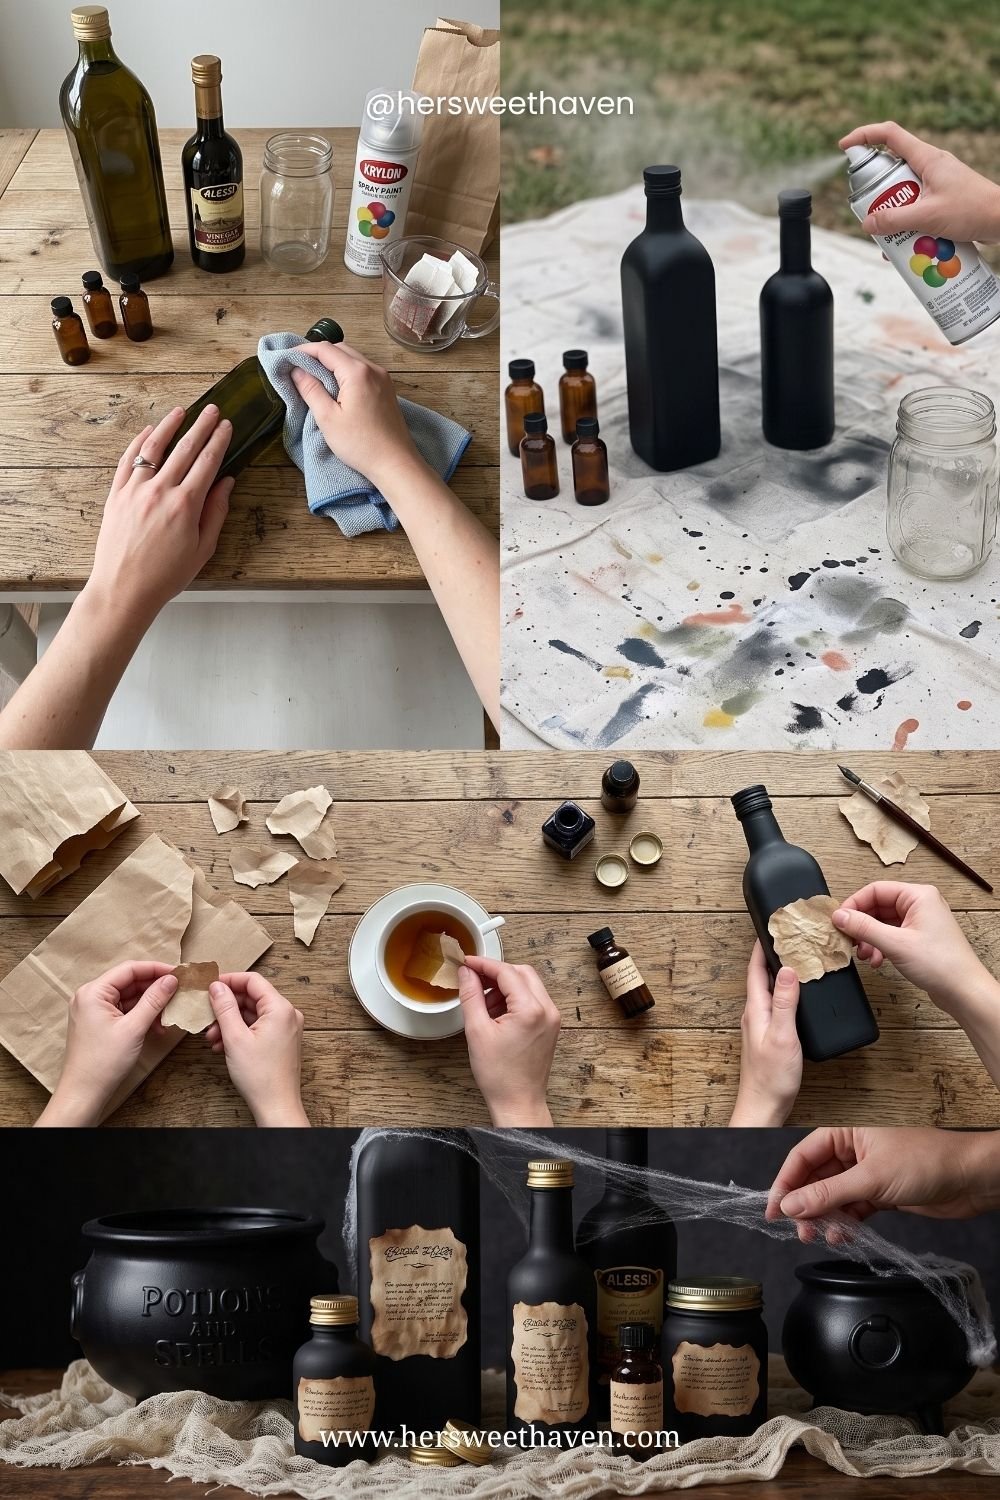
My favorite, and the reason I stopped buying props. Save wine bottles, olive oil bottles, jars, and amber vials. Wash them, spray them matte black, tear kraft paper into label shapes, stain the edges with tea, write ridiculous names on them, glue them on.
Add a cheesecloth drape and a black cauldron and you have a witch’s shelf that looks like a store display. This DIY potion bottle tutorial has free printable labels if handwriting isn’t your thing. Total cost: one can of spray paint, because everything else is trash you were about to recycle.
Two upgrades worth five extra minutes: tint water with food coloring in a couple of bottles so they catch the light, and drip candle wax over the corks. Both are nearly free, and both push it from craft project into movie set.
Your Halloween Decor Questions, Answered
What’s the Cheapest Thing With the Biggest Impact?
Warm string lights, hands down. A few strands turn any space from “room with snacks” into “party” for under twenty dollars, indoors or out. Second place: the bat shadow lanterns, which produce room-sized drama for under two dollars.
Both prove the same point. You’re buying an effect, not an object, and effects are cheap. Skip the animatronics your first few years. Nobody remembers the fog machine. Everybody remembers the glow.
Can You Really Decorate in One Afternoon?
Yes, with a plan. First hour on the tablescape. Second hour on lights and cheesecloth everywhere. Third hour on your one showpiece, whether that’s the photo wall or the wanted posters.
Prep the printables and craft the jars the night before so the afternoon is pure placement. And work from the entrance inward, so if you run out of time the parts guests see first are finished. (We’ve all run out of time. Plan for it.)
Where Do You Shop for Supplies?
Dollar stores for the basics: cheesecloth, plastic spiders, googly eyes, mini skeletons, black paper. Craft stores with a coupon for spray paint and clay. Hardware stores for chicken wire. Your own recycling bin for bottles and jars.
Skip the big-box seasonal aisle unless it’s November 1st and everything’s 70% off, which is genuinely the best day of the year to buy for next Halloween.
How Do You Store It So It Lasts?
Flat items (bats, garlands, stencils) go in a large envelope or between cardboard sheets. Potion bottles and clay pumpkins wrap in newspaper in a labeled bin. The chicken wire ghost comes apart: fold the sheet, stack the frame flat against a garage wall.
Label the bin and stash it with your other seasonal storage. Next October you start with a full kit instead of an empty table, which makes year two nearly free.
What I’d Do If I Only Had Time for Three Things
Every year I over-plan and then run out of Saturday, so here’s my honest triage. String lights, the spooky tablescape, and the wanted-poster wall. That’s it.
Those three cover the whole formula: warm light for atmosphere, a food table that anchors the look, and one personal, guest-focused moment that gets everyone talking. Everything else on this list is a lovely bonus, but those are the load-bearing walls.
And if you want one project to start tonight, pull an empty bottle out of your recycling and rinse it. Spray it black tomorrow. By the weekend you’ll have a shelf that looks like it cost fifty dollars and you’ll have spent about six. That’s the entire method, and it works on everything above.

Leave a Reply