

By the end of this guide, you’ll know how to make your own mosaic garden art, from stepping stones and garden paths to mosaic planters and decorative sculptures, even if you’ve never worked with tiles, grout, or mortar before. Mosaic garden art is one of those rare crafts that looks intricate and professional but is actually accessible to complete beginners with basic supplies and a free afternoon.
The concept is simple: take broken tiles, glass pieces, pebbles, or old china and arrange them into colorful patterns on a surface like a concrete stepping stone, a terracotta pot, or a garden wall. The result is a one-of-a-kind piece of outdoor art that adds color, texture, and personality to any garden space. Unlike painted decorations that fade in the sun or wooden pieces that rot in the rain, mosaic garden art is built to last outdoors for years. This guide covers the best beginner projects, how to choose materials that survive the weather, the broken-tile technique that makes beautiful art from free supplies, how to work without messy grout, and how to use recycled materials to keep costs near zero.
7 Mosaic Garden Art Projects for Beginners
The best way to start with mosaic garden art is to pick a small, contained project that gives you a finished piece in a single session. These are the projects that consistently work well for first-timers.
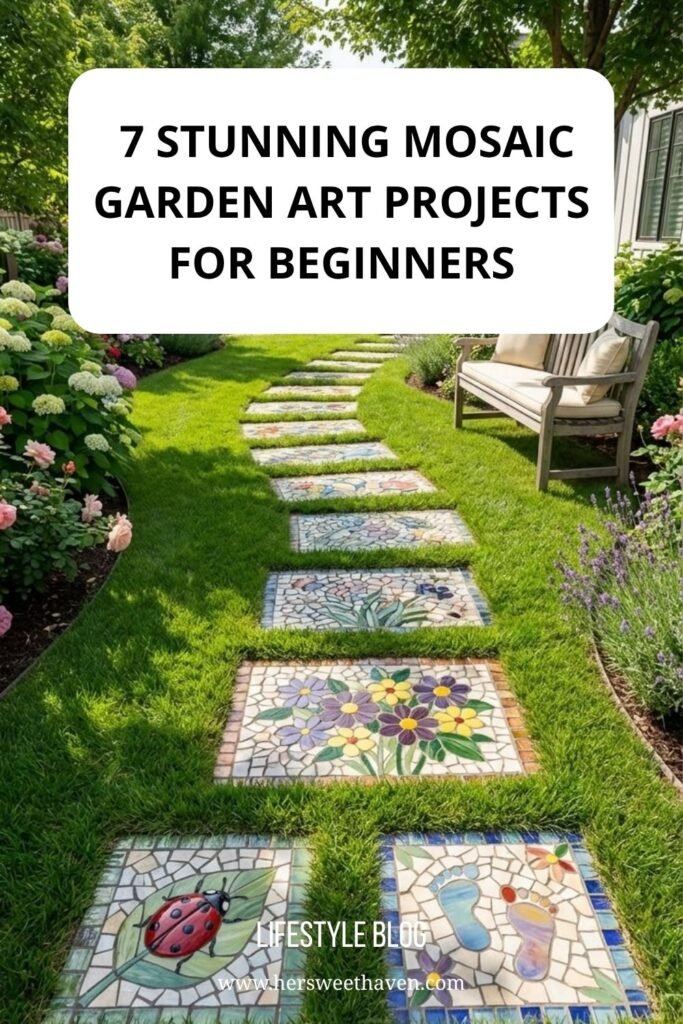
Mosaic Stepping Stones
Stepping stones are the most popular entry point into mosaic garden art because they’re small, self-contained, and produce a functional piece you can place in your garden immediately. DIY mosaic tutorials walk through the basic method: pour concrete mix into a round or square mold (an aluminum cake pan works fine), press tiles, glass pieces, or pebbles into the wet surface in a pattern, let it cure for 24 to 48 hours, and pop it out of the mold.
Popular designs include flower patterns, ladybugs, butterflies, suns and moons, geometric shapes, and simple monograms. Celestial themes work especially well because they translate clearly even at a small scale, and the contrast between dark and light tiles makes the design pop against green grass. The whole project costs about $10 to $15 per stone if you buy a kit, or nearly nothing if you use broken tiles and old dishes you already have at home. Line several finished stones along a garden path for a walkway that looks like it belongs in a Mediterranean courtyard.
Mosaic Flower Pots and Planters
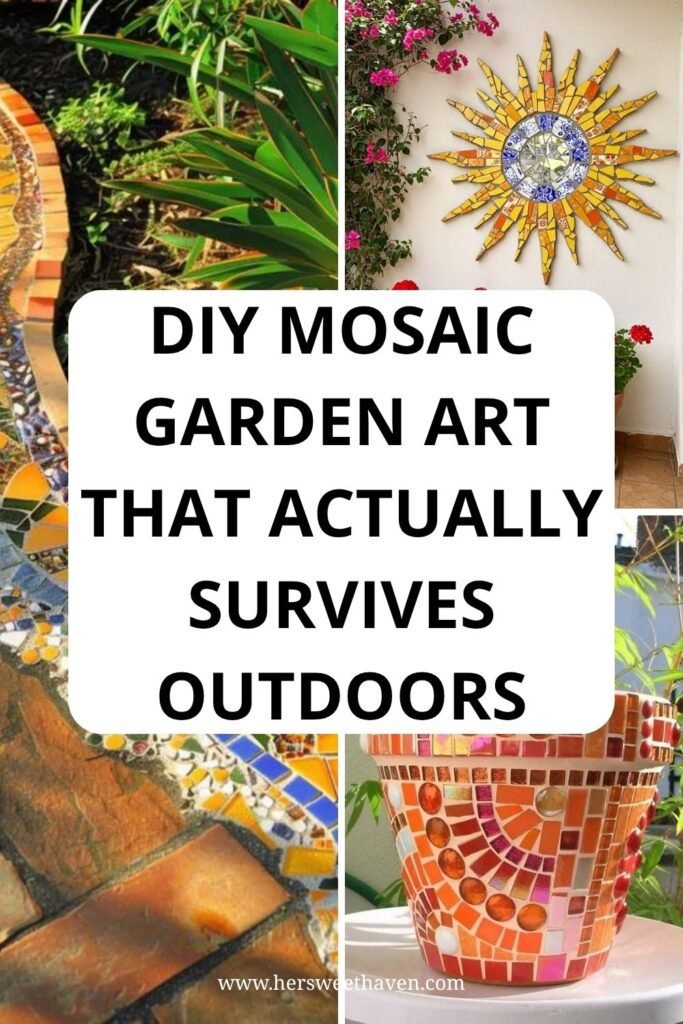
A plain terracotta pot covered in mosaic tiles becomes a garden centerpiece. The process is slightly different from stepping stones: instead of pressing tiles into wet concrete, you glue tile pieces onto the outside of an existing pot using tile adhesive, then fill the gaps between the pieces with grout. Mosaic art guides recommend using thinset mortar as the adhesive for outdoor pieces because it’s waterproof and bonds permanently to both the tile and the pot surface.
The color combinations are endless. Warm reds, oranges, and golds create a Mediterranean vibe. Blues and greens give a coastal feel. A mix of everything creates that eclectic, collected-over-time look that works in cottage-style gardens.
Mosaic Garden Walkway Paths
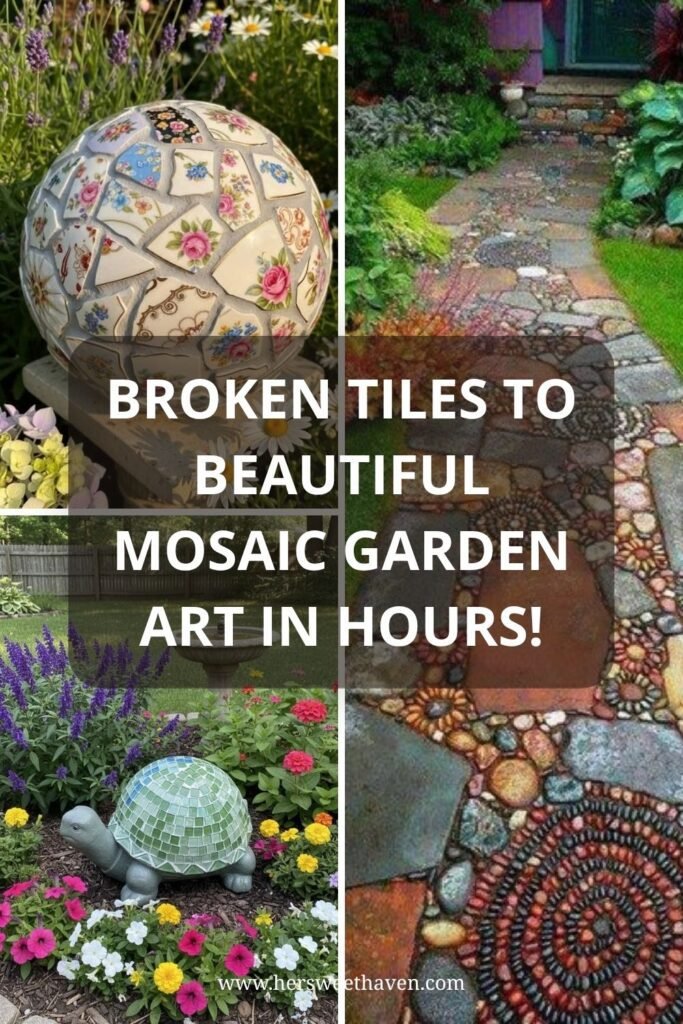
For a larger project, a full mosaic walkway made from pebbles, stones, or tile pieces set into mortar creates a garden feature that’s both functional and artistic. Fine Gardening’s pebble mosaic guide walks through the process of creating intricate patterns (spirals, sunbursts, flowers, geometric designs) using sorted river pebbles pressed into a mortar base between framing boards.
This is a bigger commitment than a single stepping stone, but the result is a permanent garden path that becomes the focal point of the entire yard. Start with a three-foot-by-three-foot section to test the technique before committing to a full walkway. If you’re also thinking about the surrounding garden layout, these small garden design tips help you plan the space around your new mosaic path.
DIY Mosaic Garden Art That Actually Survives Outdoors
The biggest concern with outdoor mosaic art is durability. Rain, frost, heat, and UV exposure can crack tiles, dissolve adhesive, and crumble grout if you use the wrong materials. Here’s how to build pieces that last.
Choosing Weather-Proof Materials
Not all tiles hold up outdoors. Mosaic supply experts recommend using glass tiles or porcelain pieces for outdoor mosaics because they’re non-porous, meaning they don’t absorb water. Ceramic tiles, especially unglazed ones, absorb moisture that can freeze and crack in cold climates.
For adhesive, thinset mortar (available at any hardware store) is the standard for outdoor mosaics because it’s waterproof, flexible enough to handle minor temperature changes, and bonds permanently to concrete, terracotta, and stone surfaces. Regular craft glue or silicone sealant won’t hold up to outdoor conditions for more than a season.
Sealing Your Finished Piece
After grouting, applying two to three coats of outdoor tile and grout sealer protects the mosaic from moisture penetration, staining, and UV fading. Stepping stone tutorials recommend sealing mosaic pieces each fall before winter weather arrives, especially in climates where freezing and thawing cycles occur. The sealer soaks into the grout lines and creates a barrier that keeps water from getting underneath the tiles and popping them off during freeze-thaw.
Choosing the Right Base Surface
The base you mosaic onto matters as much as the tiles themselves. Concrete pavers, terracotta pots, and cinder blocks all make excellent bases because they’re rigid, porous enough for thinset to bond to, and heavy enough to stay in place outdoors. Avoid wood as a base for outdoor mosaics (it expands and contracts with moisture, cracking the tiles) and thin plastic (which flexes and breaks the grout).
Broken Tiles to Beautiful Mosaic Garden Art in Hours
One of the best things about mosaic art is that the raw materials are often free. Broken dishes, chipped tiles, old mirrors, and discarded pottery all become beautiful once they’re rearranged into a pattern.
Where to Find Free Mosaic Materials
Leftover tiles from home renovation projects (your own or a neighbor’s) are the number one source. Ask at tile showrooms for discontinued samples or broken pieces they’d normally throw away. Thrift stores sell chipped plates and teacups for pennies that break into gorgeous mosaic pieces. Beach glass, smooth river pebbles, and flat stones collected on walks are all free and work beautifully in pebble mosaics.
Craft tutorials confirm that using embellishments you already have around the house (glass gems, old jewelry, buttons, seashells, marbles) personalizes stepping stones and makes each one completely unique.
Breaking Tiles Safely
Wrap tiles or plates in an old towel, place them on a hard surface, and tap firmly with a hammer. The towel keeps the pieces from scattering and protects you from sharp edges. Wear safety glasses and work gloves during this step. Use tile nippers (about $10 at a hardware store) to shape individual pieces into specific sizes after the initial break.
For projects like garden globes, birdbaths, or large planters, mix tile sizes: larger pieces for the main design and smaller chips for filling gaps. The contrast between big and small pieces adds visual texture that makes the mosaic look more complex than it actually is. If you enjoy this kind of hands-on garden craft, these DIY fairy garden decors use a similar approach of combining small decorative elements into a larger garden display.
Want Mosaic Garden Art Without the Messy Grout?
Grouting is the step that intimidates most beginners. It’s messy, time-sensitive, and requires cleanup before it dries. If you want to skip it entirely, there are legitimate alternatives that still produce durable outdoor pieces.
The Direct-Press Method
The simplest grout-free technique is pressing tiles or pebbles directly into wet concrete or mortar while it’s still soft. DIY stepping stone guides call this the “direct method,” and it’s the approach most beginner-friendly mosaic kits use. You pour the concrete into a mold, wait until it’s firm enough to hold an impression but still soft enough to push tiles into (usually about 15 to 20 minutes), and then press your pieces into the surface.
The concrete acts as both the base and the “grout” by squeezing up between the tiles as you press them in. The result is a slightly rougher finish than a properly grouted mosaic, but it works fine for stepping stones and garden decorations. No mixing grout, no cleanup, no time pressure.
Adhesive-Only Mosaics for Decorative Pieces
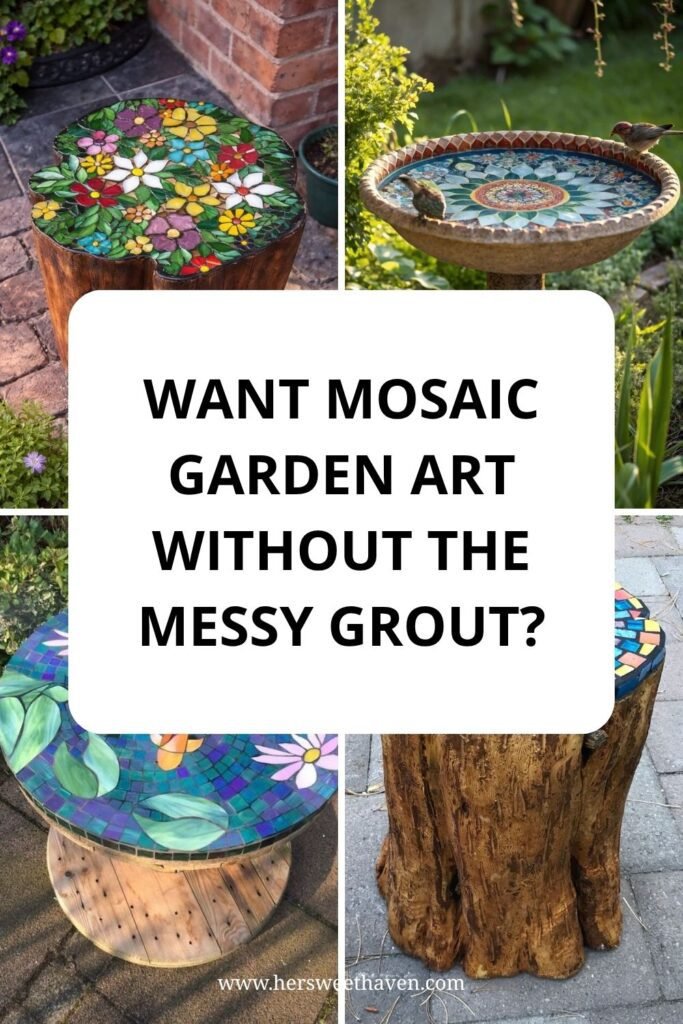
For mosaic pieces that won’t be walked on (wall decorations, birdbath rims, planter outsides, garden sculptures), you can skip grout entirely and simply glue tiles close enough together that the gaps are minimal. Outdoor-rated construction adhesive or clear silicone bonds tiles to most surfaces, and the finished piece looks like a tight, smooth mosaic without any grout lines visible.
This approach works best for pieces that will be sheltered from heavy rain (under a porch roof, on a covered wall) since the adhesive alone isn’t as waterproof as a proper thinset-and-grout installation.
How to Make Mosaic Garden Art with Recycled Materials
The sustainability angle is one of the reasons mosaic garden art resonates with so many people right now. Instead of buying new materials, you’re turning broken, discarded, and forgotten items into permanent outdoor art.
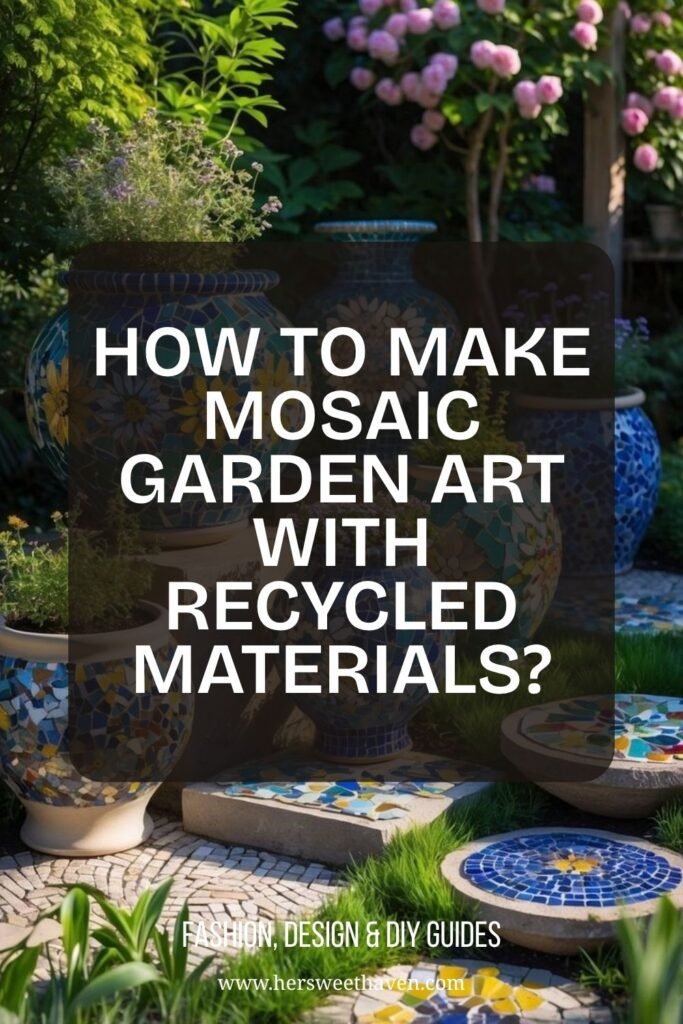
Turning Old China Into Garden Globes
A concrete or styrofoam ball covered in pieces of old china (the kind with floral patterns, gold rims, and delicate colors) becomes a garden gazing globe that looks like it came from an antique garden in the English countryside. The mixed patterns from different plates and teacups create a patchwork effect that’s visually rich and tells a story. Many people use family heirloom dishes that are too chipped to use at the table but too meaningful to throw away.
Recycled Tile Planters and Borders
Broken floor tiles from a bathroom renovation can line a garden border, cover a raised bed wall, or dress up a plain concrete planter. Sort by color first so you can create intentional patterns rather than a random jumble. Blues and whites for a Mediterranean look, earth tones for a rustic feel, or a full rainbow for a vibrant cottage garden.
The environmental benefit is real: every piece of tile or pottery you mosaic is one fewer piece in a landfill. And because mosaic art is addictive (fair warning), you’ll start seeing potential mosaic materials everywhere: at yard sales, in renovation dumpsters, at thrift stores, and in your own kitchen cabinets. Once you train your eye to see the mosaic potential in broken and discarded objects, you’ll never look at a cracked plate the same way again. Neighbors doing kitchen renovations become your new best friends, and a trip to the thrift store turns into a supply run rather than a shopping trip.
The cost savings add up quickly too. A professional mosaic garden installation can run hundreds or even thousands of dollars, but a DIY version using recycled materials and basic supplies from the hardware store costs a fraction of that. Most of the projects in this guide can be completed for under $20 in materials, with many costing nothing at all if you already have broken tiles or pebbles on hand.
For ideas on hosting a craft afternoon around your new mosaic garden, these garden party planning tips can help you turn the project into a social event.
Save this guide for your next free weekend, gather your materials (or start collecting broken tiles and interesting pebbles), and pick one project to start with. A single mosaic stepping stone takes about two hours of active work and gives you a finished piece that will add color to your garden for years to come. Once you make one, you’ll want to make a dozen. That’s not a warning. That’s a promise. Your garden is waiting for its first pop of color.
Leave a Reply