If you have a stack of old wooden crates sitting in your garage (or you just spotted some at the flea market for a few dollars), you are sitting on one of the easiest outdoor projects you will ever take on. A diy tiered planter stand from crates gives you vertical growing space, a ton of rustic character, and a finished look that your neighbors will assume you bought at a garden boutique.
The best part? You do not need a workshop full of power tools. You do not need a big budget. And you definitely do not need years of DIY experience to pull this off. Whether you want a compact herb station for your apartment balcony or a full tiered garden planter for your backyard, crates give you the structure to make it happen fast.
In this post, you will find 10 crate planter ideas that actually hold up, along with tips on sturdiness, weatherproofing, and the mistakes that trip most people up on their first build.
Why a DIY Tiered Planter Stand From Crates Is Worth Your Weekend
Before you pick up a single screw, here is why crate planters keep showing up all over Pinterest and garden blogs.
They Cost Almost Nothing to Build
Wooden crates are one of the most affordable building materials you can find. New ones at craft stores run about $5 to $10 each. Secondhand crates from flea markets, thrift stores, or even local farms often cost less. Stack three to five crates together and you have a full tiered flower stand for the price of a drive-through coffee run. If you love budget friendly patio decorating ideas, this project fits right in.
They Work for Small Spaces and Big Gardens
A vertical planter crate diy takes up a fraction of the floor space that a traditional garden bed requires. That makes it perfect for patios, balconies, porches, and narrow side yards. If you are working with limited outdoor space, check out these small garden design tips for more ways to maximize what you have. On the other hand, if you have a large backyard, you can line up several crate stands to create a full crate garden display along a fence or wall.
The Classic Three-Tier Stacked Crate Planter

This is the design most people picture when they hear “stacked crate planter,” and for good reason. Three wooden crates stacked vertically with planter boxes built into each tier give you a clean, structured look that works on a porch, a patio, or even a deck.
The key to making this style work is building a solid back support. A pair of 2×4 boards running vertically behind the crates keeps everything aligned and prevents the tiers from shifting forward under the weight of soil and water. You can attach each crate to the support frame with 1 1/4-inch wood screws and wood glue for extra strength. This is also the approach that works well if you want to hold heavier pots, like the Home Depot bucket garden setup you see in the image.
If you are growing herbs or vegetables, this tiered planter stand diy is ideal because each tier gets good sun exposure and airflow.
How to Get the Store-Bought Look Without the Price Tag
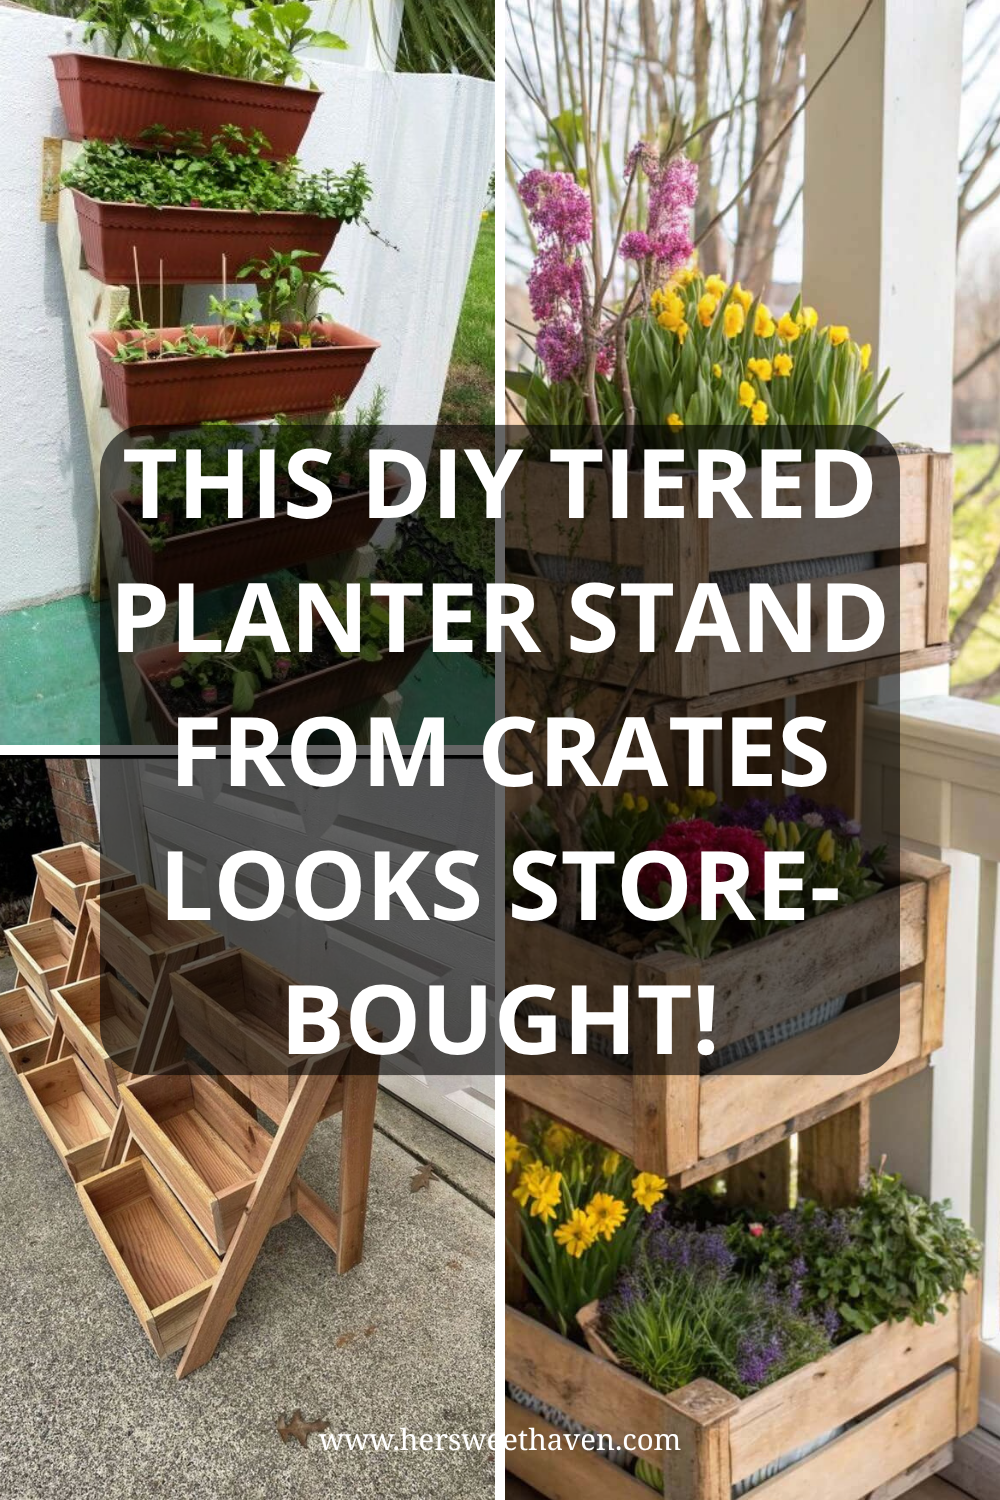
Here is something that surprises a lot of first-time builders: a crate planter stand can look polished enough to pass as store-bought furniture. The trick is all in the finishing.
Sand every visible surface before you assemble. Start with 80-grit sandpaper to remove rough spots, then follow up with 120-grit for a smooth feel. Apply a wood stain in a warm walnut or honey oak tone, and finish with a clear matte polyurethane coat. This combination gives you the kind of rich, layered color that makes people assume you spent serious money.
You can also dress up plain crates by adding small chalkboard labels (perfect for a herb garden) or lining the tiers with matching terracotta pots. When you pair your wooden crate planter with seasonal flowers like tulips, daffodils, or pansies, the whole setup looks like it came straight from a garden catalog.
Want to take the decorating even further? Pair your crate planter with some colorful painted flower pots for an extra pop of personality.
Stop Making This Mistake on Your DIY Tiered Planter Stand From Crates
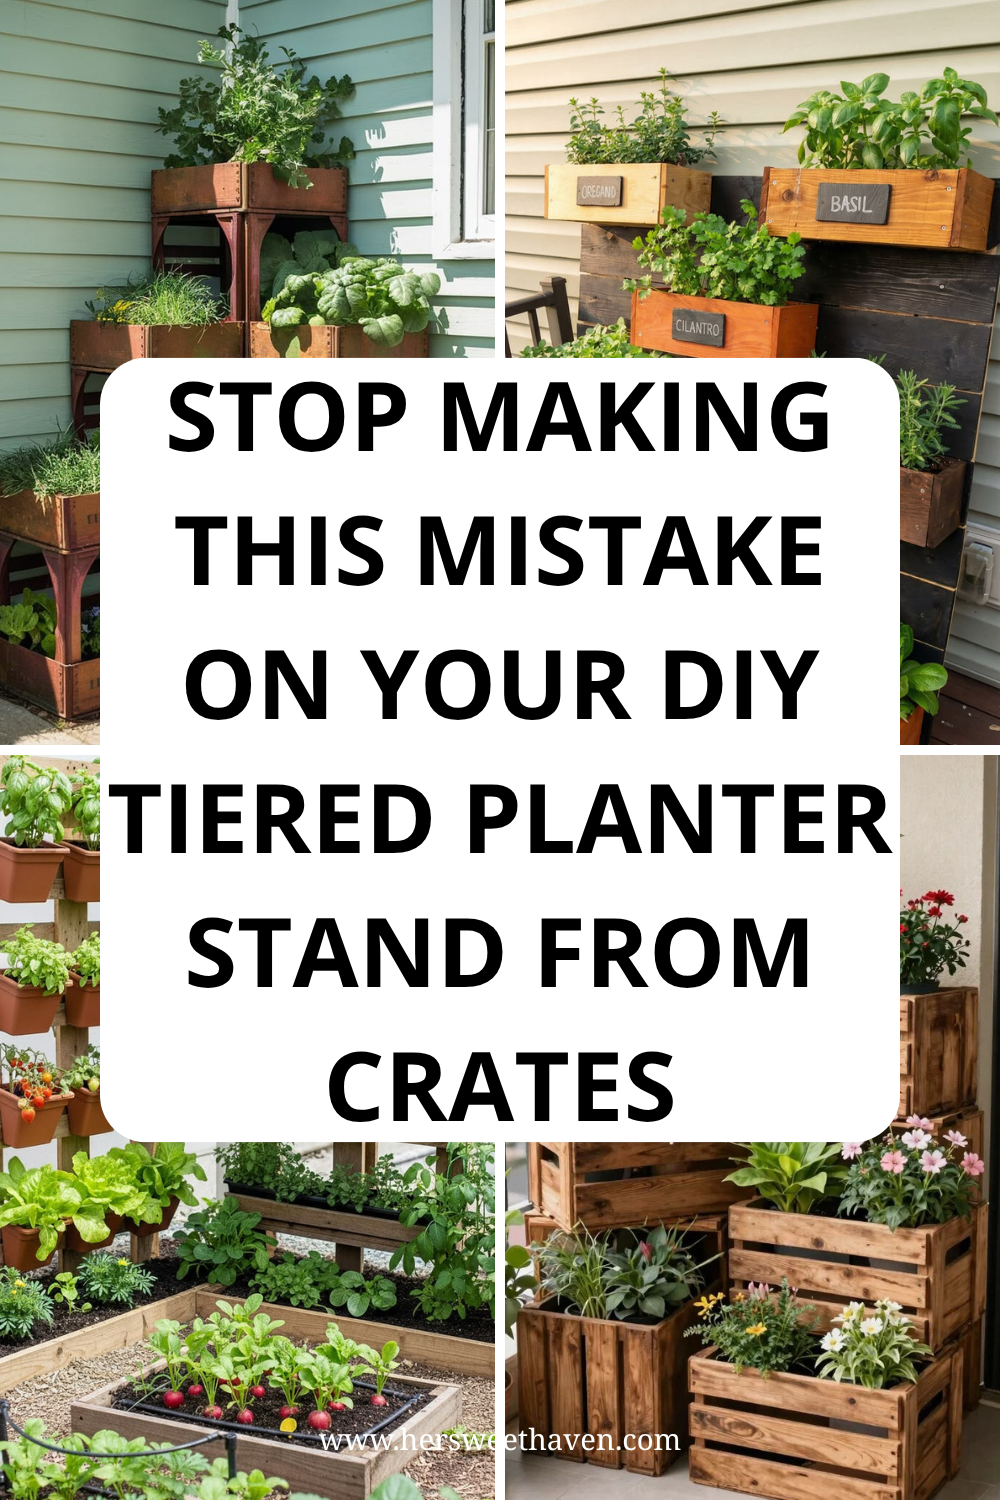
This is where most people get it wrong. They grab some crates, stack them up, fill them with soil, and then wonder why the wood starts rotting within a single season.
The number one mistake? Skipping the liner.
When you plant directly into a wooden crate, moisture from the soil sits against the wood every time you water. Over time, that constant dampness breaks down the fibers and invites mold. According to Houzz’s guide on crate planters, lining the boxes with plastic, using baskets or pots inside the crates, and elevating them from the ground with risers all help extend the life of your build significantly.
Here is the simple fix: line each crate with landscape fabric or a heavy-duty plastic sheet. Poke a few drainage holes in the bottom so water does not pool. If you would rather skip the liner entirely, just set individual pots inside each crate instead of filling the crate with soil directly. This approach also makes it much easier to swap plants in and out as seasons change.
Another common error is using the wrong type of crate. Avoid anything that has been chemically treated or painted with unknown coatings, especially if you plan to grow edible herbs or vegetables. Stick with untreated pine, cedar, or reclaimed fruit crates.
Your DIY Tiered Planter Stand From Crates Keeps Tipping Over?

If your stacked crate planter leans, wobbles, or straight-up falls over, the issue is almost always the same: the center of gravity is too high and the base is too narrow.
Here is how to fix that. Start by making the bottom crate the widest one in your stack. If all your crates are the same size, add a simple plywood base that extends 2 to 3 inches beyond the crate footprint on each side. This wider platform gives you the stability you need.
For extra security, test the stand with empty pots first before adding soil. Place the pots, check for wobble, then add soil gradually. This way, you catch balance issues before they become a mess.
If you are placing your diy outdoor plant stand on grass or uneven ground, consider anchoring it to a wall or fence with L-brackets. You can also weigh down the bottom tier with a layer of gravel or river rocks before adding soil on top. This lowers the center of gravity and keeps everything planted firmly in place. If you are building raised planters too, these same principles apply to helping you build raised garden beds on a budget.
The Under-$15 Crate Planter Build
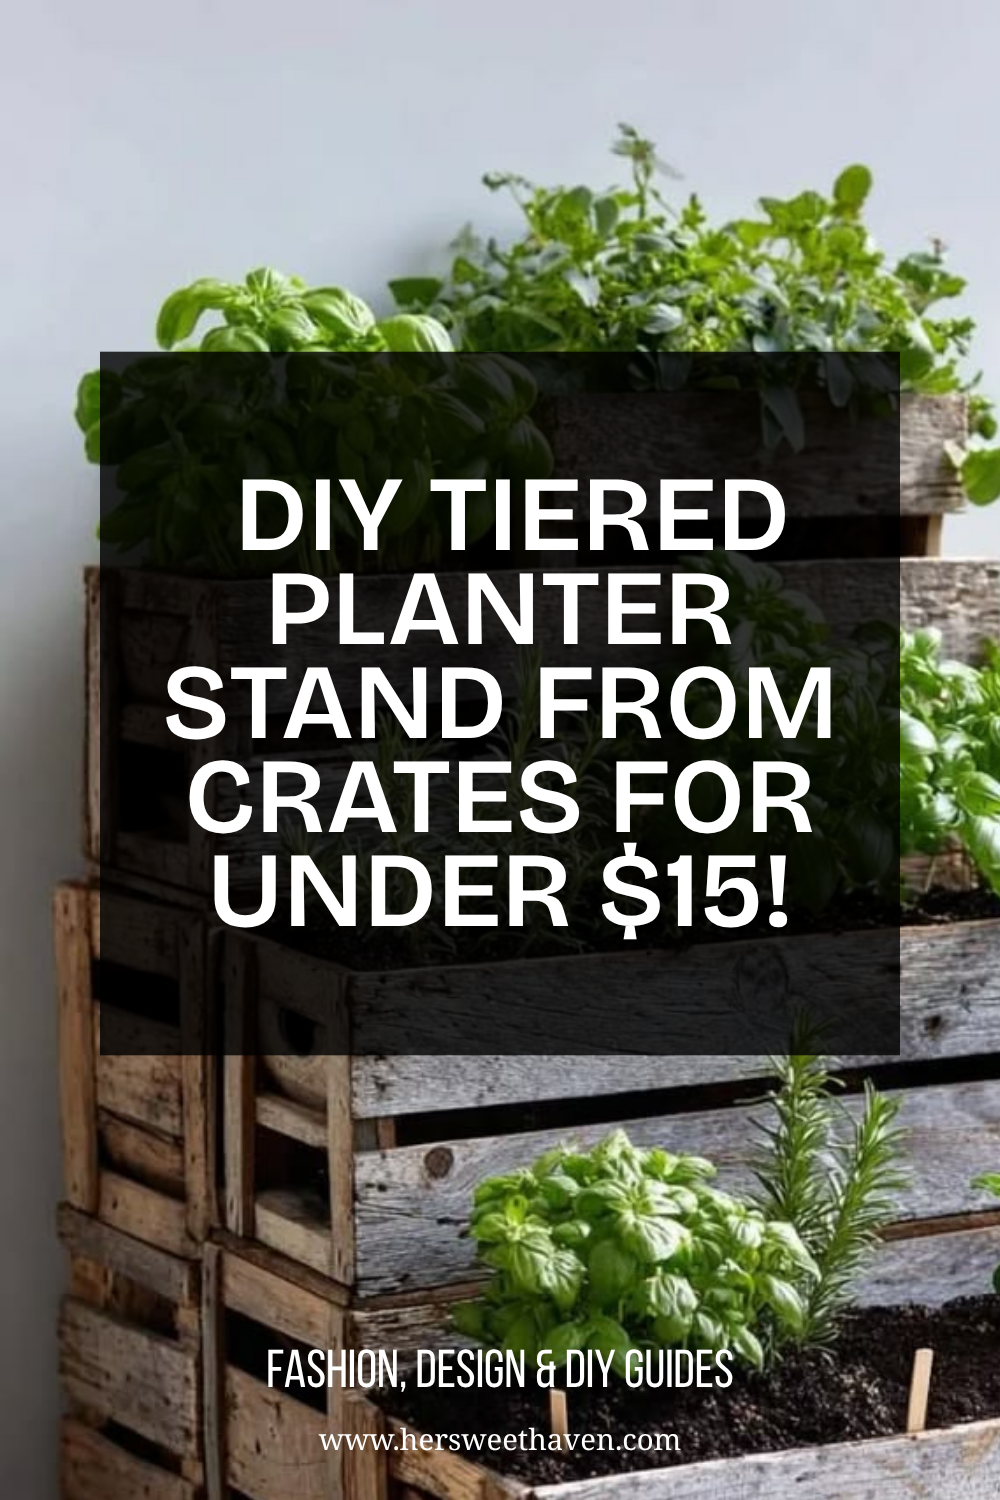
Yes, you can build a fully functional tiered planter stand for under $15. Here is how.
Pick up two to three unfinished wooden crates from a craft store or dollar store (usually $3 to $7 each). Grab a small box of wood screws and a tube of wood glue. That is your entire materials list.
Stack the crates in a staircase pattern so each one is offset from the one below it. Secure them together by driving screws through the overlapping edges. Add wood glue at every joint for reinforcement. The Proflowers crate tutorial recommends nailing each corner so the hold stays strong over time.
You do not need to stain or seal the crates if you are keeping this indoors. For outdoor use, a single coat of spray-on polyurethane adds weather protection for about $5 more. The entire project takes less than an hour from start to finish.
This is one of the most affordable crate planter ideas out there, and it is a great first project if you are new to DIY.
DIY Tiered Planter Stand From Crates With No Power Tools
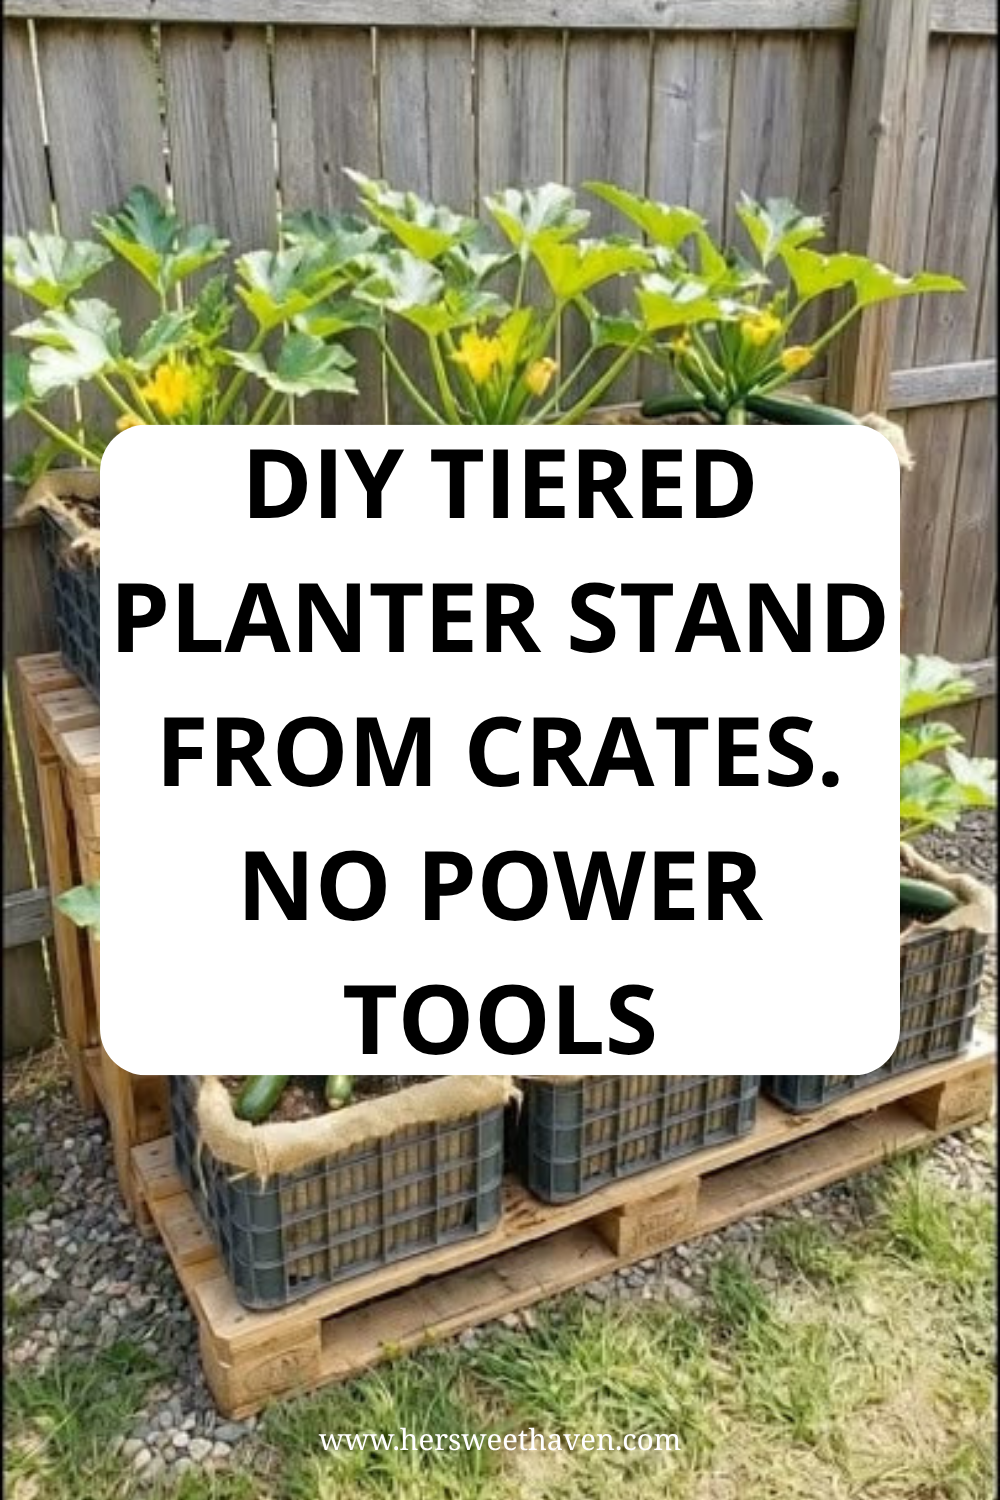
Not everyone has a drill, and that is perfectly fine. You can build a solid tiered garden planter without plugging in a single tool.
The easiest no-tool approach uses a pallet as your base. Lay a wooden pallet flat on the ground (or prop it up on cinder blocks for height). Then stack your crates on top in a pyramid or staircase arrangement. The pallet slats hold the crates in position, and the weight of the soil keeps everything locked down.
If you want more security without power tools, use construction adhesive instead of screws. Apply a generous bead along each joint where crates meet, then press them together firmly and let the adhesive cure overnight. Heavy-duty wood glue works too, though construction adhesive gives you a stronger bond on rough surfaces.
You can also use rope or heavy twine to lash crates together. Thread the rope through the slats and tie tight knots at each connection point. This method gives the finished stand a rustic, farmhouse look that works especially well on porches and in cottage-style gardens.
What Finish Makes a DIY Tiered Planter Stand From Crates Last?
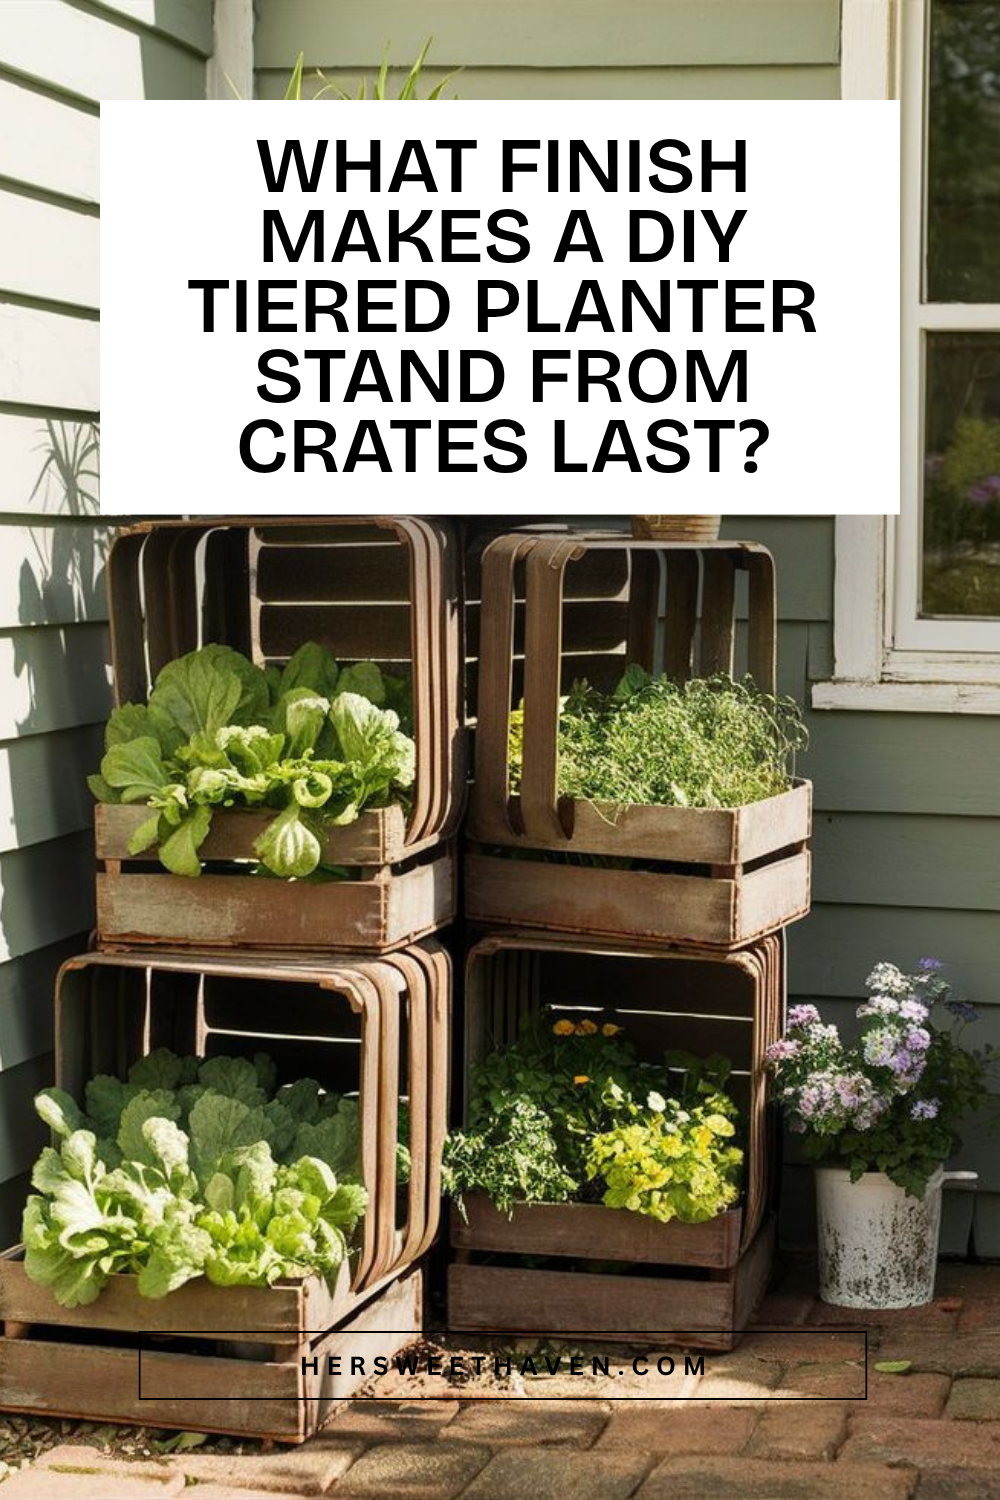
The right finish is what separates a crate planter that lasts one summer from one that holds up for years. So let’s break it down.
For outdoor use, your best options are exterior wood stain combined with a waterproof sealant. Look for products labeled “exterior” or “weatherproof” on the can. Using outdoor-rated spray paint or sealant prevents chipping and peeling when the crates are exposed to rain and sun. Applying a weatherproof sealant also protects against UV damage and moisture, which are the two biggest enemies of untreated wood outdoors.
For indoor crate planters, a simple coat of furniture wax or matte polyurethane gives the wood a polished look without making it shiny or plasticky. Beeswax finishes work well too and keep the natural wood grain visible.
If you want a painted finish, use a primer coat first, then two coats of your chosen color. Chalk paint gives a soft matte farmhouse look, while glossy enamel paint creates a more modern feel. Either way, seal the paint with a clear topcoat to prevent scratching.
Cedar and redwood crates naturally resist rot and insects, so if you can find crates made from these woods, they need less finishing work to hold up outdoors.
The Beginner-Friendly Vertical Crate Stand
If this is your very first DIY project, start here. This design uses a simple vertical stack of crates attached to a wall or fence, and it is about as straightforward as building gets.
Pick three to four matching crates. Arrange them in a straight vertical column with the open sides facing outward. Secure each crate to the one below it with two screws on each side. Then anchor the entire column to a wall, fence, or sturdy post using L-brackets at the top and bottom.
Fill each crate with a mix of potting soil and compost, and plant herbs, lettuce, or trailing flowers. The vertical arrangement means every plant gets direct sunlight, and watering from the top tier naturally drips down to feed the lower levels.
This beginner-friendly diy tiered plant stand is also a great option for renters. If you attach the column to a freestanding post (like a 4×4 sunk into a heavy planter base), you can take the whole setup with you when you move. For more ideas on growing in tight spaces, take a look at these container garden design ideas for patios.
The Indoor Ivy Tower
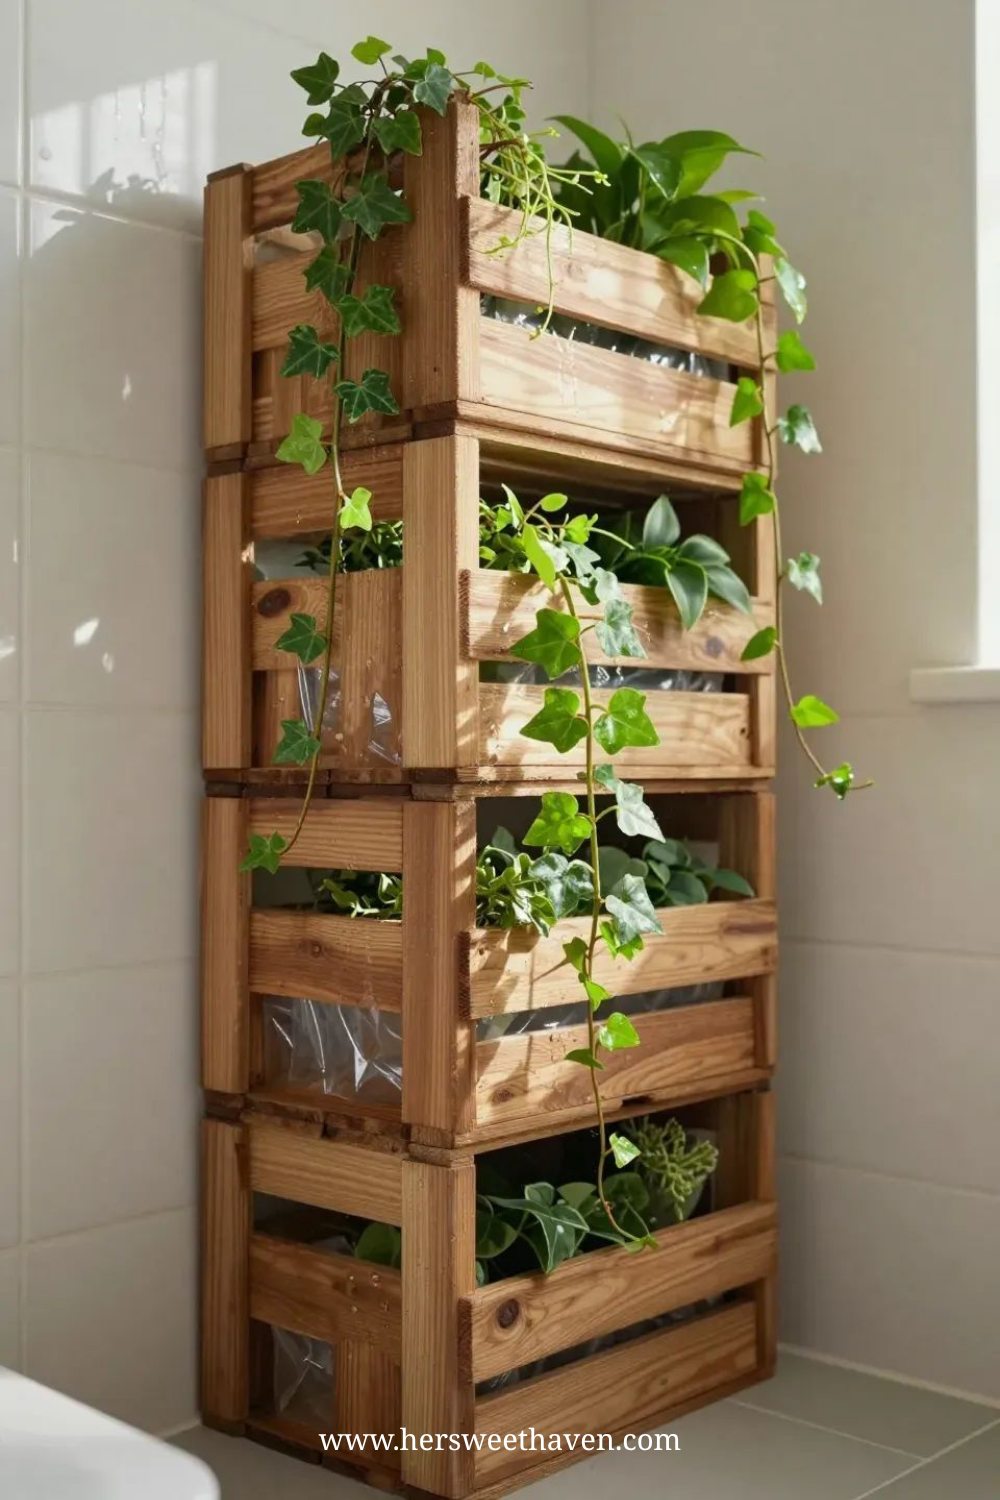
Crate planters are not just for the outdoors. A tall stack of crates indoors creates a beautiful vertical planter that works in bathrooms, living rooms, and sunrooms.
The setup here is four crates stacked with their open faces alternating directions. Line each crate with clear plastic (so it stays invisible from the outside) and plant trailing varieties like English ivy, pothos, or string of pearls. As the vines grow and cascade over the edges, the whole structure turns into a living green wall.
For indoor use, make sure your crates sit on a waterproof tray or mat to protect your floors. Use a spray bottle to mist the plants rather than heavy watering, since indoor crate planters do not have the same drainage that outdoor setups get from natural airflow.
This is also a smart option for apartments or homes without outdoor space. You get the look of a tiered flower stand without needing a patio or yard.
The Rustic Farmhouse Flower Stand
For the tenth idea, think about combining multiple styles from the ideas above into one larger farmhouse-style display. Take three or four crates of different sizes and arrange them in a loose, asymmetrical grouping on your porch or patio steps. Fill some with flowers, leave one stacked with small terra cotta pots, and use another as a decorative storage box for gardening gloves and tools.
This relaxed, “collected over time” look is the heart of crate garden display styling. It does not need to be perfectly symmetrical or matching. In fact, mixing stained crates with natural wood and painted crates creates more visual interest than a uniform set.
Add a few accessories around the crates (a watering can, a hand-lettered garden sign, a lantern) and you have a front porch setup that looks like it belongs in a magazine spread.
How Sturdy Is a DIY Tiered Planter Stand From Crates?
This is one of the most common questions people ask before starting this project, and the answer depends entirely on how you build it.
A stacked crate planter held together with just friction? Not very sturdy. A stack secured with wood screws, wood glue, and a backing frame? Surprisingly solid. The Home Depot method of using 1 1/4-inch wood screws at 4-inch intervals along with wood glue creates a strong bond that can handle the weight of soil, water, and mature plants without shifting.
Here are a few rules of thumb for sturdiness. Always drill pilot holes before driving screws into thin crate wood to prevent splitting. Use at least two screws per joint, placed diagonally from each other. Add corner brackets on the inside where they will not be visible for extra reinforcement on taller builds.
If you are stacking more than three crates high, a vertical support rail (a 2×4 or 1×3 board running up the back) makes a big difference. This is especially important for a diy outdoor plant stand that will be exposed to wind.
For the heaviest loads (think: large pots filled with wet soil), keep the heaviest items on the bottom tier and lighter plants up top. This simple placement strategy keeps your center of gravity low and your stand steady.
A diy tiered planter stand from crates is one of those rare projects that is genuinely affordable, beginner friendly, and good-looking all at the same time. Whether you go with a simple no-tools pallet setup or a fully stained and sealed vertical garden, the results speak for themselves.
Pick the idea that fits your space, your skill level, and your budget. Grab a few crates this weekend and give it a try. You will be surprised how quickly it comes together.
If you build one, come back and tell me about it. I would love to hear which design you went with and how it turned out.
Leave a Reply