

A gorgeous Christmas tablescape isn’t about owning a cabinet full of fancy china. It’s about light. Specifically, it’s about candlelight doing 80% of the work while you take the credit.
I learned this the expensive way. For years I thought a beautiful holiday table meant new plates, new chargers, new everything, so I’d panic-buy a whole set every December and still feel like something was missing. The something was glow. The year I skipped the shopping and just added a dozen candles, my table finally looked like the magazine version.
Here’s the reframe that changes everything: warm candlelight flatters every plate you already own, hides every imperfection, and makes even a $20 table look expensive. It’s the cheapest upgrade in the whole house.
And once I stopped over-buying for the table, I stopped over-buying for everything. So this post is the full picture of how I do Christmas now. Part one is my candlelight-first formula for an easy Christmas tablescape, step by step, with five real tables to copy at any budget. Part two is how I keep the rest of the house cozy instead of cluttered, in five rules and five zones. Part three is my tree, which has never matched a showroom photo and never will. Dim the overheads. Let’s start with the glow.
Why Candlelight Is the Secret to an Easy Christmas Tablescape
Before the how-to, the why. Because once you understand what candlelight actually does, you’ll stop over-shopping forever.
Light Flatters What Stuff Can’t Fix
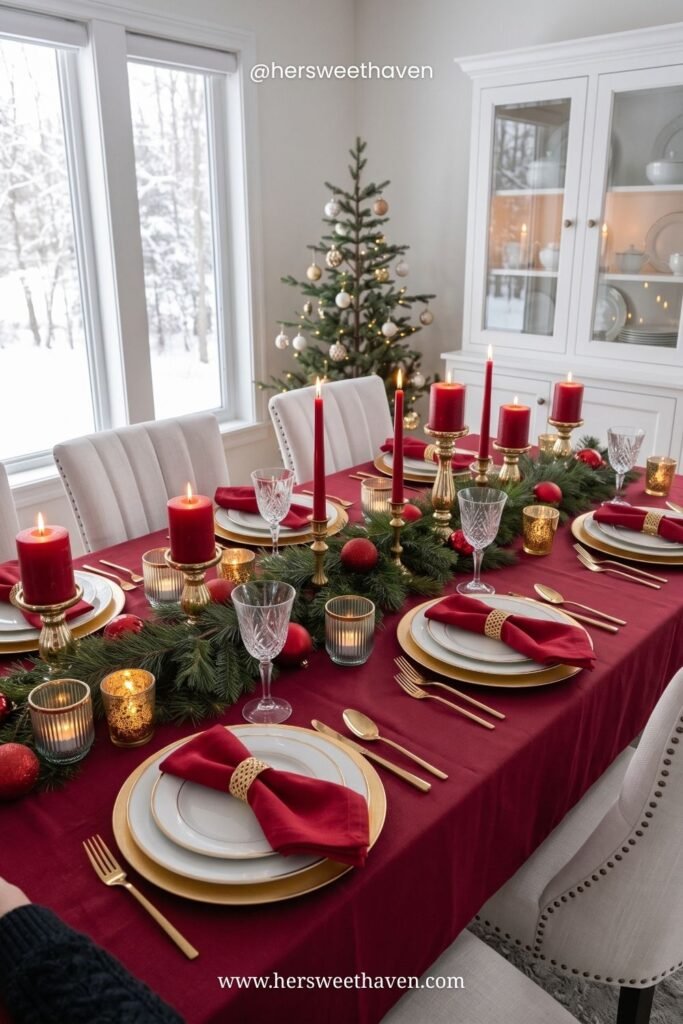
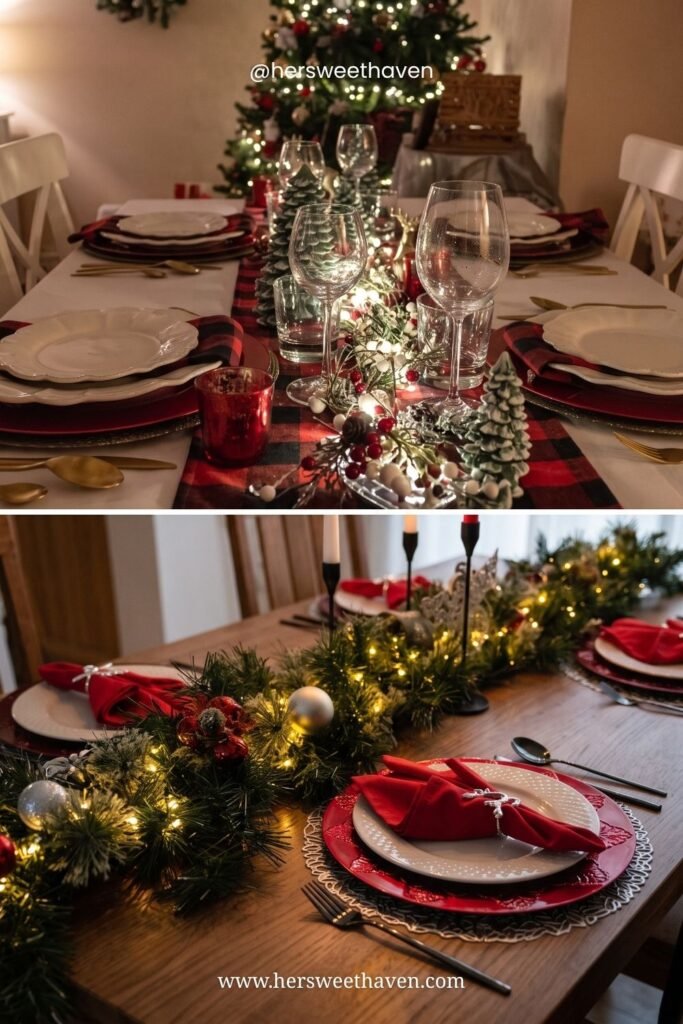
Look at this red-and-gold table: crimson candles down the center, gold chargers, a pine garland, and mismatched glasses catching the flames. It looks rich and finished, but strip out the candles and it’s just.. a table. The glow is what makes it feel special.
Warm light softens everything. Fingerprints on the glasses, a chip on a plate, the fact that your napkins don’t perfectly match: candlelight erases all of it. It’s the great equalizer of holiday hosting.
Cozy Beats Cluttered Every Time
The other thing candlelight does is let you use less. A few candles create more atmosphere than a table crammed with tchotchkes ever could. It’s the same restraint principle I use for my whole home, which is exactly what part two of this post gets into.
Fewer objects, more glow. That’s the entire philosophy, and your wallet loves it.
Step 1: Build Your Layer of Light First
Most people decorate the table and add candles last. Flip it. Place your light first, then build everything else around it, because the glow is the point, not the garnish.
Mix Three Candle Heights
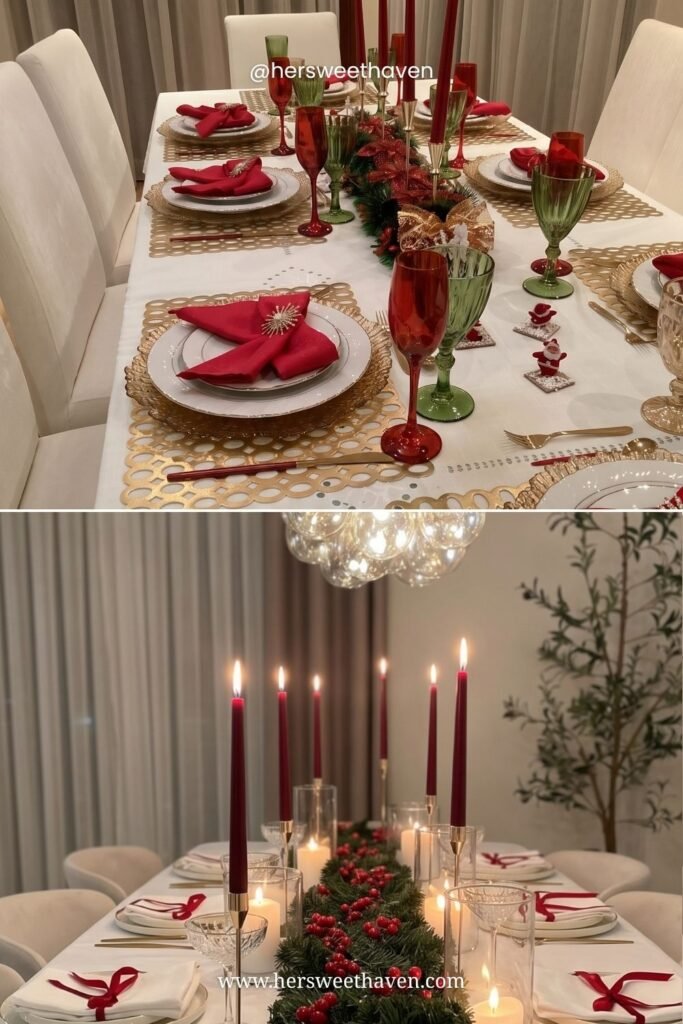
The trick to a professional glow is varying heights: tall tapers, medium pillars, and low votives all together. This red-taper-and-votive setup shows why it works, the different levels catch light at different eye lines and make the whole table shimmer. One height alone looks flat. Three looks intentional.
Cluster them down the center in odd-numbered groupings. Scatter a few votives out toward the place settings too, so the glow reaches every seat.
Color matters here as much as height. Red tapers read festive and traditional, cream ones feel soft and elegant, and gold or amber holders warm the whole thing up. Pick candle colors that match your palette before you buy, since they end up being one of the biggest color moments on the whole table.
Use Flameless Where You Need To
Real talk: real flames near greenery, kids, and flowing sleeves make some hosts nervous, and that’s fair. Good flameless candles flicker convincingly now, so mix them in wherever an open flame feels risky. Nobody can tell from across the table.
This DIY Christmas centerpiece tutorial shows how to nestle candles (real or flameless) safely into a centerpiece so they anchor the whole look.
The One Safety Rule
Keep at least a couple inches between any live flame and your greenery, and never leave lit candles unattended when you leave the room. Trim taper wicks so they don’t smoke over the food. (Ask me how I know about the smoking part.. one very eventful Christmas Eve.)
Steps 2 and 3: Add Greenery, Then Pick Your Palette
With your light placed, the base comes together fast. Greenery gives the table its spine, and your palette gives it personality.
Lay a Greenery Runner
A simple garland of pine, eucalyptus, or cedar down the center is the single best base for any Christmas tablescape. It hides the table, softens the candles, and smells incredible. This easy Christmas greenery centerpiece tutorial shows how to build one from grocery-store or backyard clippings for almost nothing.
Tuck your candles right into the greenery so they look nestled, not plonked. That layering is what separates “styled” from “set down in a hurry.”
Scatter a few extras through the garland to add depth: gold ornaments, red berries, pinecones, or a handful of loose cranberries. Just a few, though. The greenery and candles are the stars, and the accents are there to catch the light, not steal it.
The Classic: Red and Green
Then choose your color story. The timeless one is red and green with gold accents, the palette from that first photo. It’s foolproof, festive, and works with dishes almost everyone already owns.
The Soft One: Pink and Rose Gold
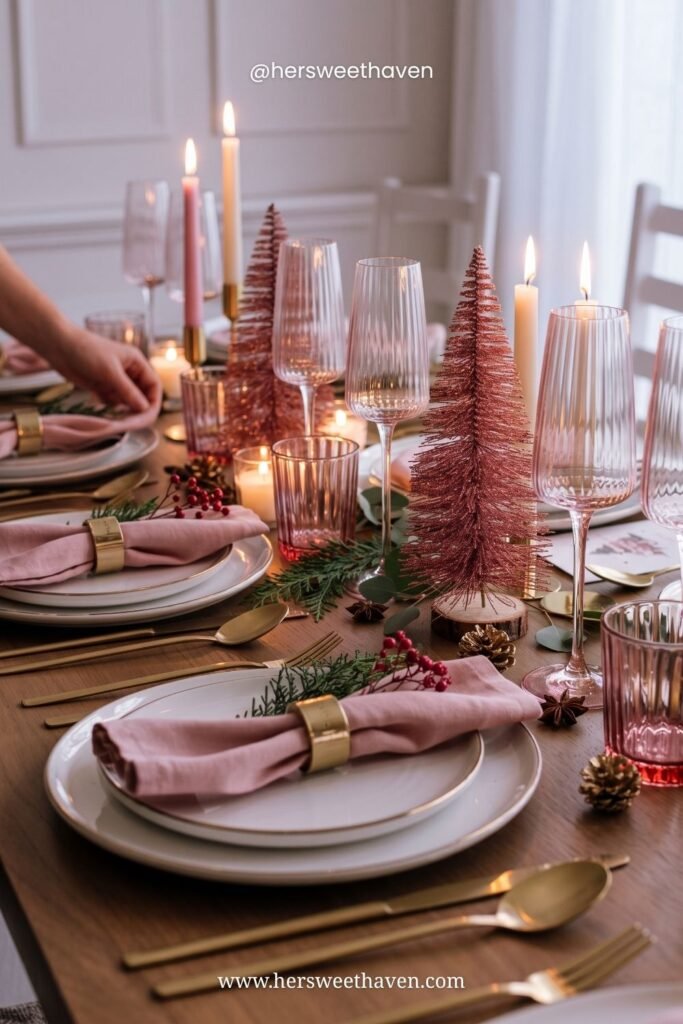
Want something less expected? Go soft: blush napkins, pink glassware, rose-gold bottlebrush trees, and cream candles. It’s romantic and modern, and it photographs like a dream in low light. This is my pick for a girls’ holiday dinner or a prettier, quieter Christmas. If you’re coordinating your outfit to the table (I do, no shame), my Christmas outfits post leans into these exact tones.
The Refined Ones: Green-Gold and Navy
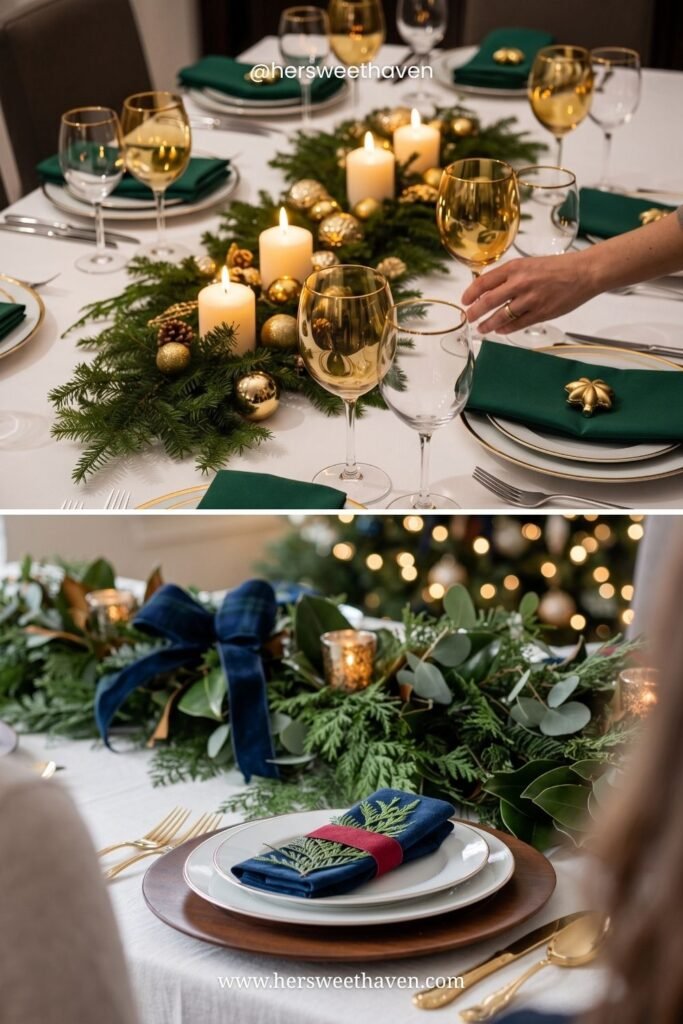
For a grown-up table, two palettes are having a moment: emerald napkins with gold-rimmed glasses and pillar candles, or deep navy with plaid ribbon and magnolia greenery. Both feel elegant without trying hard, and this easy Christmas tablescape guide has more palette combinations if none of these are quite you. Pick one and repeat it everywhere: napkins, candles, glasses, ribbon.
Step 4: The Place Settings (Where It Gets Cozy)
Your center is glowing and green. Now the individual seats, which is where guests actually sit and where the cozy details live.
The Napkin Formula
Keep it simple: a charger, your plates, then a folded or ring-wrapped napkin on top. A red napkin with a sparkly ring, a velvet ribbon tie, a tucked sprig of greenery. That one finishing touch per seat makes the whole place setting look considered.
The Runner-of-Lights Trick
See the buffalo-check and lit-garland tables above? The magic there is a battery fairy-light garland woven into the greenery runner. Those tiny lights read as extra candlelight and double your glow for about ten dollars. It’s my favorite cheat for a big, warm table.
Don’t Forget Your Hands
Here’s a detail nobody mentions: your hands are in every single table photo, pouring wine, passing dishes, lighting candles. A simple seasonal manicure quietly finishes the frame, which is exactly why I love the picks in my roundup of Christmas manicures worth booking. Small thing, big difference in the pictures.
Your Christmas Tablescape Questions, Answered
Two questions I get every December once people see my table.
Are Real Candles Safe Around Greenery and Guests?
Yes, with common sense. Keep flames a couple inches from anything flammable, use sturdy holders that won’t tip, and go flameless for the candles sitting deepest in the garland. Fresh greenery is slow to catch, but dried-out garland is not, so keep it hydrated or use faux near open flames. When in doubt, flameless in the risky spots and real ones on the ends.
How Do You Set a Holiday Table on a Budget?
Shop your own cabinets first, then add only the glow. White plates you own plus red napkins plus a pile of candles beats a whole new dish set every time. A grocery-store garland, a bag of votives, and a fairy-light strand cost under $30 combined and carry the entire look. Spend on candles, not china. (Your future self, and your bank account, will thank you.)
The Real Cost of a Magazine-Worthy Table
Let me put actual numbers on it, because I always want them too. A dozen candles in mixed heights: about $20. A fresh or faux greenery garland: $15. A fairy-light strand: $10. Everything else, the plates, the glasses, the napkins, you almost certainly already own. Total new spend: around $45, most of it reusable next year.
Time-wise, one relaxed evening with a glass of wine gets the whole table set, and you can totally do it the night before. That’s the honest math: under fifty dollars and one cozy evening buys you a table that makes guests stop in the doorway.
So that’s the table sorted. Now the harder part: the other twelve surfaces in your house.
Part Two: I Keep My Christmas Decor Cozy, Not Cluttered, and Here’s How
You don’t have to decorate every room to have a Christmas house. You just need five rules and a little self-control.
I say that as someone who used to have zero self-control about this. My first year in my own place, I bought Christmas decor the way you buy groceries when you shop hungry. Every aisle. Every snow globe. By December 5th my living room looked like a gift shop had thrown up in it, and I couldn’t figure out why it felt stressful instead of cozy.
Here’s what was really going on: my brain was reading all that stuff as visual noise, not holiday spirit.
Why More Decorations Make a Room Feel Less Festive
A room feels cozy when your eye has somewhere to land and somewhere to rest. Cram twelve decorations onto one shelf and your eye never lands anywhere, so the whole thing just reads busy.
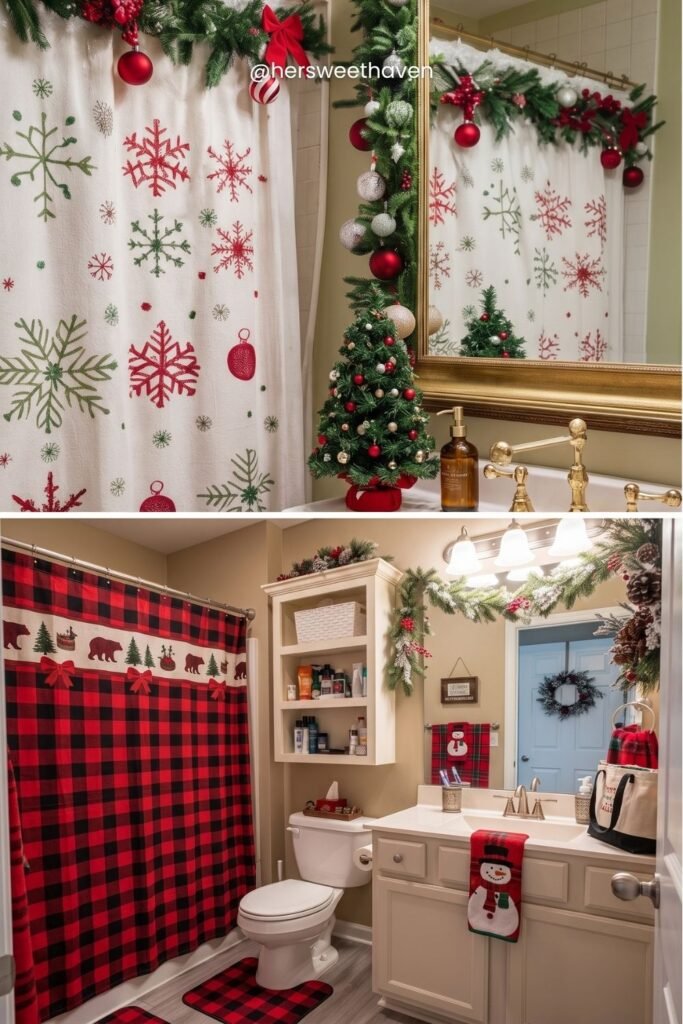
Look at that snowflake-and-plaid bathroom above. One curtain, one garland over the mirror, a couple of towels. Three moves, done, and it feels more Christmassy than a countertop covered in tiny Santas ever would.
Professional organizers say the same thing, honestly. The Homes & Gardens roundup on cutting Christmas clutter makes the point that holiday decor accumulates for decades, so most of us are decorating with fifteen years of impulse buys rather than the things we actually love. Editing beats adding, every single time.
Rule 1: Pick Two Colors and Repeat Them Everywhere
Two colors plus one neutral. That’s the whole palette rule, and it’s the fastest way to make a pile of mismatched decorations look like it belongs together.
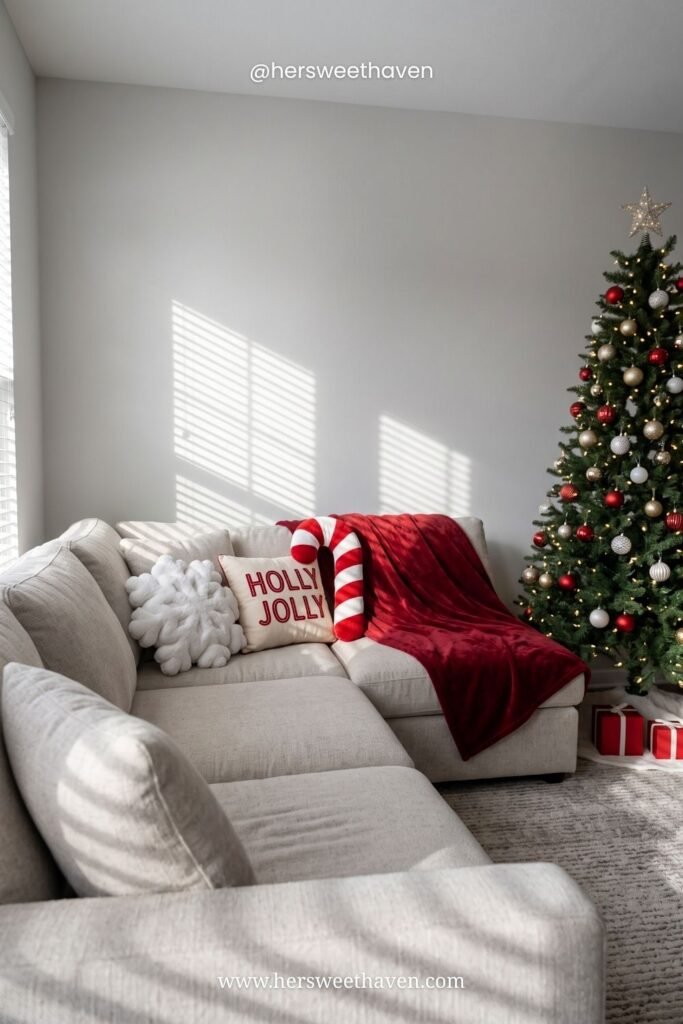
This living room is doing red and white against warm neutrals, and that’s it. Red throw, red pillow, candy cane pillow, red and gold on the tree. Nothing in the room costs much, but because everything speaks the same two-color language, it reads as one deliberate look instead of a collection.
Here’s why that matters: repetition is what your brain reads as “on purpose.” Scatter five different color stories through one room and it reads as “whatever was on sale.”
Pick your two before you unpack a single box. Then anything that doesn’t fit goes back in the bin, no negotiating. (I keep a “maybe” box. The maybe box never gets opened. Says a lot, honestly.)
Rule 2: One Christmas Moment Per Surface
This is the rule that cleared my counters, and I’m slightly embarrassed it took me this long to figure out.
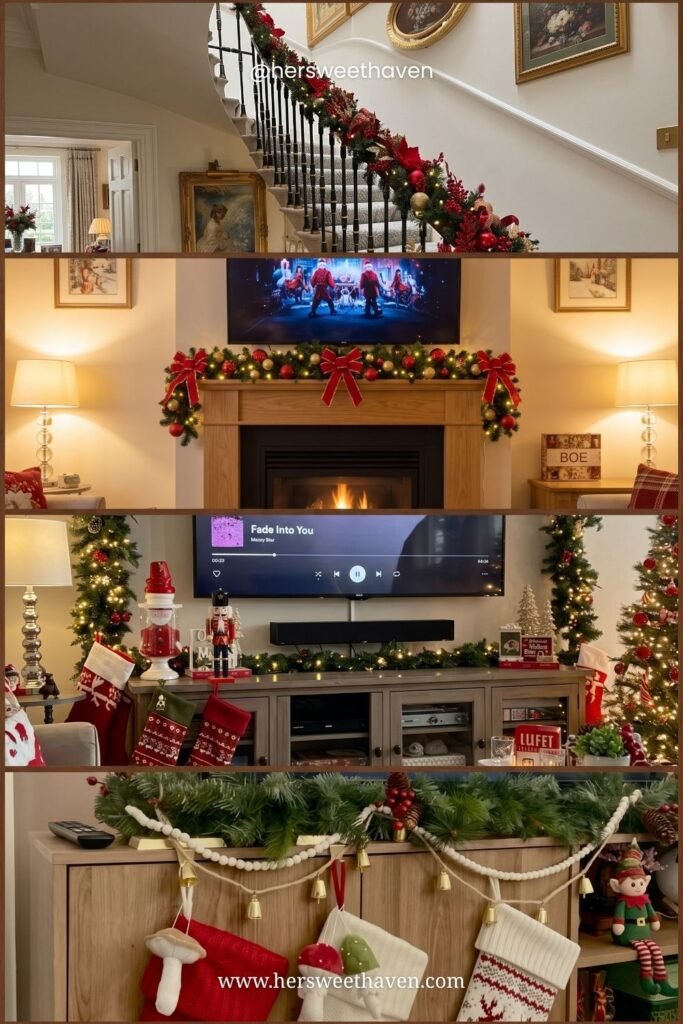
One surface, one moment. The staircase gets the garland. The mantel gets the stockings. The sideboard gets the greenery and the bells. Nobody gets two.
Look at how much breathing room that banister has. The garland is genuinely full, red and gold and dense, but because it’s the only thing happening on that staircase, it reads as generous instead of chaotic. Same with the console below it: greenery, beads, stockings, done.
The kitchen counter is where this rule saves you the most. Kitchens are working surfaces, and every decoration you put down there becomes something you have to move to chop an onion. One small thing near the coffee maker, and that’s your kitchen decorated. Especially if you’re baking your way through the Christmas cookies everyone asks me to bring, you’ll want that counter space back.
Rule 3: Decorate Five Zones, Not the Whole House
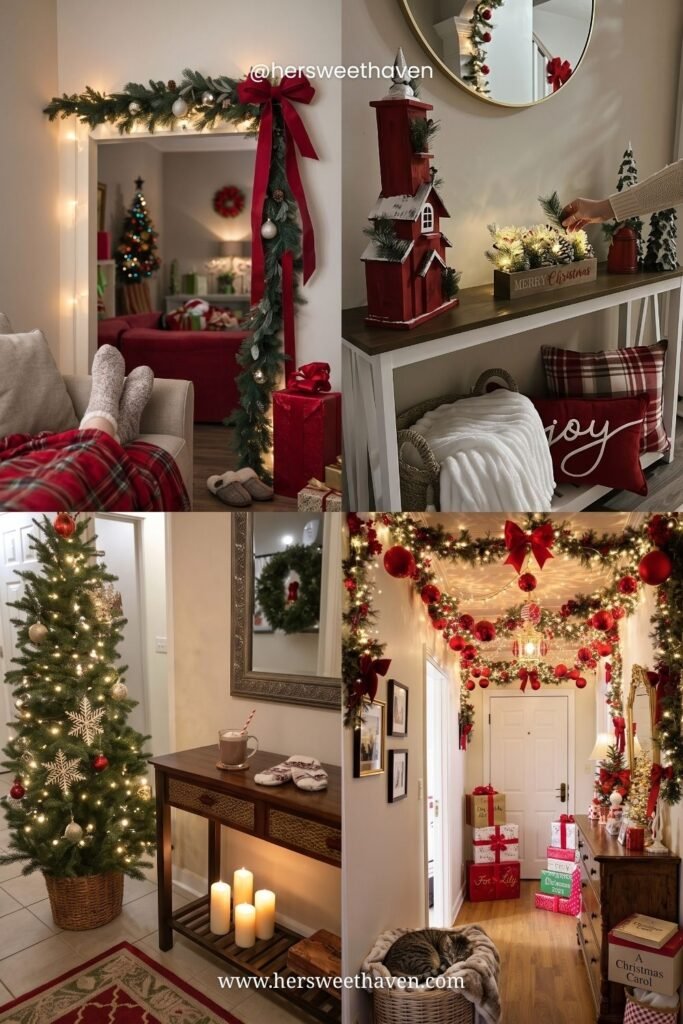
Nobody experiences your house as a whole. They experience it as a series of moments: walking in the door, sitting on the couch, standing in the kitchen doorway.
So decorate the moments. Five zones, one afternoon:
- The entryway (first impression, highest return)
- The living room, tree and one soft layer
- The mantel or the main shelf
- One kitchen or dining surface
- Your bedroom, just for you
That collage above is exactly that plan in action. A garland framing the doorway, a console table with a little village, a slim tree in the corner, an entry dresser with gifts stacked beside it. Nothing in the hallways. Nothing in the guest room nobody’s using.
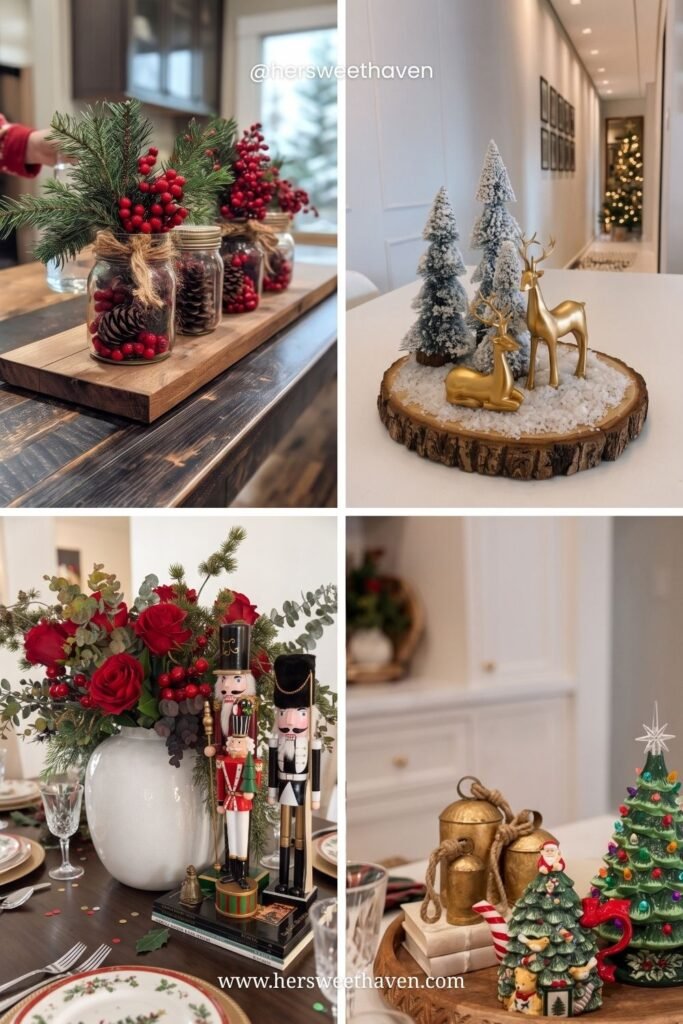
Within each zone, one grouping does the job. Mason jars with berries and pinecones on a wood board. A wood slice with two brass deer and three bottlebrush trees. A vase of red roses and eucalyptus with two nutcrackers standing guard. Every one of those is five objects or fewer, and every one of them looks finished.
Odd numbers, varied heights, one tray or board to hold it all together. That’s the formula, and it works on any surface in the house.
Rule 4: Add Warm Light Before You Add Objects
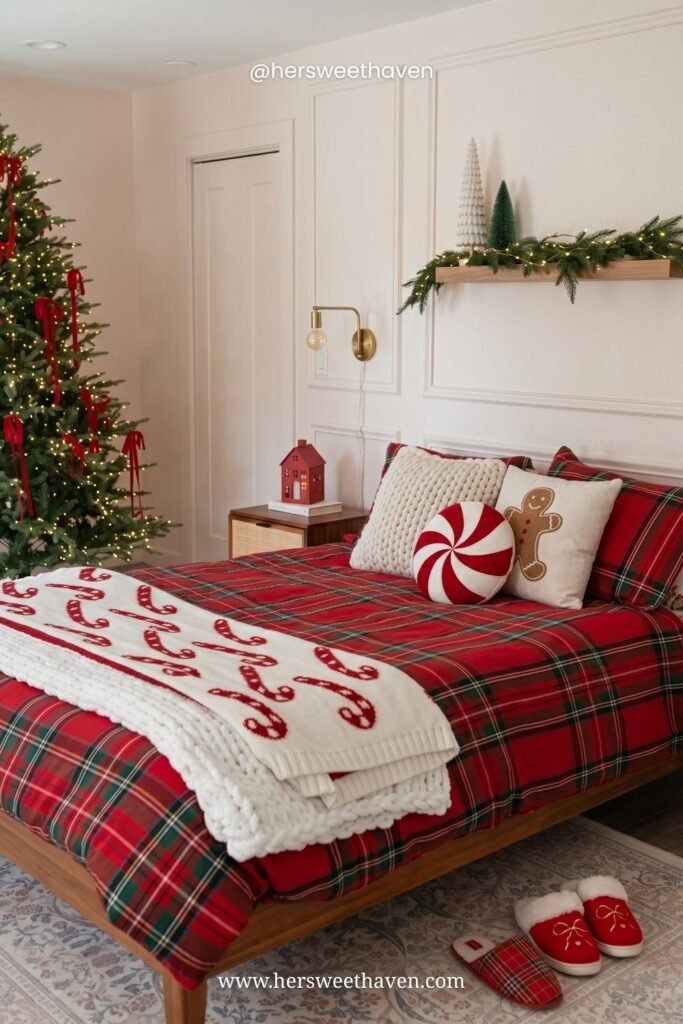
Same principle as the table. Light does more for cozy than objects do, and it takes up zero physical space.
This bedroom is a shelf of greenery with fairy lights, two little trees, and plaid bedding. That’s genuinely all of it. The room feels like Christmas because of the glow and the texture, not because of quantity.
Warm white, always. Cool white lights make a room feel like a parking garage, and no amount of plaid will save it. Swap your bulbs to the warmest ones you can find, add a lamp in a dark corner, and put anything you can on a timer so it’s already glowing when you walk in.
My whole house runs on this rule from about September onward, which I get into in my full cozy-mode home reset. Christmas is just the same idea with more red in it.
Rule 5: Swap, Don’t Stack
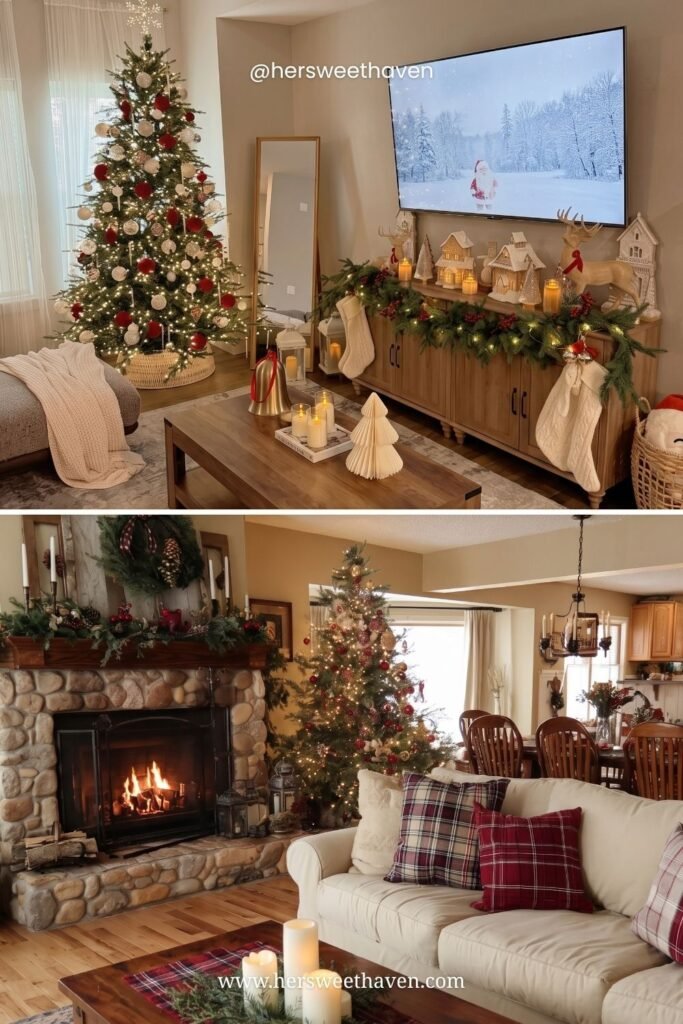
The mistake almost everyone makes: putting Christmas decor on top of everything that’s already out.
Don’t stack. Swap. Every Christmas item that comes out of the bin means one everyday item goes into it. The candlesticks stay, the summer vase goes away. The bowl of ornaments replaces the bowl of shells.
Your house has a fixed amount of surface. Treat it that way and you get a home that looks decorated rather than a home that looks buried.
And here’s the money part: when you swap instead of stack, you need way less. That whole-house look in the photo above, tree, mantel village, garland, plaid pillows, candles, comes together for under $50 in new pieces if you already own the basics. Grace In My Space has a whole cozy Christmas list built entirely from things you already have, and it’s worth a read before you order anything.
What If Your Living Room Is Really Small?
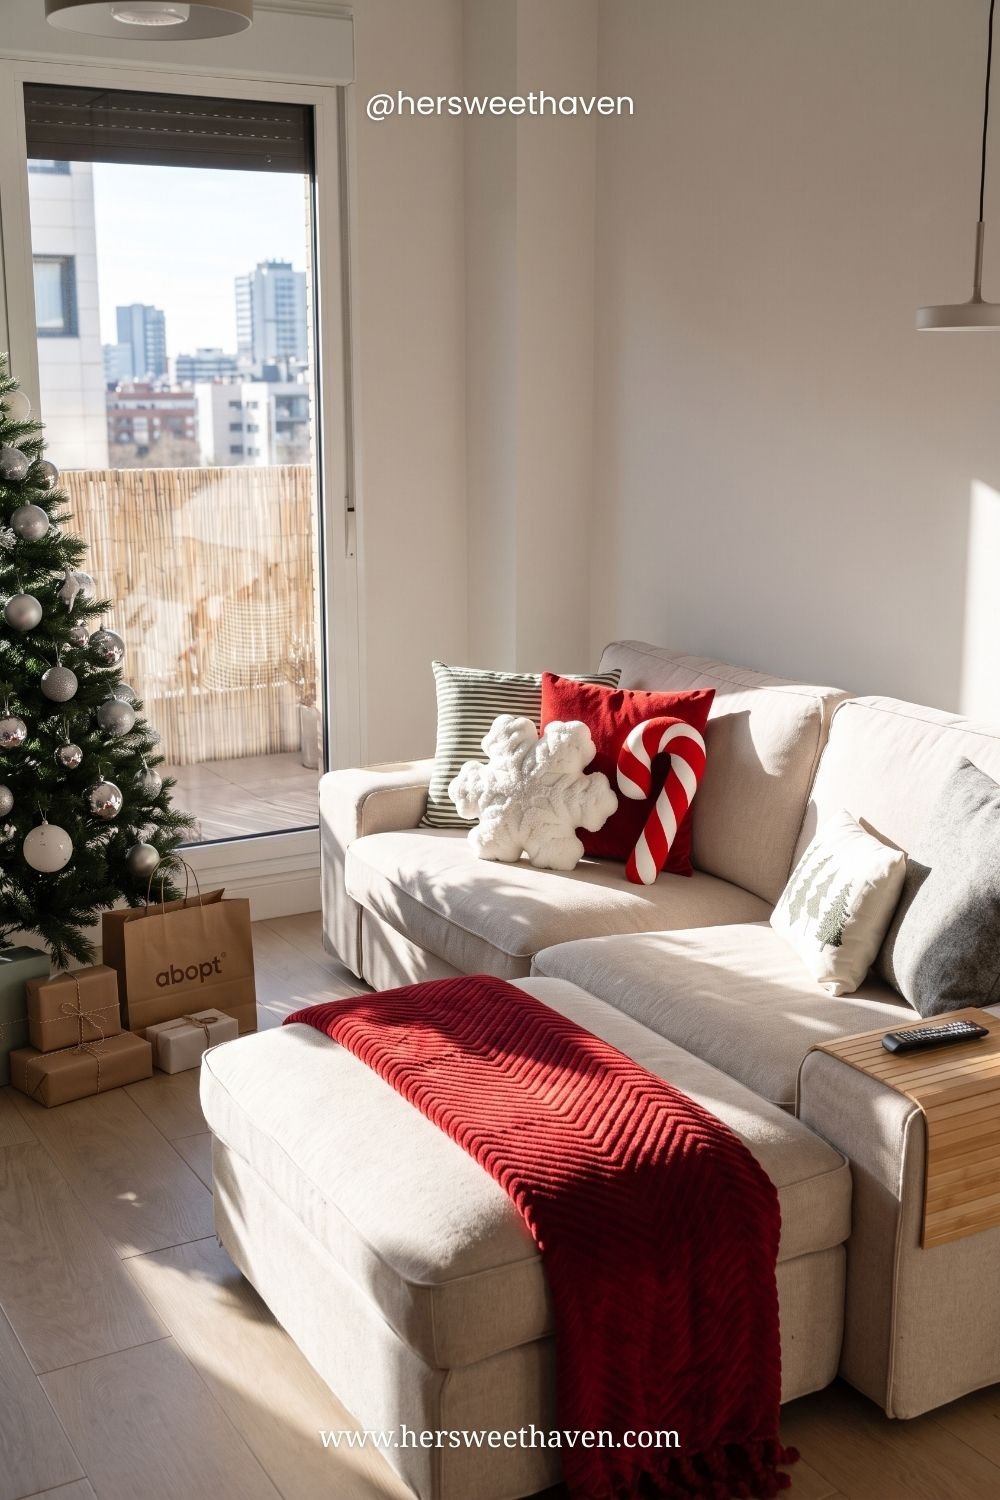
Then you go up, and you go soft.
Small rooms can’t afford floor-hogging decor, so put Christmas into the things already taking up space: pillows, throws, the corner the tree lives in. This apartment is doing exactly that. A red throw over the ottoman, a candy cane pillow, a snowflake pillow, a slim silver-and-white tree tucked against the balcony door. The floor plan didn’t change at all.
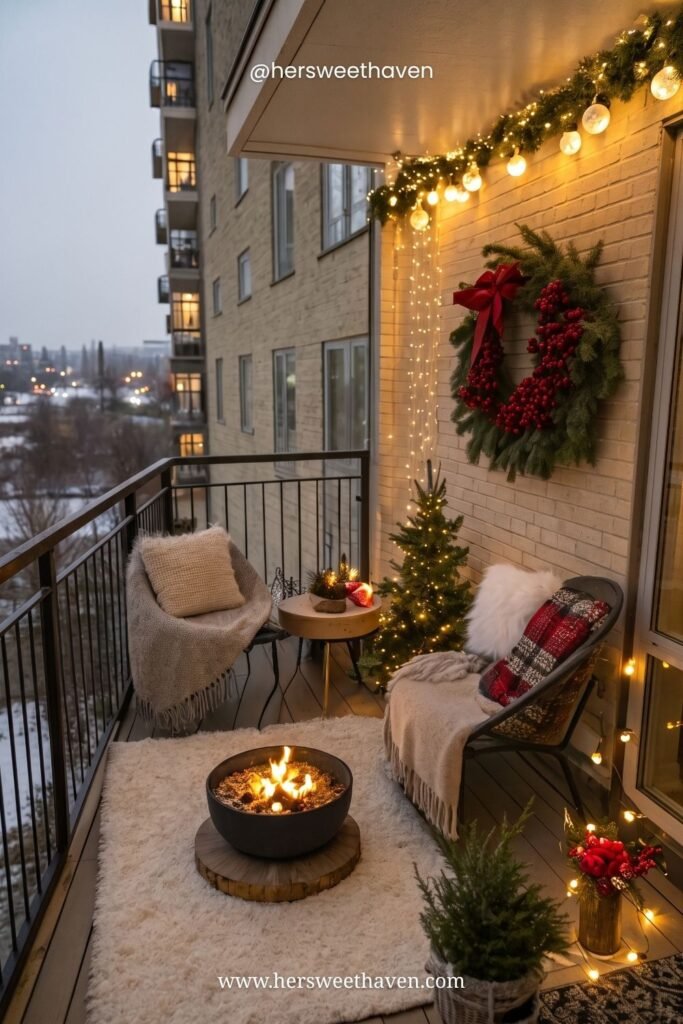
And if your living room genuinely can’t take one more object? Push the holiday outside. A garland along the balcony rail, a wreath on the exterior wall, lights down the side, a sheepskin on the chair. You get all the glow through the glass and you lose zero square footage inside.
Gentle Living Homes makes a good case for the one-corner approach in small apartments: one beautifully styled Christmas corner beats a light sprinkle of decor across every room. Pick your corner and commit to it.
Is It Too Early to Decorate Before December?
Fair question, and my answer is no, and I’ll die on this hill.
Split it up instead. Greenery, wreaths, and warm lights can go up in mid-November because they read as winter, not specifically Christmas. Save the red ornaments, the stockings, and the tree for the first weekend of December.
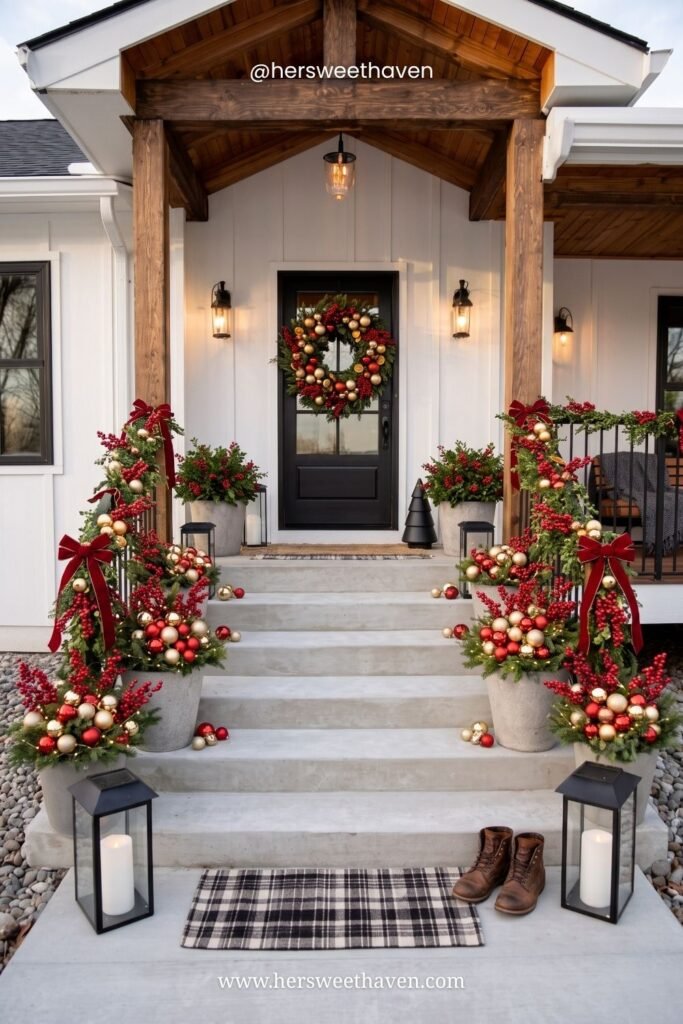
Outside is where the early start really pays off. Porch planters, a big wreath, lanterns on the steps, a plaid mat. Get the exterior done while it’s still 50 degrees out and you’ll never have to hang a garland in the sleet. (I have hung a garland in the sleet. Zero out of ten.)
If you want the full breakdown of how I do the outside, my Christmas front porch post covers the whole thing, planters and all.
Part Three: Proof Your Christmas Tree Doesn’t Need to Match Anyone Else’s
You have permission to have a tree that doesn’t coordinate with anything. Not your living room, not Pinterest, not your mother-in-law’s.
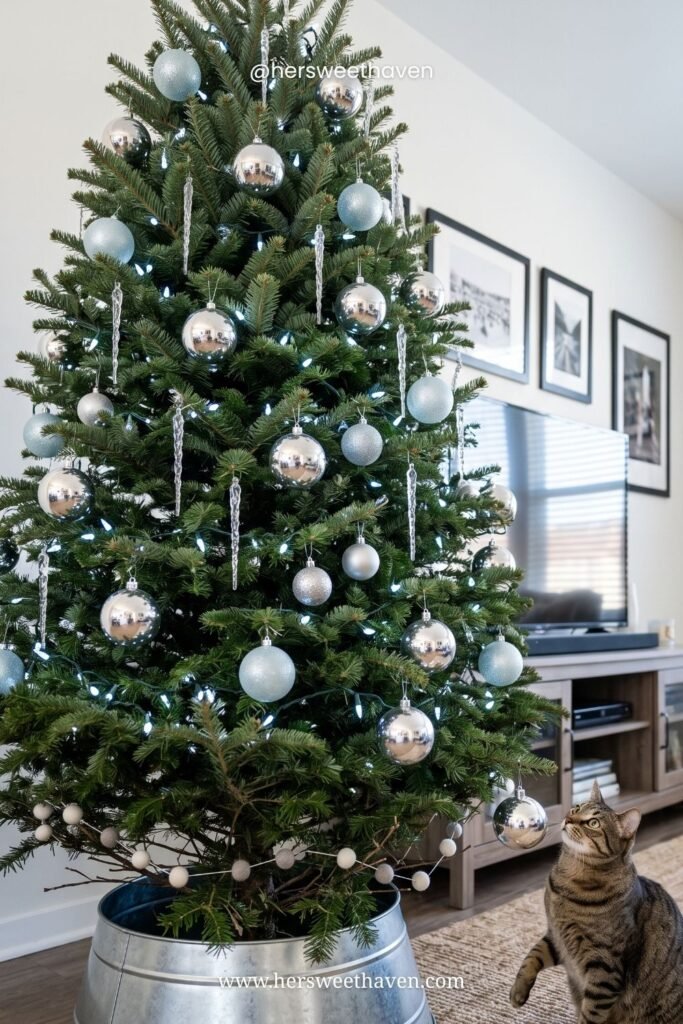
I know that sounds obvious written down. But every December there’s a specific kind of guilt that shows up when you unpack a box of ornaments with a preschool handprint, a novelty flamingo, and three baubles from three different decades, and none of it looks like the trees you’ve been saving.
Here’s the thing: those coordinated trees photograph beautifully and feel like nothing. This pale blue and silver tree has maybe four ornament types on it, cool white lights, a felt garland, and a cat. It works because it’s simple and it’s someone’s actual living room, not because a stylist approved the palette.
The tree that makes you feel something is the one with your history hanging on it. And there’s a real trend backing you up now, too. House of Hipsters covered the return of the nostalgic, deliberately unmatched tree, and vintage baubles and thrifted ornaments are having a proper moment.
The One Trick That Pulls a Mismatched Tree Together

Repeat one element from top to bottom. That’s it. That’s the whole trick.
Ribbon, a bead garland, one repeated shape, or a single consistent light color. Whatever it is, it has to appear all the way around and all the way down, and it will visually stitch everything else together no matter how random your ornaments are.
This farmhouse tree is a perfect demo. Buffalo plaid ribbon, wood bead garland, and laser-cut snowflakes, all repeating. The red balls are just red balls, nothing fancy. But because three elements circle the whole tree, it reads as designed.
Tikkido explains this unifying-element approach really well for trees built from years of collected ornaments. Pick your repeating element first, hang the sentimental chaos second.
The Numbers Worth Knowing
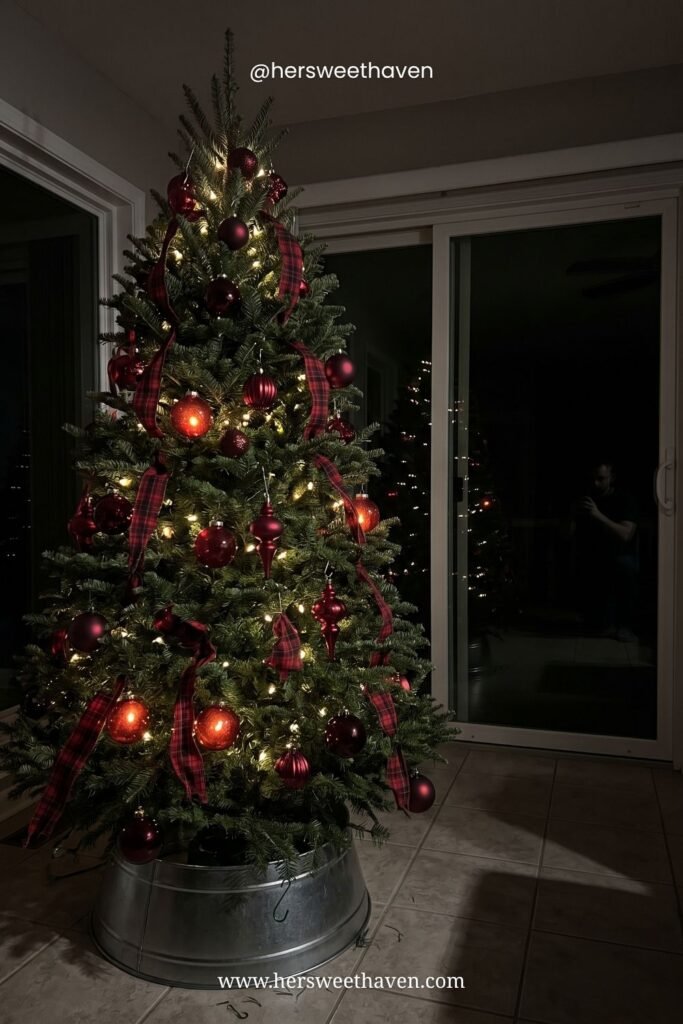
I resisted the numbers for years because they felt fussy. Then I saw my tree in a dark room and understood.
That photo is a real tree at night with not quite enough of everything. Nice ribbon, nice burgundy ornaments, but the eye goes straight to the gaps. It’s not a bad tree. It’s an under-supplied one.
The rough guides worth knowing, per Balsam Hill’s tree decorating guide:
- Lights: around 100 per foot for a normal glow, up to 300 per foot if you want it seriously lit
- Ornaments: 10 to 20 per foot of tree height, more for a full artificial tree
- Ribbon: roughly 10 to 15 yards per foot of tree
So a 7-foot tree wants somewhere around 700 lights and 70 to 100 ornaments. That number shocked me the first time. (It also explained a lot about my sad 2019 tree.)
Layer in This Order
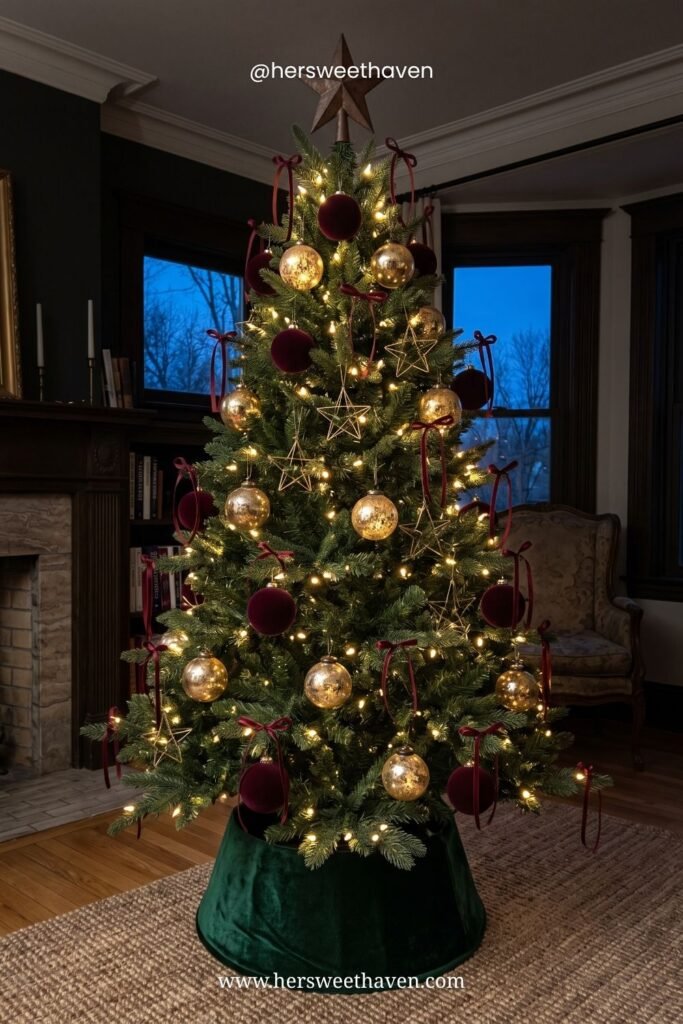
Order matters more than budget here. Five layers, in this sequence:
- Shape the branches first, especially on an artificial tree. Fluff every tip outward and fill the holes.
- Lights, wrapping around each branch from trunk to tip, not just circling the outside.
- Ribbon, after the lights and before the ornaments. This is the step most people get backwards.
- Picks and garland, tucked deep to add texture.
- Ornaments last, largest first.
This moody green room is that sequence done right. Burgundy velvet balls and gold mercury glass, burgundy ribbon streamers hanging vertically instead of swagged, a rustic star on top. Two colors, five layers, and it looks like a magazine tree in a real house.
Mix Three Sizes and Hang Them Deep
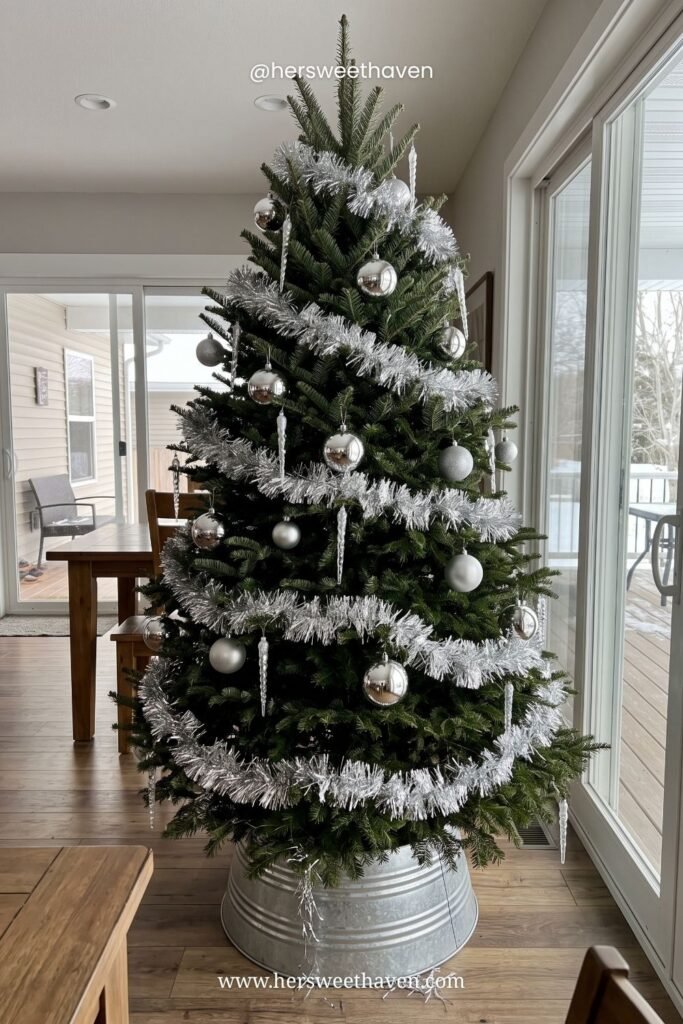
Two moves separate a flat tree from a full one.
First, three ornament sizes: small fillers, medium workhorses, and a few genuinely big ones. Same-size ornaments all over a tree read like polka dots.
Second, hang some ornaments deep, close to the trunk, not just on the outer tips. Interior ornaments catch the light from inside and create shadow and depth, which is what makes a tree look like it has actual volume.
This silver tree is the “sad tree” fix in action. Real tree, fairly open branches, and the tinsel garland plus reflective silver balls and glass icicles do all the heavy lifting. The tinsel bounces light around and visually fills the gaps between branches for about six dollars. (Tinsel is back. I’m as surprised as you are.)
Five Color Stories, Zero Rules
Now the fun part. Here’s what “doesn’t match anyone else’s” actually looks like across five very different homes.
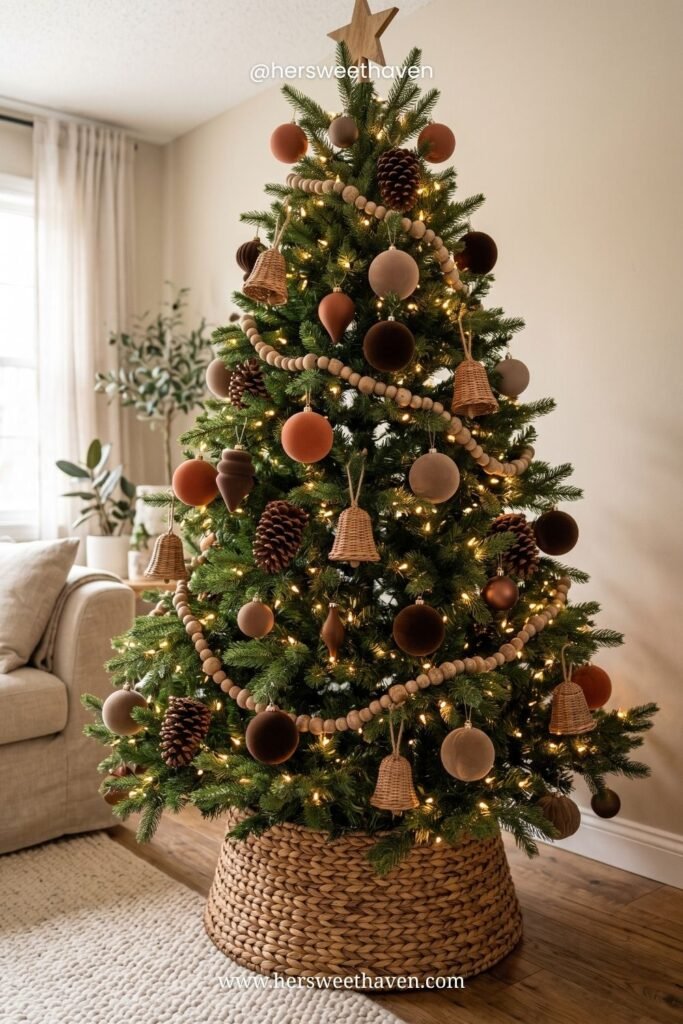
Earthy and warm. Terracotta and chocolate velvet balls, wicker bells, real pinecones, a wood bead garland, and a woven basket collar. This one costs the least of any tree here because half of it is texture rather than ornaments. It suits a neutral room without disappearing into it.
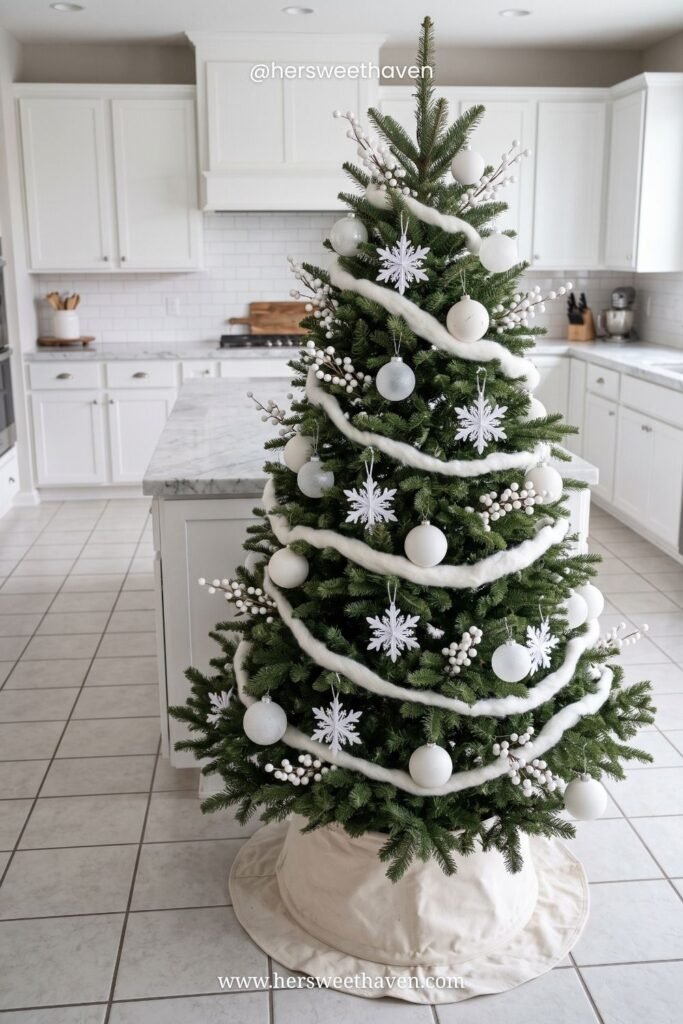
All white, all texture. White balls, paper snowflakes, white berry picks, and a soft wool roving garland instead of tinsel. In a white kitchen this could easily vanish, but the roving gives it enough dimension to hold its own. Very calm, very winter, and it stays up happily through January.
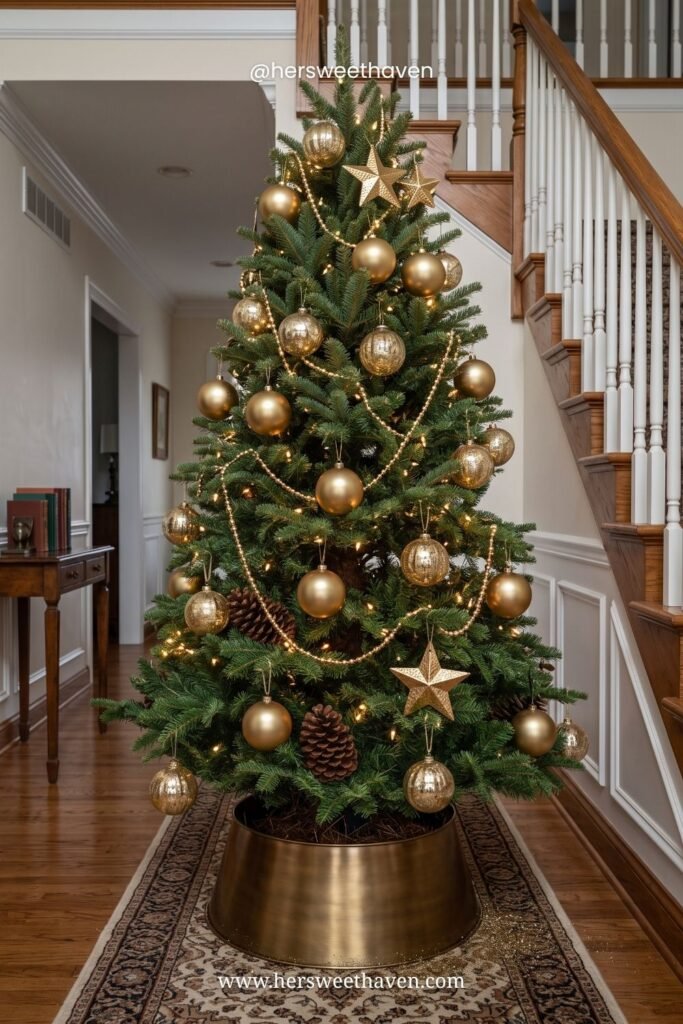
One metal, nothing else. Gold balls in three finishes, gold stars, a gold bead garland, pinecones, and a brass collar. Committing to a single metal is the easiest way to make a slim tree in a hallway look intentional. Warm, glowy, and hard to get wrong.
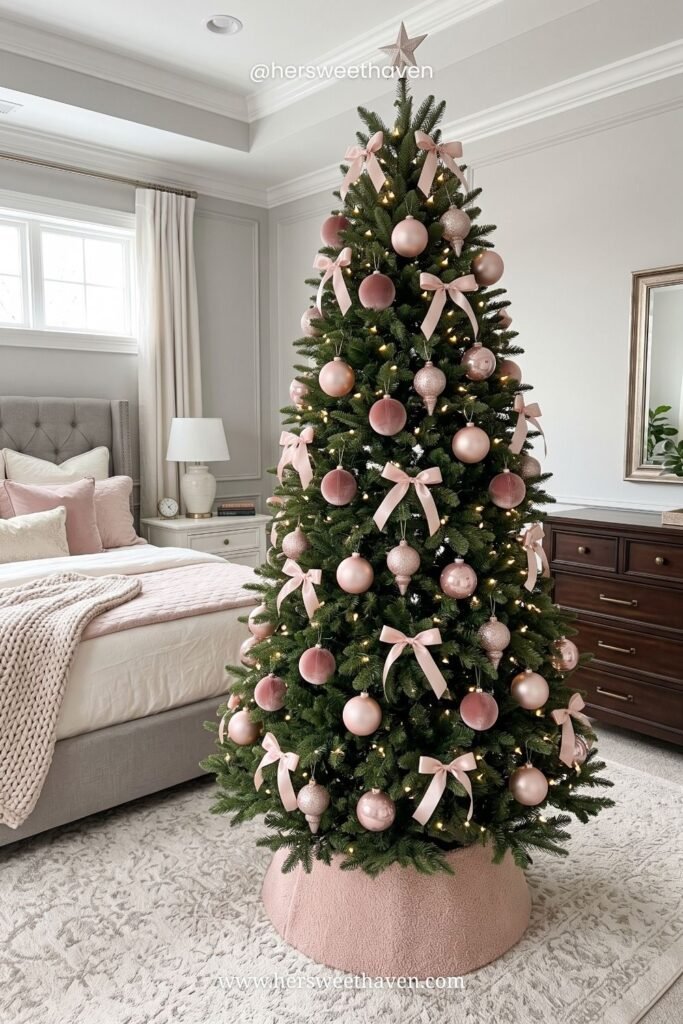
Blush in the bedroom. Dusty pink balls, satin bows, a pink collar, warm white lights. This is the one people are asking about most for 2026, and I get it. A second small tree in the bedroom is a genuinely lovely idea if you have the corner for it, and it pairs perfectly with the matching holiday pajamas I’ve already added to my cart.
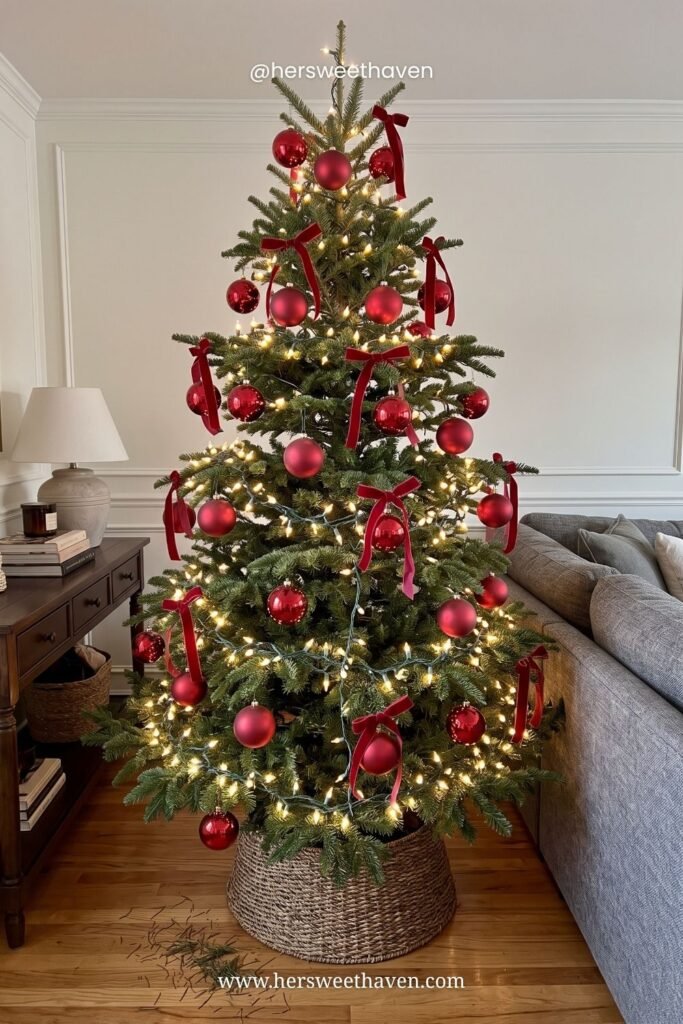
Red balls and velvet bows. The cheapest tree on this list and maybe my favorite. Matte and glossy red balls, a bag of velvet ribbon cut into bows, warm white lights, a basket collar. Under $40 in ornaments for a full-size tree, and the bows are what make it look expensive.
Do Your Ornaments Have to Match Your Room?
Nope. But your lights kind of do.
Ornaments can be any color story you want, because they’re small and scattered and your eye reads them as pattern. Light temperature is different: it washes the entire corner of the room. Warm white next to warm lamps, cool white in a cooler, more modern space, and try not to mix the two on one tree.
If the mismatch bothers you, tie the tree to the room with one repeated color instead of the whole palette. One shade pulled from your sofa or your rug is enough to make the tree feel like it belongs.
How Do You Make a Cheap Tree Look Full?
Four things, in order of impact.
Add more lights than you think you need, and wrap them around the branches instead of draping them across the front. Add a garland with texture, wood beads or tinsel or wool, because it fills horizontal gaps that ornaments can’t. Tuck a few faux picks (berries, pinecones, snowy sprigs) into the sparse spots. Then hang your biggest ornaments low and deep where the branches are thickest.
Skip the tree skirt and use a collar or a basket. It hides the stand properly, it costs about $20, and it makes even a scrappy tree look finished at the bottom. Half the trees in this post are doing it.
Fewer Things, Warmer Light, More of You
Three parts, one idea. The table doesn’t need new china, the house doesn’t need every surface covered, and the tree doesn’t need to match a single thing.
What all of it needs is glow, a little restraint, and the stuff that actually means something to you. The handprint ornament. The candlesticks your grandmother had. The two colors you keep coming back to. That’s what makes a house feel like Christmas, and none of it is available for purchase in a seasonal aisle.
So start with the light. Buy candles instead of dishes, warm bulbs instead of more objects, and let the rest be things you already love. Then sit in the dark with the tree on for a minute before anyone else gets there.
That part’s the whole point, honestly.

Leave a Reply