
DIY cat climbing furniture doesn’t need a workshop. Most of these builds start with things you already have or can pick up in one trip to a dollar store and a hardware store: boxes, a plain shelving unit, a few boards, a roll of sisal rope. They go from a cardboard tower you can put together in an afternoon with no tools at all to a pegboard wall you can rearrange whenever your cat gets bored.
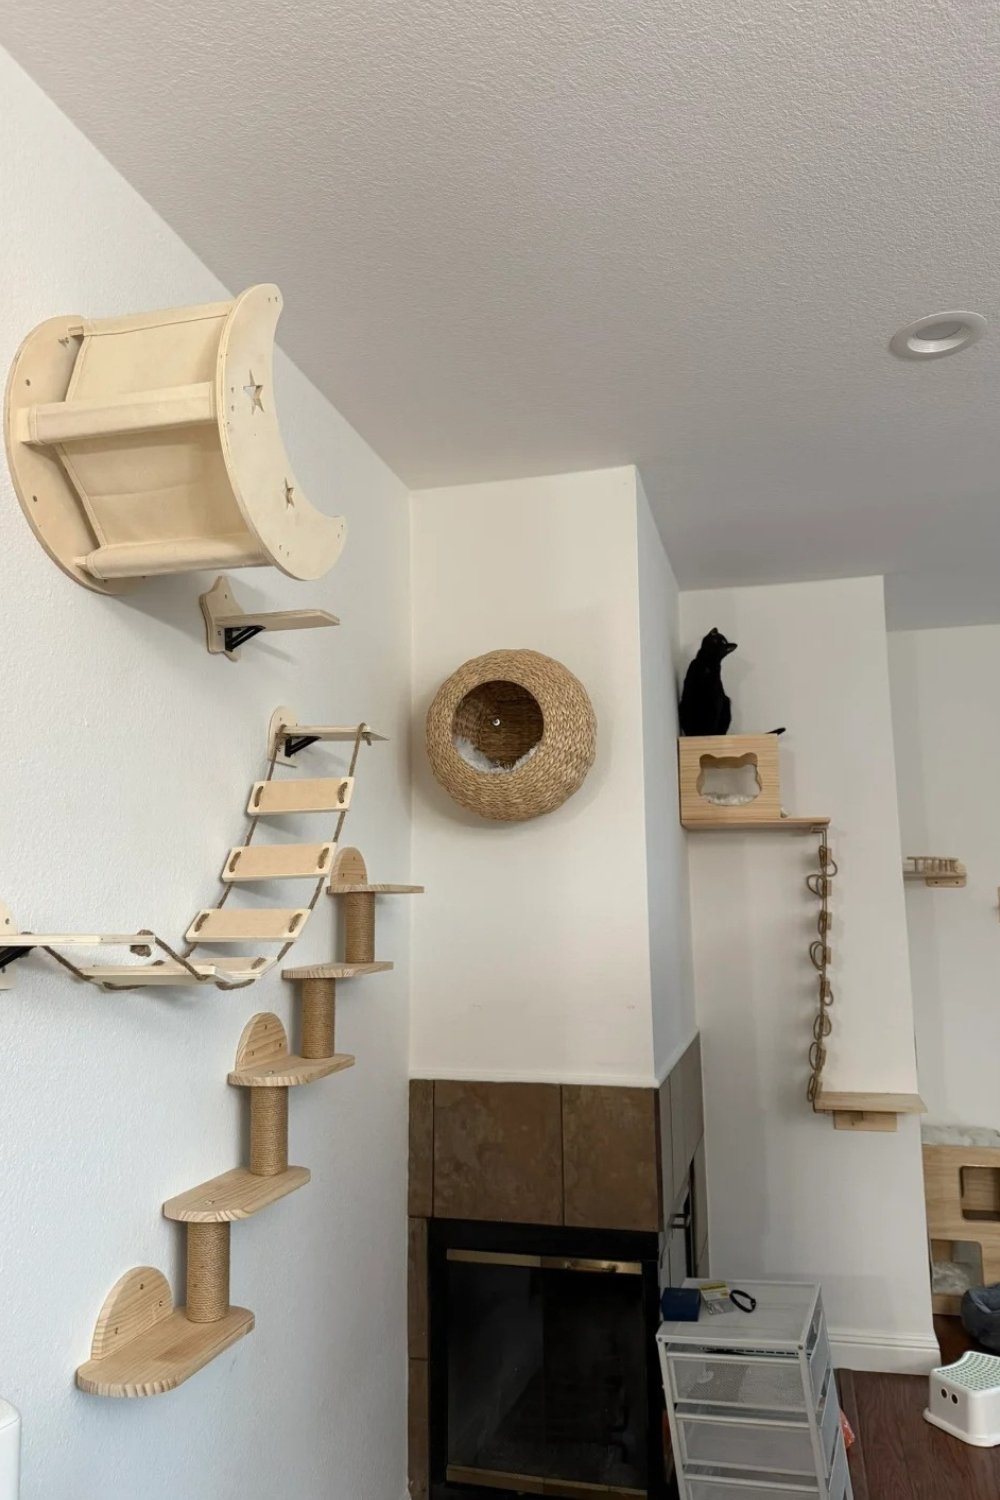
A word before you start: cats care about three things in cat climbing furniture. Height, a spot to hide, and a surface they can grip and scratch. Every project here covers at least two of the three. If your space allows, a mix of a floor tower and a few wall steps gives your cat a route instead of a single perch, and a route is what keeps them using it.
The no-tools starter: a cardboard box cat house
This is the cheapest cat house you’ll ever make, and probably the one your cat will love most.
What you need: four to six sturdy boxes in a few sizes (shipping boxes, produce boxes from the grocery store, or new ones from the dollar store), paper tape or glue, a box cutter, and a small cushion or folded towel.
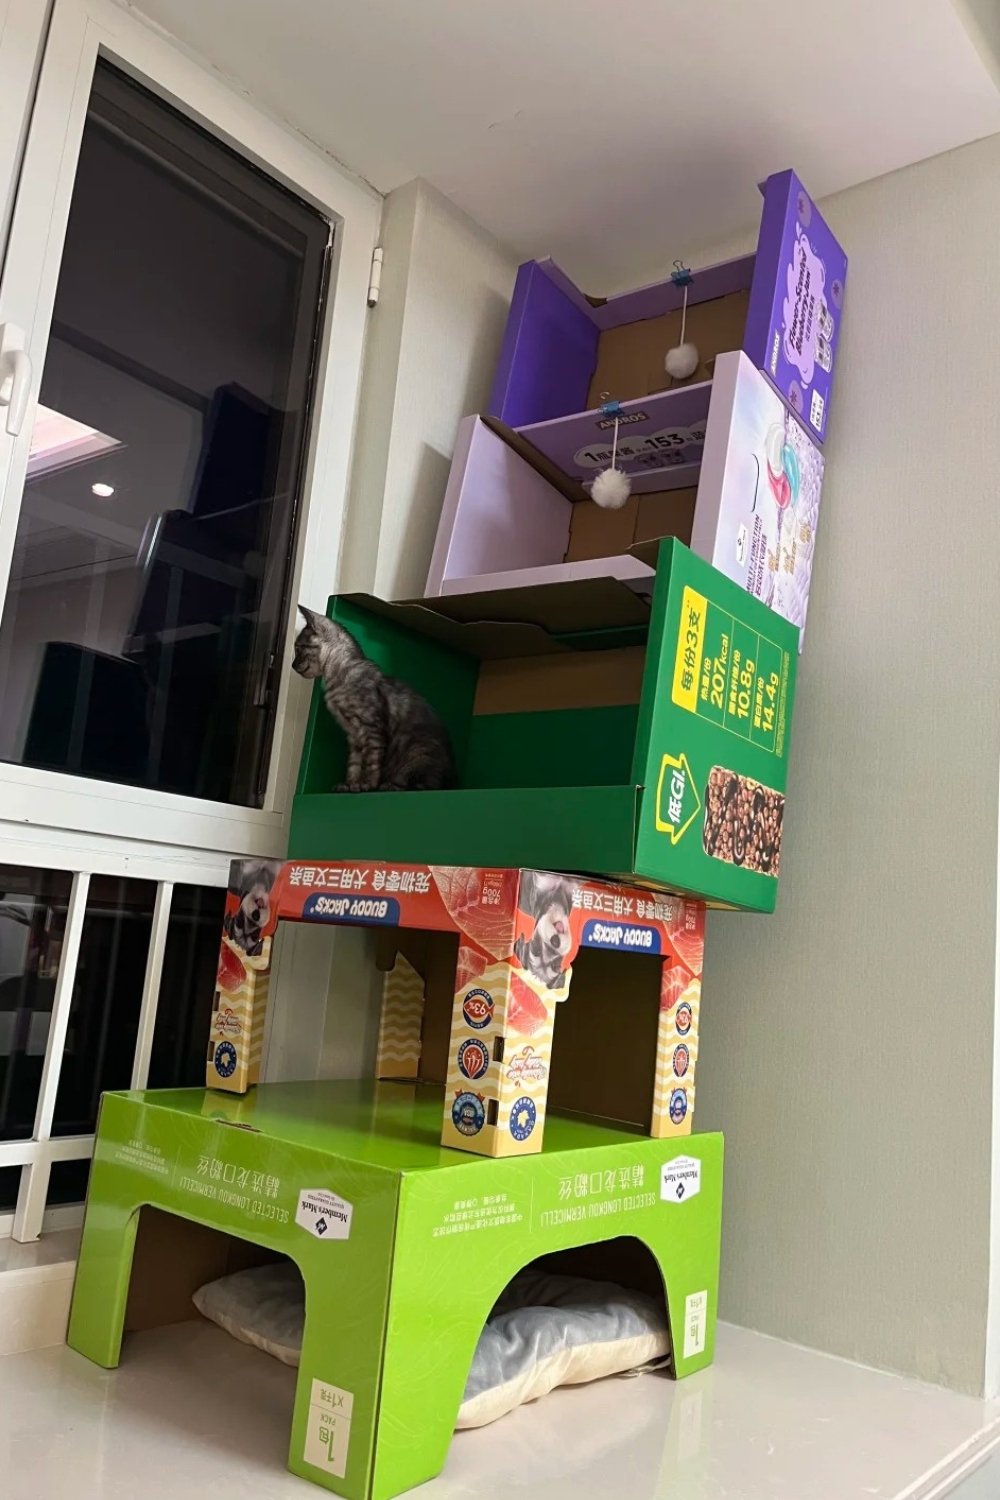
- Pick the base. Put the largest, strongest box on the bottom, open side down. This is the ground floor, so cut a round doorway about 7 to 8 inches across in one side.
- Stack and offset. Place the next box on top, a little off-center, so part of the lower box’s roof becomes a landing. Cut a hole in the top of the lower box and the bottom of the upper one so your cat can climb through inside, or leave the boxes closed and let them jump from ledge to ledge.
- Join the boxes. Glue or tape where the boxes meet. Paper tape or glue is the better choice, because loose plastic tape is the first thing a curious cat starts chewing.
- Add the extras. A cushion on the ground floor, a peephole or two, a toy on a short string tied inside a doorway.
- Test it. Press down firmly on each level with your hand. If a box bends, add a second box inside it or swap it for a stronger one.
The downside is obvious: cardboard wears out. Expect to replace a box or two every few months. That’s also part of the charm, since you can change the layout every time.
Turn a basic shelving unit into a cat climbing tower
A plain metal or wood shelving unit is basically cat furniture waiting to happen. It already has levels, uprights and a solid frame. All you add is grip, comfort and a bit of personality. This is the DIY cat climbing furniture project that gives the most for the money.
What you need: an open shelving unit with four or five shelves, natural sisal rope (¼ to 3/8 inch thick), a hot glue gun, washable cushion pads or bath mats cut to size, a woven basket or a small hammock, zip ties or S-hooks, and anything you want to decorate with: wooden trim, felt shapes, fabric.
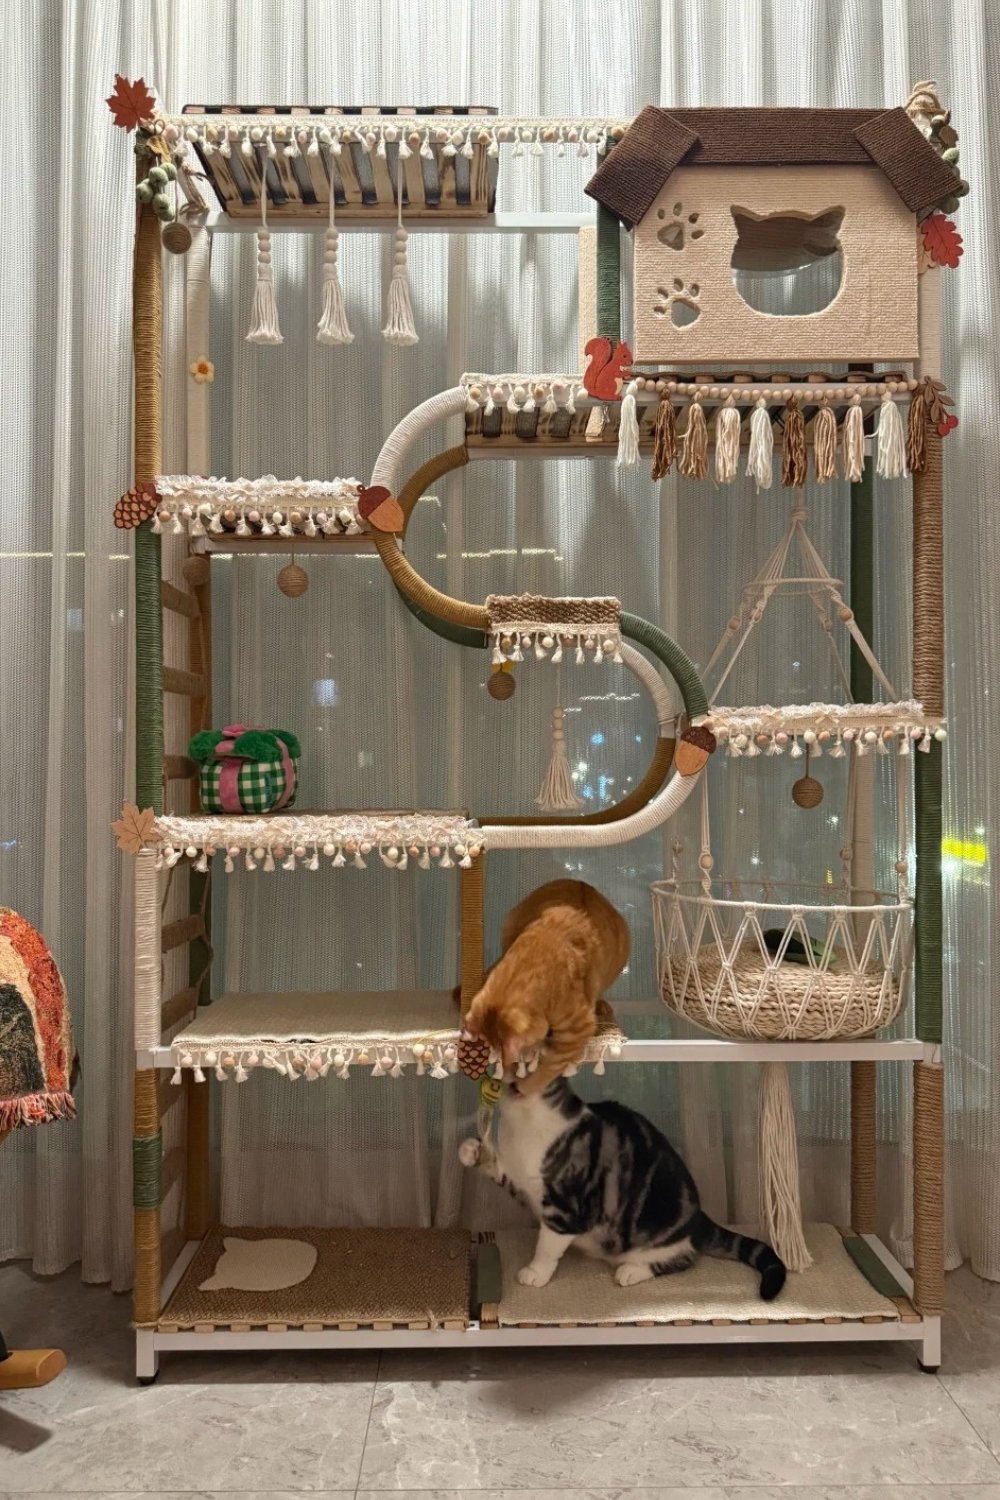
- Wrap the uprights. Start at the bottom of one upright, glue the end of the sisal rope, and wrap tightly upward, gluing every few inches. No gaps and no overlaps: overlaps snag claws, and gaps leave the rope loose. Untreated, oil-free sisal is the one to buy.
- Pad the shelves. Cut cushion pads or rubber-backed bath mats to the size of each shelf, so paws don’t slip on metal or smooth wood. Zip-tie them through the shelf if it’s wire, or use strong double-sided tape on wood.
- Hang a bed. Hook a woven basket or a fabric hammock under one of the middle shelves with S-hooks or zip ties at each corner. Put a cushion inside.
- Add a hideout. A small wooden or cardboard house on the top shelf gives your cat a lookout and a hiding spot in one.
- Decorate. Wooden trim, felt leaves, painted details.
- Anchor it. Screw the top of the unit to the wall with an anti-tip strap or an L-bracket. A tall shelf with a cat jumping onto the top level can tip over, even if it feels steady when you shake it.
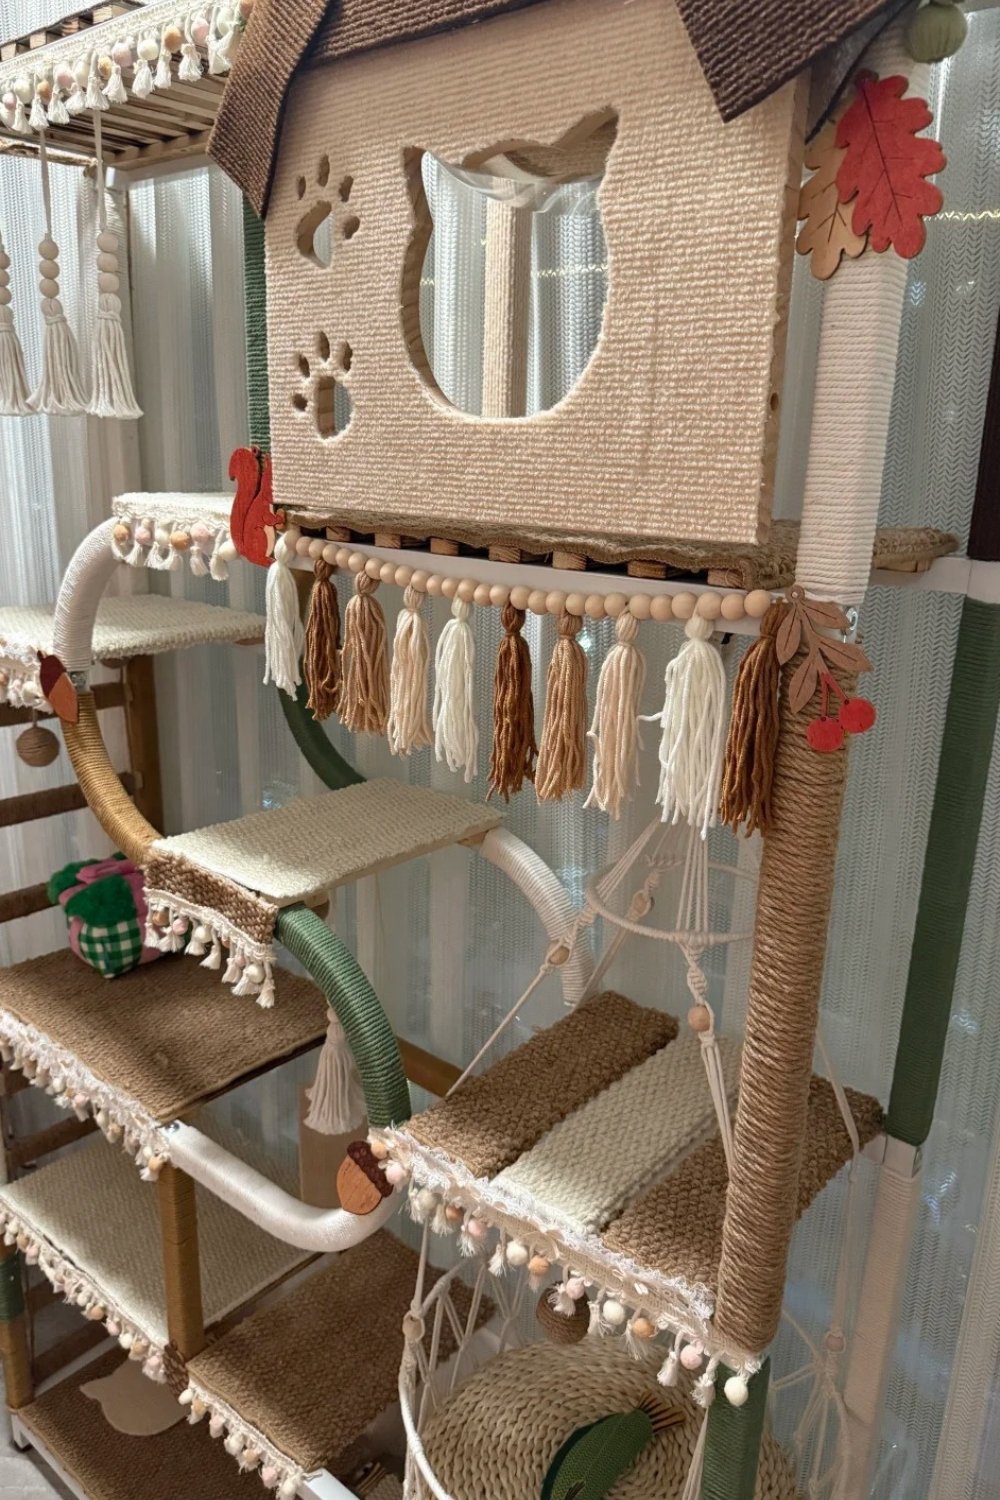
Tassels and fringe look sweet in photos, but they’re also very easy for a cat to chew off. If you love the look, keep them short, sew them on firmly, and put them where your cat can’t hang from them. In my opinion, wooden trim gives the same decorative effect with nothing to pull loose.
Wall-mounted cat climbing shelves and steps
Wall-mounted cat climbing furniture takes up no floor space at all, which makes it the best option for small apartments. It does need a drill and a bit of planning. If you’re furnishing a small place for the first time, my first apartment checklist has more space-saving finds.
What you need: solid wood boards at least ¾ inch thick, heavy-duty steel shelf brackets, a stud finder, a level, wood screws long enough to go well into the studs, sisal rope or a sisal mat, and carpet scraps or rubber matting for the tops.
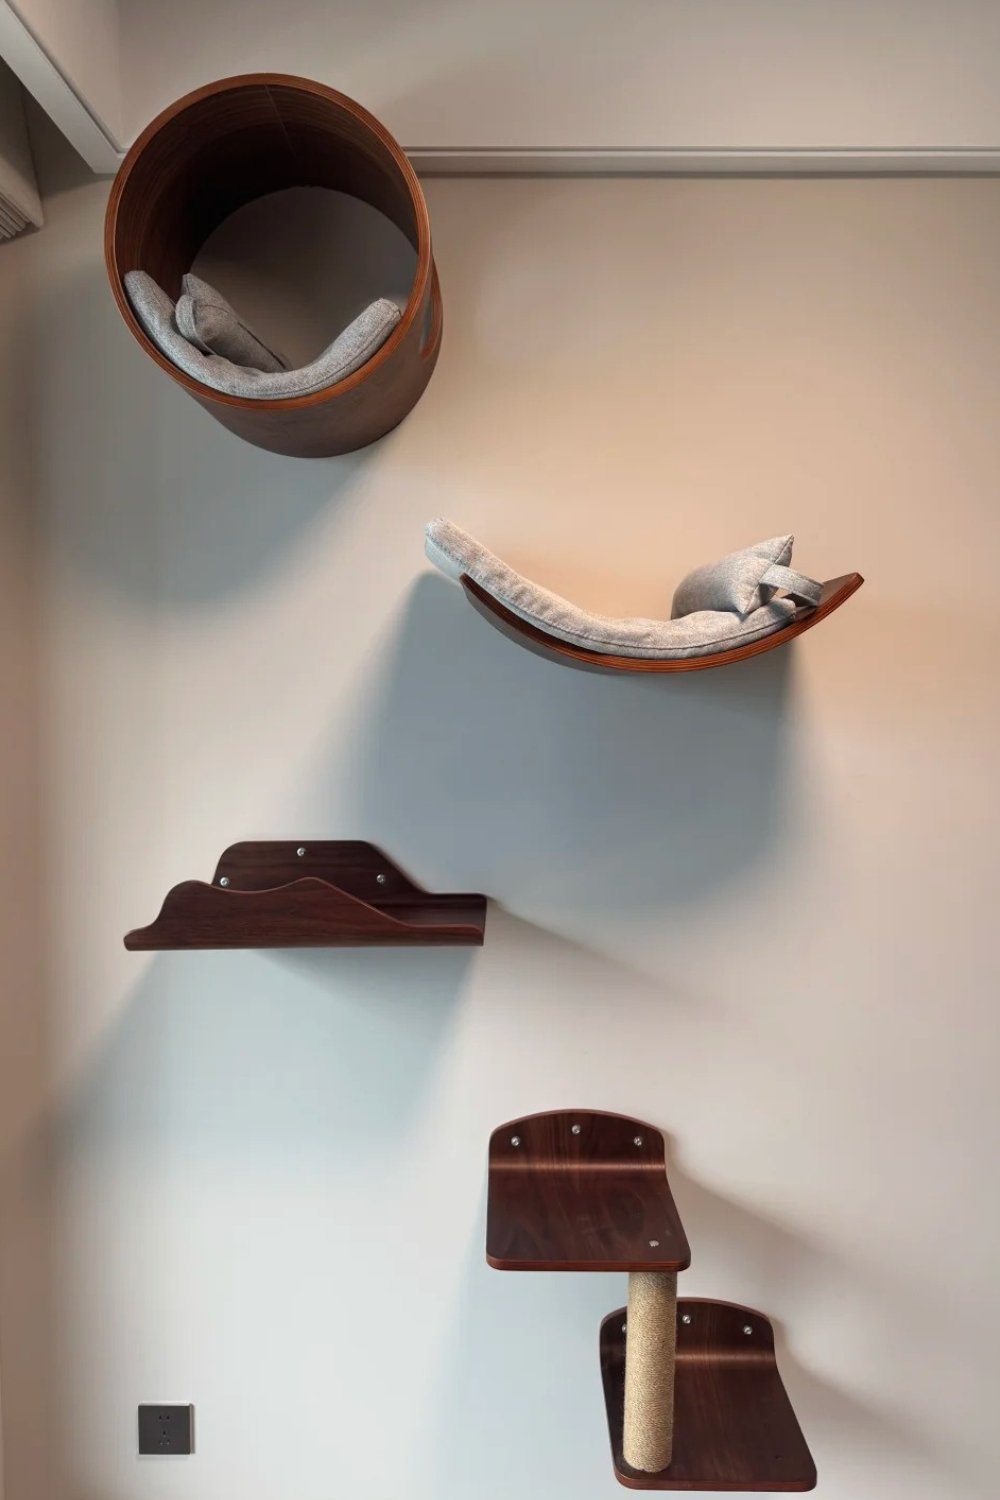
- Plan the route. Sketch it on paper or with painter’s tape on the wall. Keep 12 to 18 inches between shelves vertically, which suits most cats and is still easy for older ones. Start low, next to a piece of furniture your cat already uses as a launch point.
- Find the studs. Wall studs are usually 16 inches apart. Every bracket goes into a stud, not just into drywall with an anchor. A cat landing on a shelf hits it with far more force than its standing weight.
- Prep the boards. Sand the edges, then glue carpet or rubber matting on top so paws grip. A shelf for lounging can be deeper; a step your cat only passes through can be narrower.
- Mount and level. Screw the brackets into the studs, check with a level, and attach the boards. Press down hard on each shelf before your cat is allowed near it.
- Add a bridge or a post. A rope bridge between two shelves (wooden slats threaded on two lengths of rope, tied tight at both ends) or a short sisal-wrapped post between two steps turns separate shelves into a route.
A tall sisal scratch board leaning against the wall next to the steps, or screwed flat onto it, gives your cat a place to scratch on the way up.
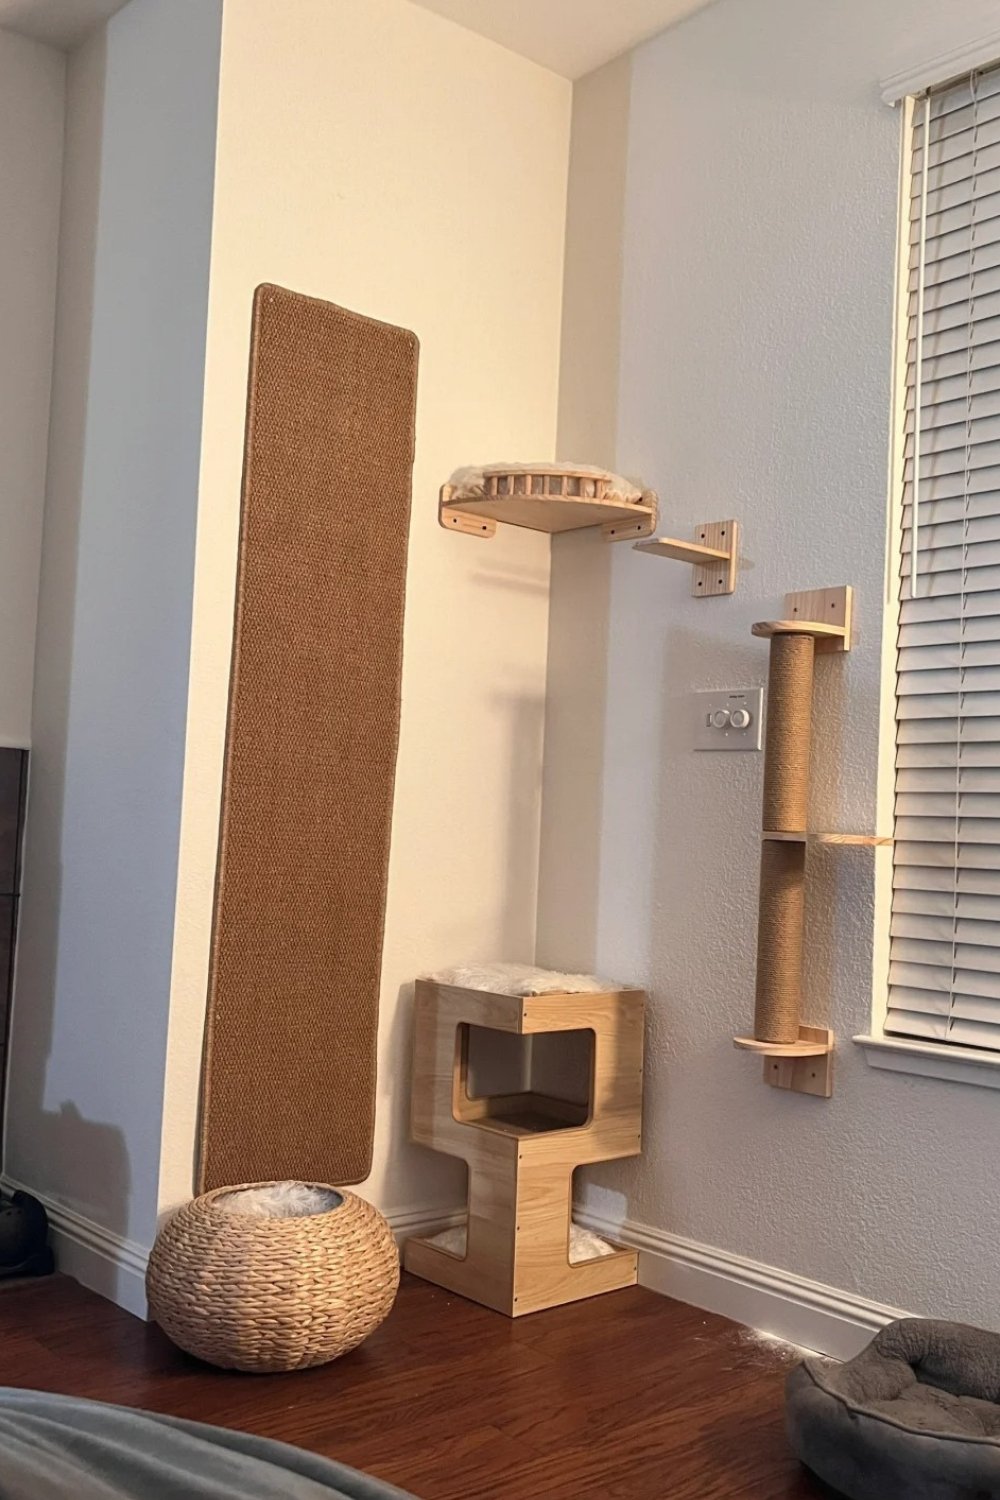
A pegboard cat climbing wall you can rearrange
A pegboard wall is the most flexible DIY cat climbing furniture on this list. Shelves, steps, a little house and a hammock all attach to the same panel, and you can move them around in a few minutes.
What you need: a wooden pegboard panel, wooden furring strips to create a gap behind it, wood screws, short wooden shelves and steps, a small wooden cat house, wooden dowels, bolts and washers, and a stud finder.
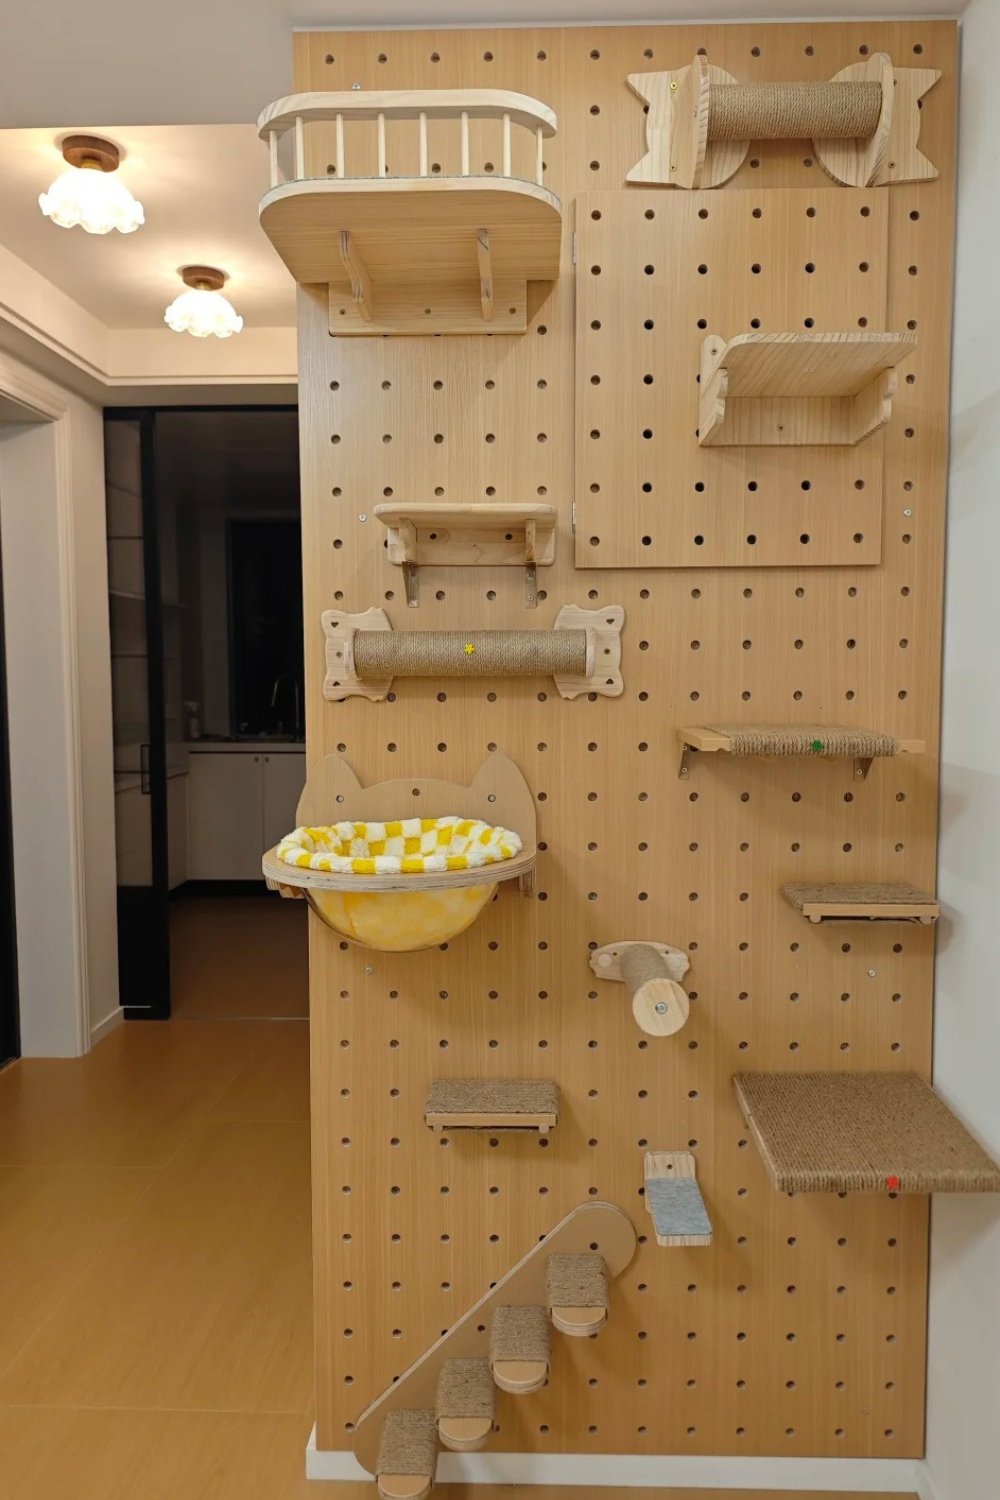
- Mount the furring strips. Screw vertical wooden strips into the wall studs. They hold the pegboard away from the wall so you can reach behind it.
- Attach the pegboard. Screw the panel to the strips at every strip and at several points along each one. It needs to feel as solid as the wall.
- Fix the pieces with bolts. This is the step I’d pay the most attention to. Standard pegboard hooks are made for tools hanging still, not for a cat jumping on them. Bolt each shelf through the holes with washers on the back, or use wooden dowels glued and screwed into shelf brackets.
- Build a route. Steps at the bottom, a sisal post for scratching, a house or a bowl bed in the middle, a lookout shelf at the top.
- Rearrange when they get bored. Unbolt, move, bolt again. A new layout every few weeks keeps the wall interesting.
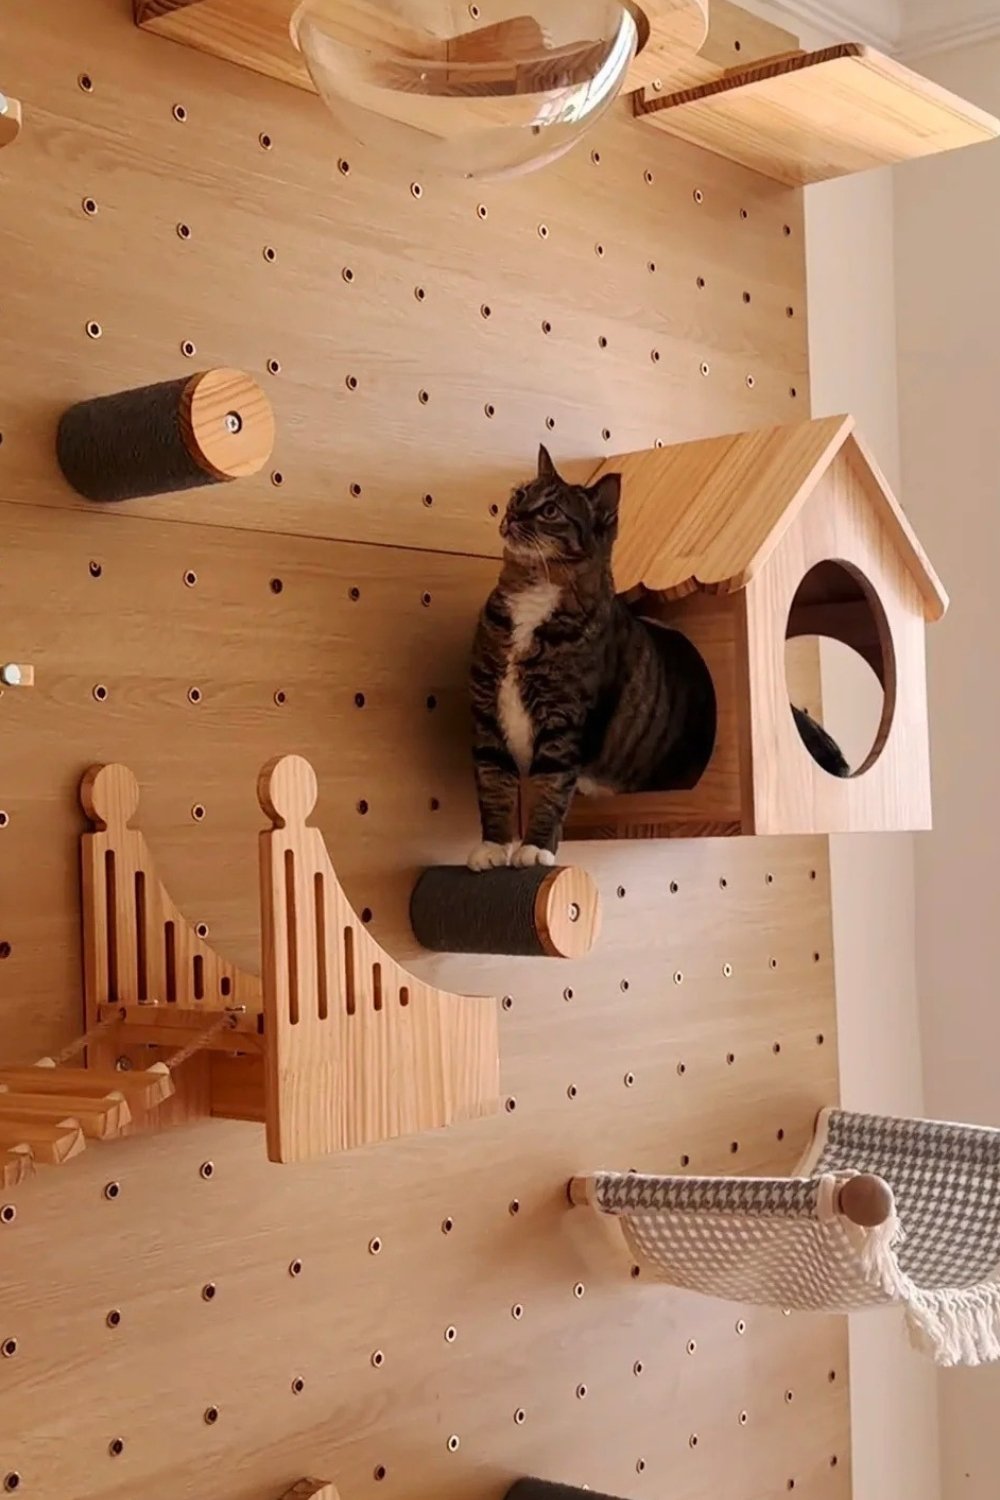
For crafty extras, a small crocheted hammock or basket fits right in. My crochet beginner projects include a few pet pieces that work well here.
Hiding the litter box inside a cat house
Litter boxes are the least attractive thing in any home, and building cat furniture around one solves that while giving the cat a climbing spot on top.
Floor-to-ceiling tower. Two sisal-wrapped posts with shelves between them can frame a hooded litter box at the bottom, with perches and a basket bed above. The box stays accessible from the front for scooping.
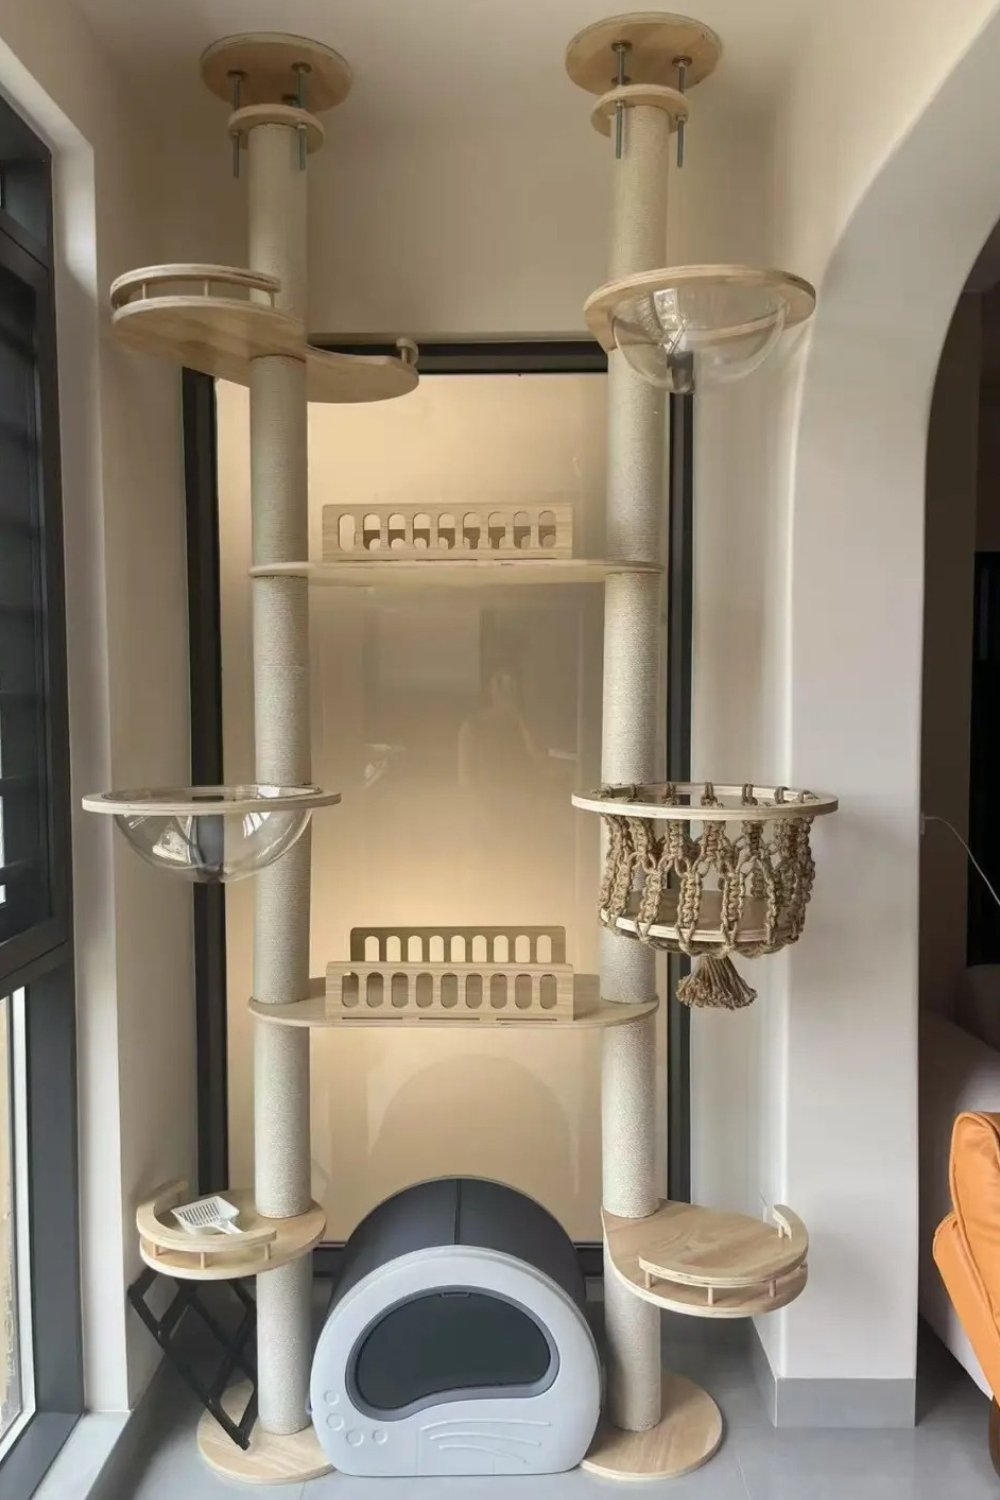
Cabinet cover. An old side cabinet or a plywood box with a side entrance hides the box completely. Cut a doorway on one side, not the front, so litter doesn’t scatter straight into the room, and drill a few ventilation holes in the back. The lid or front should open fully so cleaning stays easy.
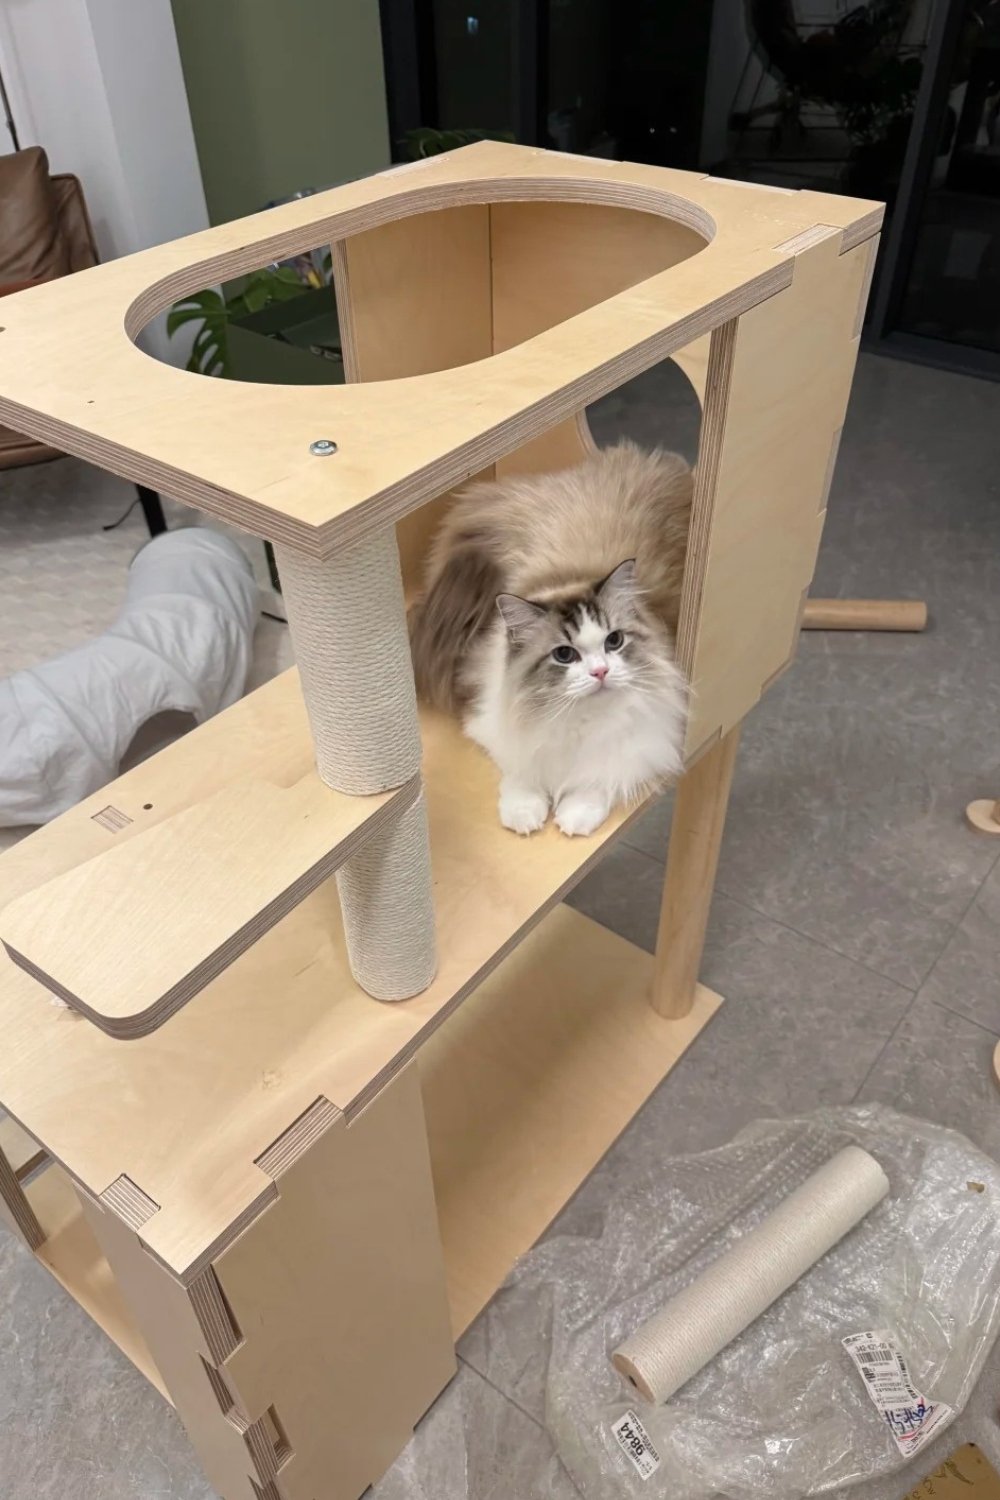
Plywood flat-pack. If you’d rather build from scratch, slot-together plywood pieces make a sturdy cat house with a lounging shelf and a sisal post. Most hardware stores will cut plywood to size for you, so you don’t need a saw.
The dollar store supply list
A surprising amount of DIY cat furniture comes from the dollar store and the craft aisle. Empty bottles are worth saving as well, since these plastic bottle crafts turn them into fairy houses and bird feeders. For the cat projects, stock up on:
- Sisal rope or twine for wrapping posts and legs (check that it’s untreated)
- Woven baskets for beds and hideouts
- Felt pads under the feet of towers, so they don’t scratch the floor or slide
- Zip ties for attaching pads, baskets and hammocks to wire shelves
- Washable cushions, bath mats and place mats for padding shelves
- Hot glue sticks and a basic glue gun
- S-hooks for hanging beds
- Small toys to tie into doorways
The things worth buying at a hardware store instead: screws, brackets, anti-tip straps and solid wood. These hold the weight, so they’re not the place to save money.
Safety checks for any DIY cat furniture
Every build gets the same five checks before the first climb:
- Stable base. Tall towers and shelving units get anchored to the wall. A wide base helps, but a strap is what stops a tip-over.
- Weight. Press down hard on every shelf, step and bed with your hand. If it flexes, wobbles or creaks, reinforce it.
- No loose strings. Trim zip-tie ends flush, cut off loose rope loops, and keep tassels and yarn short and firmly attached.
- No sharp edges. Sand plywood edges and cover screw heads.
- Glue fully dry. Let hot glue and wood glue set before your cat goes near the build.
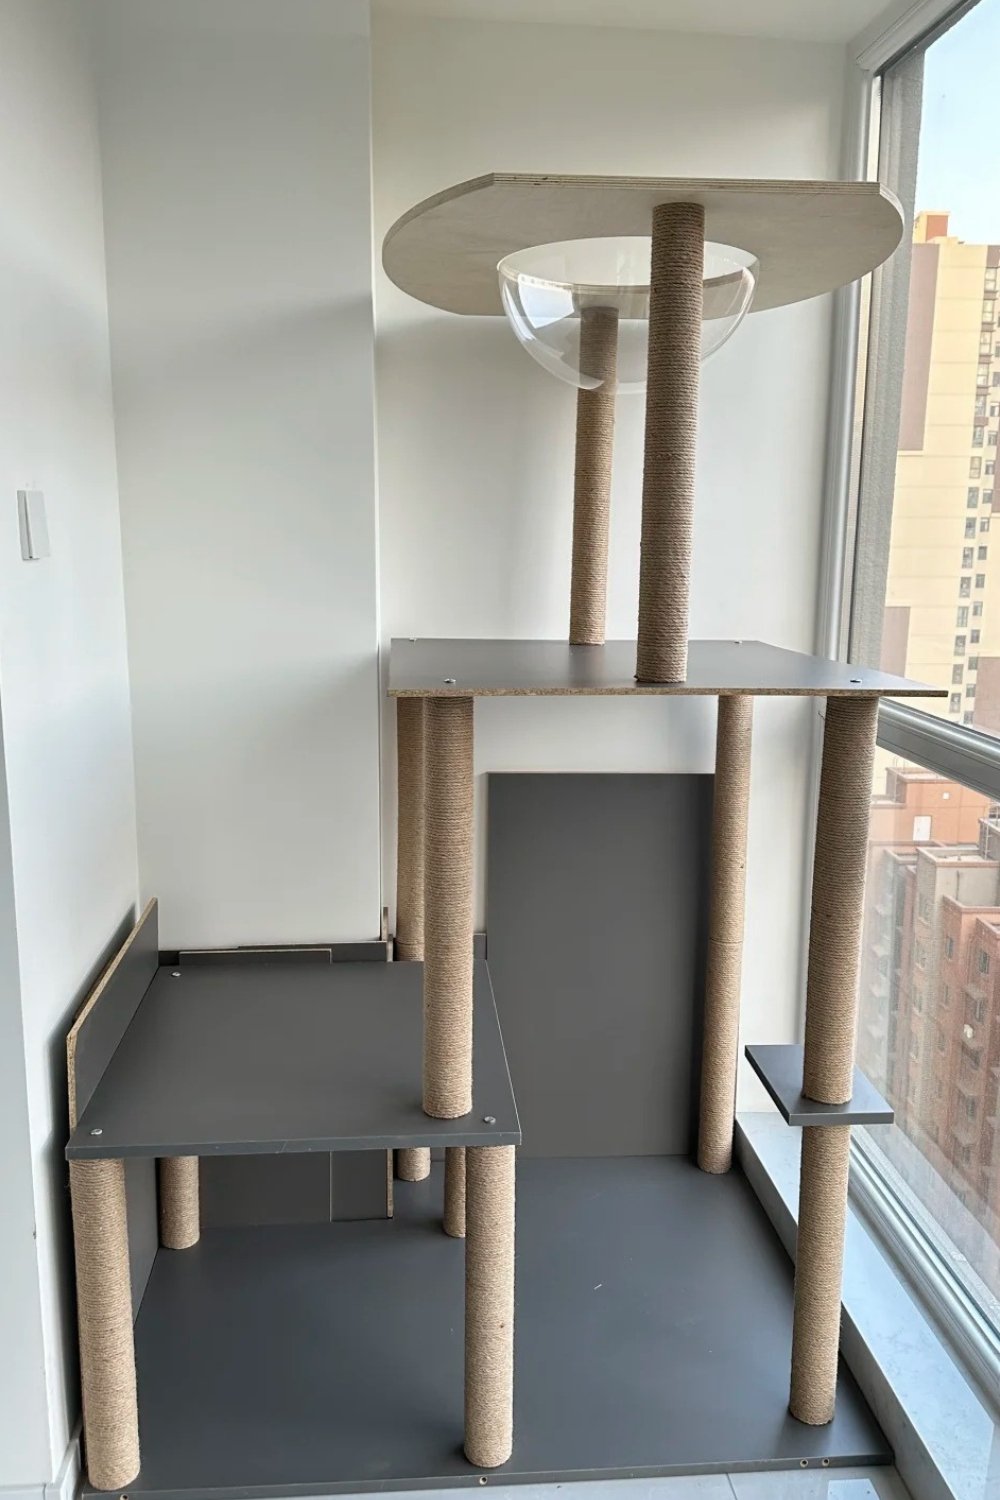
On a balcony, add one more: the tower should never sit close enough to the railing to become a step over it. Keep it against the inner wall, and if the balcony isn’t enclosed, use the tower only while you’re there.
Once your cat furniture is finished, it doesn’t have to look like pet gear. A painted tower or a wall of wooden steps can be part of the room in the same way any odd, personal piece is. If that idea appeals to you, my quirky home decor ideas have more ways to make a room feel like yours.
Start with a cardboard cat house to see what your cat likes, then build the version that fits your wall.




Leave a Reply